Ever uploaded an Instagram Story video only to find it looks like it was filmed through a foggy or low-quality camera? Blurry, pixelated, or grainy Stories can be frustrating, especially when the original video looks sharp and clear in your phone’s gallery. If you’re facing an Instagram story video quality bad issue, you’re in the right place. In this guide, we’ll provide you with the top effective methods to solve this issue in no time.
Part 1: Reasons Behind Bad Instagram Story Video Quality
Why is my Instagram story quality bad? There could be several reasons behind this issue. Below, we’ve mentioned the top reasons behind bad Instagram story video quality:
- Aggressive Compression: One of the most common reasons behind bad Instagram story video quality is Instagram’s aggressive compression. The platform automatically compresses videos during the upload process to reduce file size and help Stories load faster.
- Wrong Aspect Ratio: If your video isn’t 9:16 (1080 x 1920 pixels), Instagram may automatically crop, resize, or adjust it to fit the Story format. This can affect the video quality.
- Poor Connectivity: Weak Wi-Fi or mobile network can trigger Instagram to upload a lower-quality version to avoid upload failures. To get better results, use a stable and reliable internet connection when uploading your Instagram Stories.
- Outdated Instagram App: Using an outdated version of Instagram can sometimes cause video-uploading and processing issues. Updating the app to the latest available version can help resolve bugs and ensure you have the newest media-upload features.
Part 2: How to Fix Bad Instagram Story Video Quality
Once you’ve learned about the common reasons behind bad Instagram story video quality, now it's time to fix the issue. Fortunately, you don’t need professional editing skills to improve the quality of your Stories. Here are some effective methods to help you fix low-quality Instagram Story videos:
1. Check Internet Connection
If your internet connection is not stable, the uploaded Instagram Story video might get blurry because it is not fully loaded. A slow or interrupted connection can also cause the upload to take longer or fail while Instagram processes the video. Before uploading, make sure you are connected to a strong Wi-Fi network. Here is how to do it:
- Unlock your Android or iOS device. Go to “Settings.”
-
Select the Wi-Fi option and disconnect from the current network connection.

- Choose any stable internet connection and enter the password.
Once you’ve connected to a reliable Wi-Fi network, open Instagram and try uploading your Story again.
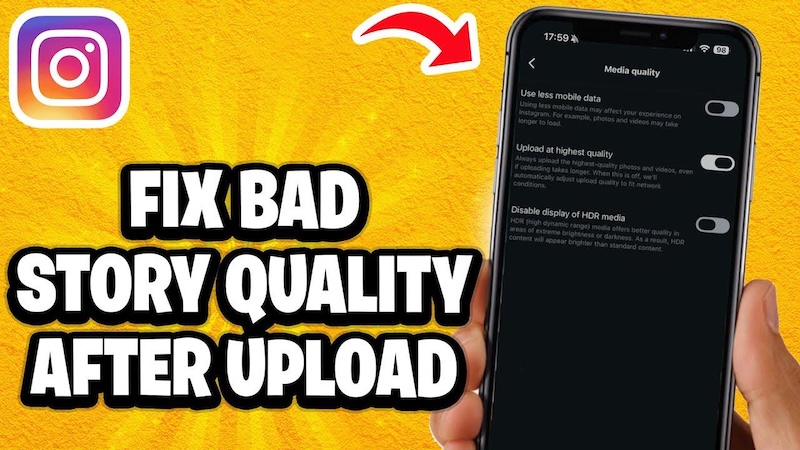
2. Enable the “Upload at Highest Quality” Option
Instagram offers an option that allows users to upload photos and videos at the highest available quality. If this setting is disabled, then you might face low-quality issues. Enabling this feature can help Instagram prioritize better-quality uploads instead of focusing mainly on reducing data usage and upload time. Here is how to enable this option:
- Launch Instagram on your iOS and Android device. Go to your profile and tap the three-line menu to get to the “Settings.”
- Locate the “Data Usage and Media Quality” option and tap on it.
-
Next, enable the “Upload at Highest Quality” option. Make sure the Use Less Data feature is disabled.
3. Adjust Camera Settings
If your video is recorded in low quality, it may appear blurry or pixelated after being uploaded to Instagram. Before recording your next Story, check your phone’s camera settings and make sure you are capturing videos at a suitable resolution. Here is how to adjust your camera settings:
Android
- Open the Camera app on your Android device and navigate to “Settings.”
- Select a high-quality resolution, such as 1080p.
-
Next, select an appropriate frame rate, such as 30 FPS for everyday Instagram Stories.
iOS
- Launch the iPhone Settings app on your phone.
-
Find the “Camera” app and enable the “Smart HDR” option.
- Now the iPhone camera will record Instagram Stories in HD quality.
4. Optimize Content for Instagram
You’ll have to upload a file that is optimized for Instagram’s ecosystem. If you do that, Instagram will not need to make significant adjustments to the video, which can help preserve its original quality. For the best results, follow these settings:
- Resolution: Use a 9:16 vertical aspect ratio with a resolution of 1080 x 1920 pixels.
- File Format: Select JPEG format saved at a “High” or “Maximum” quality setting.
- Audio: AAC 48kHz - 256kbps.
- Keep the original video quality as high as possible before uploading. Enable the Smart HDR option on iOS devices.
Bonus Tips: Edit Instagram Stories Before Uploading
Before uploading a video to Instagram Stories, editing and optimizing it can help improve its quality. For this, users can try HitPaw Edimakor, an AI-powered video editor designed to make video editing simple for beginners. With the help of this tool, users can easily customize Instagram Stories according to their requirements. It offers multiple video editing tools, such as trimming, cropping, resizing, adding text, captions, transitions, effects, filters, and background music. Users can also adjust the video to a 9:16 vertical aspect ratio and prepare it for Instagram’s recommended Story dimensions.
Key Features of HitPaw Edimakor
- AI Video Editor: HitPaw Edimakor offers powerful video editing tools, such as trimming, cutting, cropping, resizing, transitions, filters, effects, subtitles, and background music.
- Powerful AI Tools: The program isn’t limited to video editing. It includes a wide range of AI tools, such as Text-to-Video, Image-to-Video, Text-to-Image, Image-to-Image, and more.
- High-Quality Downloads: With this tool, users can edit and download videos in HD, making it ideal for Instagram Stories, TikTok, YouTube Shorts, Instagram Reels, and more.
- Intuitive Interface: HitPaw Edimakor offers an easy-to-use interface, which is ideal for non-tech and beginner users. Users can edit videos without editing experience or professional help.


Step-by-Step Guide:
Step 1: Upload Instagram Story
Launch HitPaw Edimakor on your device and select the “New Project” option. Click on “Import” and upload the Instagram Story in the program.
Step 2: Edit Instagram Story
Drag-and-drop the video to the timeline to begin video editing. Now, users can trim the video, change aspect ratio, adjust video speed, and add background music.
Step 3: Preview and Download
Once the video editing is complete, click on the “Export” button. Choose the MP4 format, and click on the “Export” button again to download the video.
Final Thoughts
Instagram story video quality bad can be an irritating issue, especially when the original video looks clear and sharp on your device but becomes blurry or pixelated after uploading. Fortunately, you can solve this issue in no time. This guide provides you with the best solutions to solve the bad Instagram video quality issue. Plus, if you want to optimize videos for Instagram Stories, we recommend using HitPaw Edimakor. It is one of the best AI video editors that enables users to prepare, edit, and export videos for social media platforms without requiring professional editing experience.
Leave a Comment
Create your review for HitPaw articles