Adding subtitles to videos has become essential in 2025 for accessibility and engagement. Davinci Resolve’s automatic subtitle feature simplifies the process and provides accurate and time-saving solutions for content creators. Let us explore the steps to add subtitles with Davinci Resolve effortlessly.
Part 1: How to Add Subtitles With Davinci Resolve
Adding subtitles in Davinci Resolve is a straightforward process that enhances your video's accessibility and engagement. Follow these simple steps to learn how to add subtitles in Davinci Resolve 18 :
-
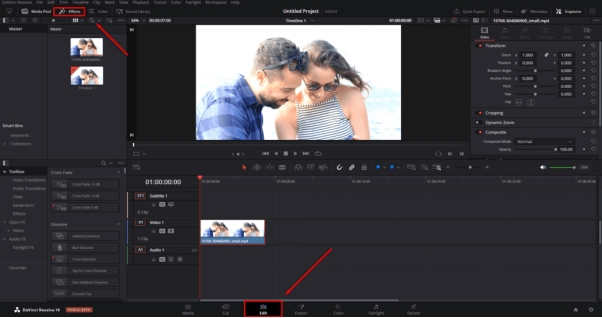
1. Navigate to the Edit Workspace in Davinci Resolve
Click on the Effects tab after opening the Edit workspace in Davinci Resolve. All of the editing tools, including those for subtitles, are located here.

-
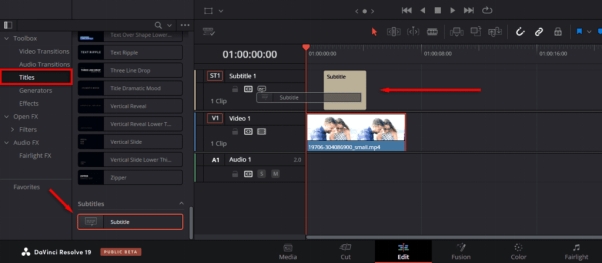
2. Add a Subtitle Track
Drag the Subtitle option onto a new track above your timeline after choosing Titles in the Effects window. As an alternative, you can move the play head to the required location, right-click the track, choose Add Track, and then right-click above the timeline and choose Add Subtitle Track.

-
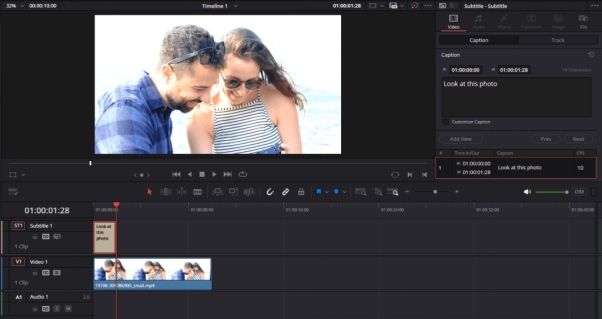
3. Add and Adjust Subtitle Text
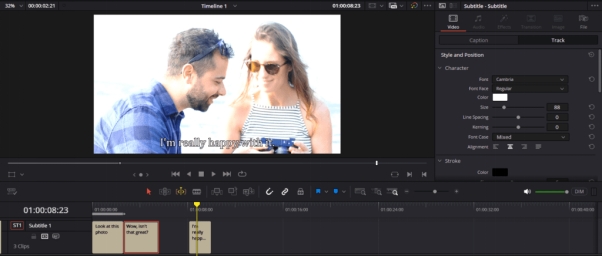
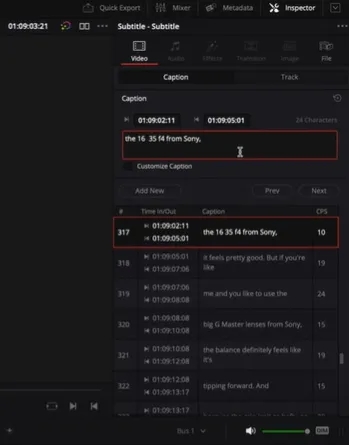
Select the Inspector tab after clicking the Subtitle. Type the text that goes with the frame in the Caption field. By sliding the subtitle's right edge to match the audio time, you may also change the subtitle's length.

-
4. Repeat and Stylize Subtitles
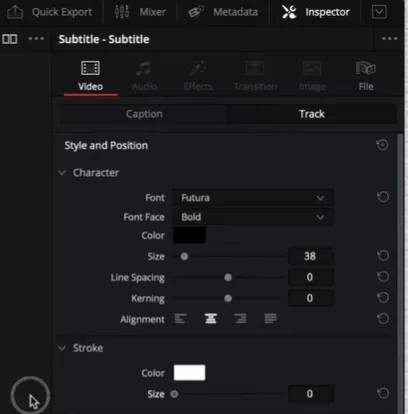
To add new subtitles, select Add New in the Inspector. Choose the Track tab in the Inspector to personalize the subtitles. To improve the design and visibility of subtitles, alter the font, stroke, and location, or apply effects like backdrops or shadows. These are the steps of how to add subtitles in Davinci Resolve 19 as well.

Part 2: How To Choose Davinci Resolve Subtitles’ Language
Your videos will be more inclusive, accessible, and able to reach a worldwide audience if you select the appropriate subtitle language in Davinci Resolve. A detailed tutorial on choosing and storing subtitle languages on the platform can be found below:
-
1. Import your Video into Davinci Resolve
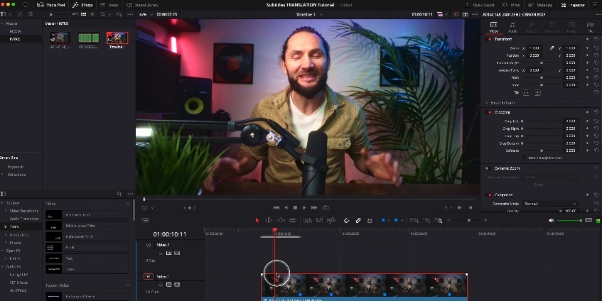
Launch Davinci Resolve first. You can either use the Import option from the File menu or drag & drop your video onto the timeline. For ease of access, make sure the video is in the timeline.

-
2. Select the Create Subtitles option
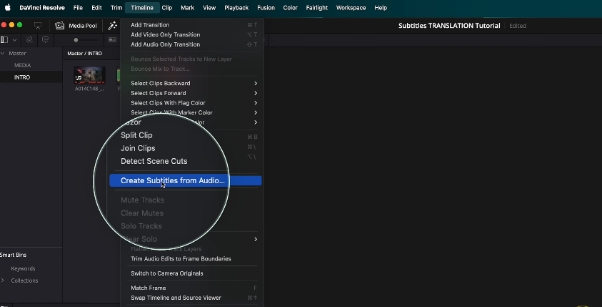
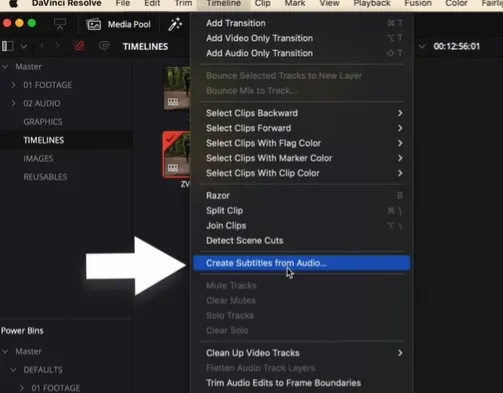
To start adding subtitles to your project, use the Create Subtitles from Audio option here. This will enable you to begin creating text tracks or captions that complement your video footage.

-
3. Select the Language
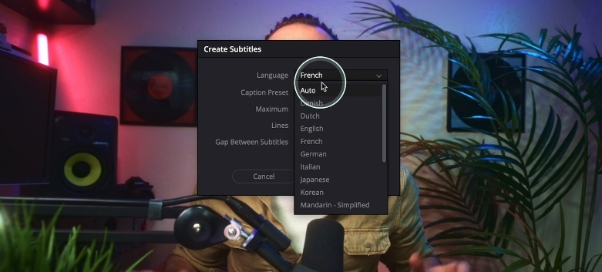
A drop-down menu for choosing the language will show up in a tiny box in the middle of the screen. From the selection, select the language you want to use for the complete subtitle track. For projects involving multiple languages, this functionality is crucial.

-
4. Save Subtitles and Export the Video
Click Save to have your changes take effect after you have completed creating the subtitles. Choose the proper output parameters to export the video. To share the subtitles with your audience, you can either save them as a separate file or embed them into the video. This guarantees optimal adaptability across many platforms.
Part 3: How to Add Automatic Subtitles Davinci Resolve Free
Davinci Resolve's built-in capabilities make creating subtitles easy. The following is a procedure guide for using Davinci Resolve subtitles free version for the addition of subtitles in a video:
-
1. Import and Timeline Setup
Drag your movie onto the timeline after importing it into the Media Pool in your Davinci Resolve project, or make a new one.
-
2. Access the Transcription Tool
Select Timeline then Create Subtitles from the Audio option if you have Davinci Resolve Studio. Choose the audio track that you want. It could take a few minutes for Resolve to analyze the audio and create a transcript.

-
3. Review and Editing of the Transcript
The Subtitles panel will display the transcript. Examine it critically for correctness, then edit and polish the wording using the Inspect and Caption panels. Drag the boundaries of the subtitle blocks on the timeline to change the timing of the subtitles.

-
4. Style Subtitles and Export
This was the Davinci Resolve subtitles automatic procedure. Now, you can make your subtitles appear unique. Using the Inspector panel, choose a subtitle block and adjust its font, size, color, and placement to fit the aesthetic of your video. You can either integrate your subtitles straight into the video or export them in formats like SRT or VTT. Navigate to the Deliver page, set up your export preferences, and make sure the final render has subtitles.

Part 4: How to Add Davinci Resolve Subtitles Effects
Adding subtitle effects in Davinci Resolve can make your content more dynamic and engaging. You can customise the appearance and animation of subtitles to match your video style. Here’s a step-by-step guide:
-
1. Add the Subtitle Track
Add a subtitle track to your timeline first. Move the play head to the desired beginning point by right-clicking on the timeline, choosing Add Subtitle Track, and then moving it there.
-
2. Go to the Effects Library
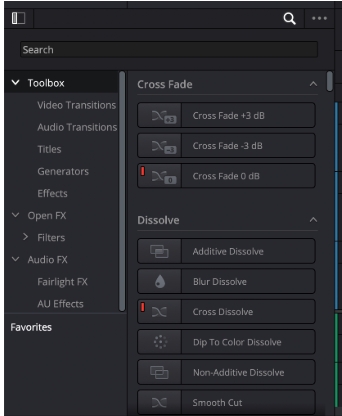
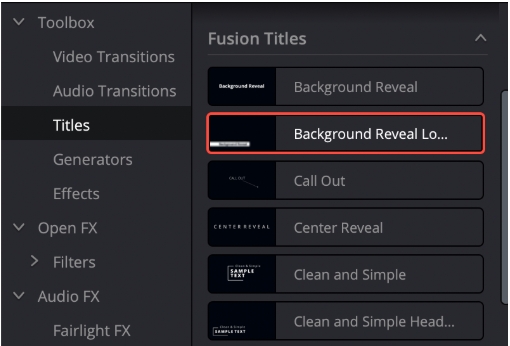
From the Edit workspace, launch the Effects Library. Locate Titles and select the text option that best fits your writing style. Drag and drop the chosen text option into the timeline's subtitle track.

-
3. Edit the Text
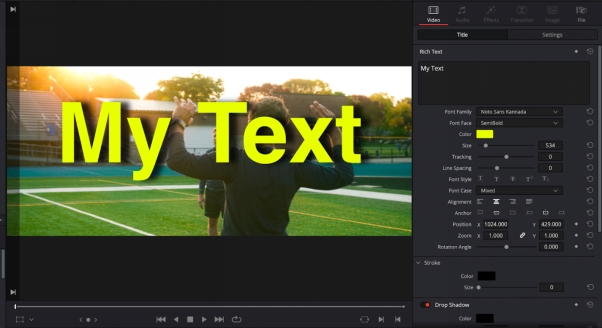
Go to the Video tab on the right-hand side after selecting the text layer. Font, size, colour, and placement can all be changed here. Additionally, effects like drop shadow and backdrop colour are available to improve style and visibility.

-
4. Include Animations and Visual Effects
Click the diamond icon next to any text effect in the Video tab to use keyframes. This enables you to add motion effects or transitions to subtitles to give them a dynamic appearance.

Part 5: How to Fix Davinci Resolve Subtitles Not Rendering
Users of Davinci Resolve occasionally experience problems with subtitles not appearing in their finished video. Inaccurate settings or problems with the timeline may cause this. To troubleshoot and resolve this issue, follow these steps:
-
Make sure the subtitle track has been added and enabled correctly. Check sure the Subtitle Track is selected by going to the timeline.
-
Make sure the timeline's subtitle track is in the proper place. Subtitles may be skipped during rendering due to misplaced tracks.
-
Software faults can occasionally be the cause of problems with subtitle rendering. To prevent known problems, make sure your version of Davinci Resolve is up to date.
-
Resolving rendering issues can be achieved by clearing the cache in Davinci Resolve. To clear the cache, go to Playback, pick Delete Render Cache, and then pick All.
Part 6: Subtitle Editors Comparation| Davinci Resolve vs. Capcut vs. Edimakor
When choosing a subtitle editor, Davinci Resolve, CapCut, and Edimakor each offer unique features.
FAQs on Adding Subtitles With Davinci Resolve
-
Q1. What is the Shortcut to Add Subtitles in DaVinci?
A1: Using the keyboard shortcut Ctrl + Shift + T on Windows or Cmd + Shift + T on Mac, you may quickly add subtitles to Davinci Resolve. Using this shortcut, users can add a subtitle track more rapidly.
-
Q2. Does Davinci Resolve’ free version have Subtitles?
A2: Yes, complete subtitle functionality is available in Davinci Resolve's free version. Subtitles can be created and edited by users right within the timeline, including formatting, placement, and text editing possibilities.
To Sum Up
In 2025, Davinci Resolve's automatic subtitle functionality will revolutionise the speed and precision to add subtitles with Davinci Resolve . Tools like HitPaw Edimakor (Video Editor) , which provide enhanced customisation and precision for professional-grade videos, can be used to increase subtitle quality for even more refined results.
Home > Subtitle Tips > How to Add Subtitles With Davinci Resolve Automatically 2026
Leave a Comment
Create your review for HitPaw articles



Yuraq Wambli
Editor-in-Chief
Yuraq Wambli is the Editor-in-Chief of Edimakor, dedicated to the art and science of video editing. With a passion for visual storytelling, Yuraq oversees the creation of high-quality content that offers expert tips, in-depth tutorials, and the latest trends in video production.
(Click to rate this post)