Instagram is a popular social media platform with billions of active users worldwide. It allows users, creators, and businesses to share engaging photos and videos with audiences across the globe. However, uploading a video with the wrong resolution can affect its quality, making it look blurry, pixelated, and poorly cropped. Choosing the right Instagram video resolution and aspect ratio is essential for creating clear and professional-looking content. Whether you are uploading a Reel, Story, or feed video, using the recommended settings can help maintain video quality. This guide will provide you with the perfect Instagram video resolution and also introduce an AI tool to get high-quality results.
Part 1: What is Instagram?

Instagram is a popular social media platform focused on sharing photos, videos, and messages. Users can post content on their profile, share temporary updates through Stories, create short-form videos called Reels, and communicate through direct messages. The platform also allows users to discover new content through the Explore section and interact with posts by liking, commenting, and sharing them. Instagram is widely used by individuals, influencers, creators, and businesses to connect with their audience and promote their content. Since videos are one of the most engaging types of content on the platform, using the correct resolution and aspect ratio is important for maintaining good quality.
Part 2: Why Instagram Video Quality Suffers After Uploading
You filmed clean, sharp clips on your phone and it looked perfect before posting. Then you hit upload, and your reel's quality fell apart. Here are the top reasons why Instagram video quality suffers after uploading it:
- Incorrect Instagram Video Resolution: Just like any other social media or streaming platforms, Instagram also has video requirements that users should follow when uploading content. If a video does not meet the recommended resolution, the video can appear pixelated or blurry.
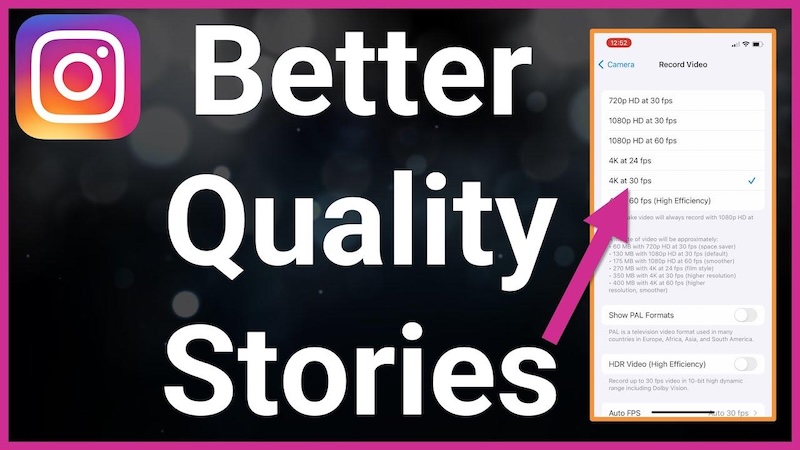
- Instagram Compression: The platform shrinks your file to save space and load faster. This squeezing removes fine details from your footage, so your sharp clip becomes softer in seconds. Enable the “Upload At Highest Quality” option in the settings to solve this issue.
- Unstable Internet Connection: A slow or unstable internet connection can lower the video quality on Instagram. High-quality videos require a fast internet connection to upload videos properly without interruptions.
- Wrong Export Settings: Many creators explore with random settings and simply hope for the best results. However, using incorrect export settings can affect the final video quality on Instagram. Try to download videos in 1080p or 4K quality.
Part 3: Best Instagram Video Resolution for All Formats
When creating videos for Instagram, it’s important to use the best Instagram video resolution to ensure your content looks its best. Different Instagram formats have different recommended dimensions and aspect ratios, so using the correct settings can help prevent quality loss. Here are the ideal resolutions for each Instagram video format:
1. Instagram Feed Videos
- Format: MP4 or MOV
- Max Duration: Up to 60 minutes
- Aspect Ratio: Portrait 4:5, Landscape 16:9 and Sqaure 1:1
- Resolution: 1080 x 1350 pixels recommended for vertical posts
- Max File Size: Up to 4 GB
2. Instagram Stories
- Format: MP4 or MOV
- Max Duration: Up to 60 seconds per Story segment
- Aspect Ratio: 9:16
- Resolution: 1080 x 1920 pixels
- Max File Size: Up to 4 GB
3. Instagram Reels
- Format: MP4 or MOV
- Max Duration: Up to 3 minutes
- Aspect Ratio: 9:16
- Resolution: 1080 x 1920 pixels
- Max File Size: Up to 4 GB
4. Instagram IGTV (Long-Form Videos)
- Format: MP4
- Max Duration: Up to 60 minutes
- Aspect Ratio: 9:16
- Resolution: 1080 x 1920 pixels
- Max File Size: Up to 650 MB for videos up to 10 minutes; up to 3.6 GB for longer videos.
5. Instagram Live
- Format: MP4 or MOV
- Max Duration: Up to 4 hours
- Aspect Ratio: 9:16
- Resolution: 1080 x 1920 pixels recommended
- Max File Size: Not applicable, as the video is streamed live rather than uploaded as a pre-recorded file.
These are the best Instagram resolutions for all formats. If you follow these specs, then the chances of losing video quality, unwanted cropping, or blurry visuals can be reduced.
Part 4: How to Create High-Quality Instagram Videos Using HitPaw Edimakor
If you follow the recommended Instagram resolution, your videos can look clearer and more professional after uploading. However, choosing the correct resolution is only the first part of creating high-quality content. The second part is to edit them properly before sharing them on Instagram. That is where HitPaw Edimakor comes in. HitPaw Edimakor is an all-in-one AI Video Editor that enables users to edit, crop, trim, and resize videos before sharing them on Instagram. With the help of this tool, users can customize their videos according to different Instagram formats, adjust the aspect ratio, remove unwanted sections, and improve the quality of their footage. The best part of this tool is that it also provides safe zone templates for Instagram, TikTok, and YouTube Shorts, allowing users to adjust the important information within the visible area of the video.
Key Features of HitPaw Edimakor
- AI Video Editor: HitPaw Edimakor provides a wide range of AI editing tools, allowing users to trim, crop, resize, enhance, and customize their videos with minimal effort.
- Safe Zone Templates: One of the standout features of this tool is that it provides Safe Zone templates for multiple platforms, such as Instagram, TikTok, YouTube, and more.
- AI Video Enhancer: The program also includes AI enhancement capabilities, allowing users to turn blurry and pixelated videos into high-resolution videos, ideal for Instagram.
- Powerful AI Tools: HitPaw Edimakor offers a wide range of AI tools, each with unique capabilities, such as text-to-video, AI video editor, AI voice changer, and image generator.
- Intuitive Interface: This tool is ideal for non-tech and beginner users. It enables them to edit Instagram videos without editing experience or professional help.


How to Edit Instagram Videos With HitPaw Edimakor?
Follow this guide to learn step-by-step instructions on how to edit Instagram videos with HitPaw Edimakor:
Step 1: Launch HitPaw Edimakor
Download, install, and launch HitPaw Edimakor on Windows and macOS. Click on the “New Project” option and upload the Instagram video you want to edit. Users can upload videos in multiple formats, including MP4, MOV, and AVI.
Step 2: Edit Instagram Video
Next, drag and drop the Instagram video on the timeline and begin the video editing process. Users can now perform customization, such as splitting clips, adjusting the video speed, cropping or resizing footage, and more.
Step 3: Preview and Download
Click on the “Play” button to preview the final results. If satisfied, click on the “Export” button. Select the format, resolution, frame rate, and click on the “Export” button again to download the video.
Final Thoughts
If you want your video to truly stand out on Instagram, then following Instagram video resolution is essential. Using the right resolution, aspect ratio, and export settings can help prevent blurry visuals, unwanted cropping, and quality loss. Users can also use tools like HitPaw Edimakor to create high-quality Instagram videos.
Leave a Comment
Create your review for HitPaw articles