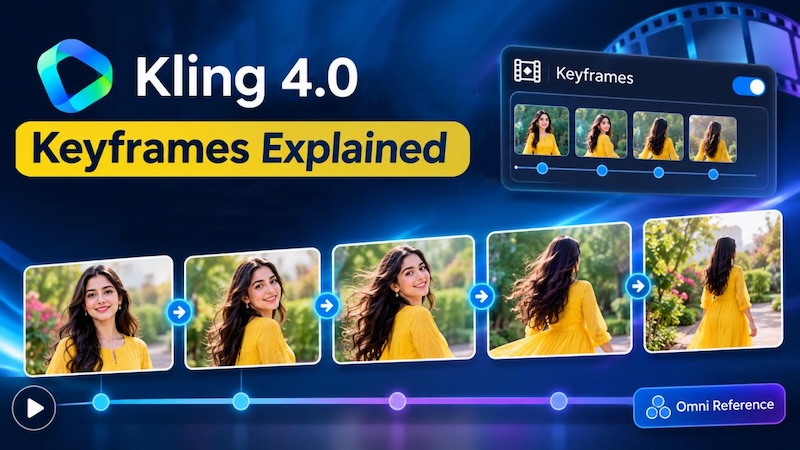
In late September, Kling AI began rolling out Kling 4.0. What creators keep talking about isn't just speed or resolution, but also control. Video can now run up to 30 seconds, which gives a clip plenty of room to drift away from the script. The solution is Kling 4.0 keyframes. Let's look at how Kling 4.0 keyframes work, when they help the most, and how to create frame-to-frame transitions the easy way.
What Are Keyframes in Kling 4.0?
1 Keyframes Define Important Moments
AI generated videos are basically the combination of multiple images that are consecutive and each image is ordered in such a way that the next image shows the next moment.
A keyframe is a still image that marks a specific point your video must reach: the opening shot, a product reveal, or a final pose. That is the concept behind Kling AI keyframes : the model takes care of everything around the milestones you choose.
2 How Kling 4.0 Connects Keyframes
You can create better images on Kling 4.0 if you describe what kind of transition you want and it will create the transition exactly as per your specific instructions. This is something that does not bind you to the specific options available in the video editor. AI does all the work of editing the video as per your description.
The images you upload are not frames played back in sequence. You describe the action between the scenes, and Kling generates the transitions, camera movement and action that connect them. Up to 10 images can be added, so multiple keyframes in Kling allow a Kling 4 keyframe video to follow your planned sequence much more closely than a prompt-only clip.
How Kling 4.0 Keyframes Improve AI Video Creation
The real-world payoff shows up across many video types, and AI video keyframes come in handy in each of them.
Product Transformation Videos
Pictured on the studio plinth is a sneaker, in the second frame a sprinting runner and in the third frame a clean packed shot. The keyframes determine the position of the product or the state of the product, enabling the model to move the product in a realistic way between the frames without having to improvise the entire scene.
Story-Driven Scene Changes
If a character walks into a blank room, discovers an item, responds to it, and exits the room, they can be heard saying, "I noticed the (item), I reacted to it, and then I left." Four keyframes provide you with four beats in the correct sequence, and your acting and pacing will provide the beats between those keyframes.
Character and Outfit Continuity
If a character is wearing more than one outfit, it is possible to use both outfits as keyframes. This specifies the character to wear at each spot which can help to reduce a random drift that occurs in long clips.
Camera and Environment Transitions
You can perform wide to close-up, day to night, and your AI video transitions will follow the framing you've selected for the shot. The camera move starts and ends clearly, as do the changes of setting.
Pairing Multiple Keyframes with Omni Reference
Keyframes and references play different roles. Keyframes determine when things change, while Kling 4.0 Omni Reference decides what stays the same. The official guide from Kling, suggests using them together. A character image can lock in a face and costume, a product shot can hold shape and branding, and a video clip can guide movement. Because Kling 4.0 supports up to 15 reference assets, a keyframe no longer has to carry every detail of the task.
Prepare the Keyframes
Focus only on the moments that have to look a specific way, and ask, "What does the viewer need to see here?" Five shots (setting, product introduction, product in use, new angle, hero shot) can fill a 30-second ad. You can use up to 10 keyframes, but you don't have to. Extra frames that add no change blur the direction. Keep their proportions and style consistent.

Add Omni Reference Guidance
Add references for anything that must stay constant, then check that references and keyframes agree. If your reference shows a red coat and a keyframe shows a blue one, the model has to guess. Write the prompt in time blocks that follow the same order as the frames. Kling accepts long prompts, but a short, clear one often works better.
Test the Sequence in Stages
Don't jump straight to the 30-second mark. Try two or three keyframes, assess the transition, and then add one keyframe at a time. That way you'll know which frame caused any break. Typical culprits are changing too many elements in one frame and a prompt order that contradicts the keyframes.
Create Keyframe Transitions with a Simpler Workflow
Kling's setup is strong, but it requires planning, references and trial runs. If you're looking for smooth transitions between still images, HitPaw Edimakor is a shorter route. Its Multi Frame AI Transition feature combines multiple photos into one continuous video.
Edimakor also offers several AI video models in a single app, including Kling 4.0. What's more, the generated video can be added directly to your timeline for music, subtitles, and export.


Step 1: Open AI Transition
Launch Edimakor, open the Media panel, go to AI Video, choose AI Transition, and switch to the Multi Frame tab.
With only two images, the First-Last Frame option in the Toolbox does the same job.
Step 2: Upload Your Keyframes
Import between two and seven images. For a smooth result, pick frames with a clear visual relationship, such as the same subject in a new pose, place or lighting. Images that share a subject, palette or composition blend naturally. Totally unrelated ones force the AI to invent a leap, and viewers can tell.
Step 3: Describe Each Visual Change
Every pair of neighboring images gets its own prompt box. Click the button between two frames to open it, then say what should happen, for example: "The camera pulls back as the sneaker dissolves into the runner's foot." You can also set a duration per transition, giving a big change more time than a small one.
Step 4: Set the Resolution and Generate
Pick your output resolution and click Generate. The clip appears in My Creations. Preview it, drag it onto the timeline, then add music, subtitles, filters or classic transitions and export from the same project.
Step 5: Preview and Export
Preview the results. If everything is alright, you can simply export. If you want to continue editing, you can drag the clip to the timeline.
FAQs
A1: They're still images that mark key visual moments in a video. Kling generates the motion and scene changes that connect them.
A2: Up to 10 in a single generation, for videos running 3 to 30 seconds. You don't need to use them all.
A3: It's a way to feed the model reference images, videos and more so characters, products and motion stay consistent while keyframes control the timing of changes.
A4: Yes. HitPaw Edimakor's Multi Frame AI Transition links two to seven images with a prompt for each change, then lets you edit and export the result.
Conclusion
Keyframes mark the moments, Omni Reference keeps the details steady, and a good prompt connects the two. Together they give Kling 4.0 videos real structure. If you'd rather skip the complexity and just turn still images into smooth transitions, download HitPaw Edimakor and try Multi Frame AI Transition today.
Leave a Comment
Create your review for HitPaw articles