
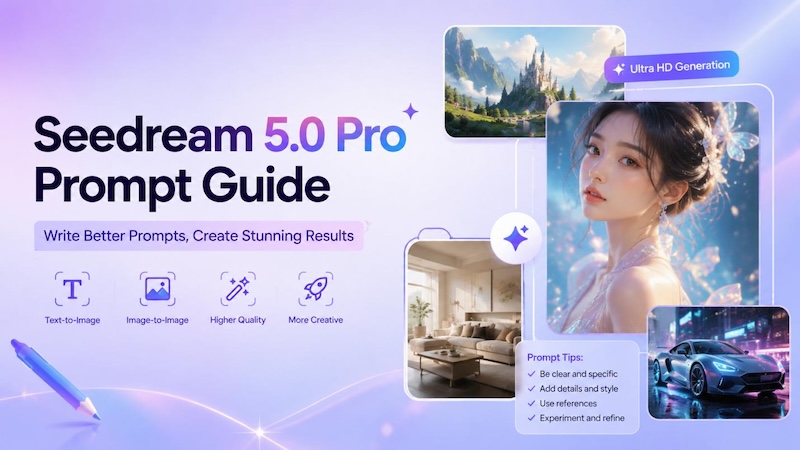
When I first started using Seedream 5.0 Pro, I noticed it responded to prompts much more accurately than many AI image generators I'd tried before. Instead of constantly rewriting descriptions, I could focus on refining creative ideas and getting results closer to my vision. In this Seedream 5.0 Pro prompt guide, I'll share the techniques that have worked best for me, from writing clearer prompts to creating consistent, high-quality images for design, marketing, and personal projects.
Part 1. What Makes Seedream 5.0 Pro Different?
After experimenting with different AI image models, I found that Seedream 5.0 Pro isn't just about generating beautiful images—it's about understanding what you actually want to create. It follows complex prompts more faithfully, keeps objects and compositions consistent, and even renders readable text surprisingly well. Whether I'm designing posters, creating branded graphics, or generating concept art, it usually requires fewer prompt revisions than many traditional AI image generators.
1 Better Prompt Understanding
One of the biggest improvements I've noticed is how well Seedream 5.0 Pro interprets detailed instructions. It handles complex scenes with stronger spatial reasoning, keeps object relationships more consistent, and preserves important details instead of randomly changing them. That makes it much easier to write effective Seedream 5.0 Pro prompts without over-explaining every element.
2 Native Text Rendering
Unlike many AI image models that struggle with typography, Seedream 5.0 Pro does an impressive job rendering readable text directly inside images. I've used it to generate posters, logos, infographics, and even multilingual designs with far fewer spelling or layout issues, making it especially useful for branding and marketing projects.
3 Powerful Editing Features
Beyond text-to-image generation, Seedream 5.0 Pro also offers flexible editing workflows. I frequently switch between image-to-image, region editing for targeted changes, multi-image fusion to combine references, and layer separation for more precise creative control. These features make it much easier to refine ideas instead of starting over every time.
Part 2. How Seedream 5.0 Pro Understands Prompts
After testing dozens of prompts, I realized that Seedream 5.0 Pro doesn't simply match keywords—it tries to understand the visual scene you're describing. The more specific and descriptive your prompt is, the closer the generated image will match your expectations. Instead of relying on subjective words like beautiful, cool, or professional, I always focus on describing what should actually appear in the image.
For example, rather than writing "a beautiful living room," I get much better results with something like "a modern Scandinavian living room with oak furniture, floor-to-ceiling windows, warm afternoon sunlight, beige walls, and green indoor plants." Concrete visual details give the model much more useful information to work with.
When writing Seedream 5.0 Pro prompts, I usually think about five core elements:
- Subject: Who or what is the main focus?
- Environment: Where is the scene taking place?
- Composition: How should everything be arranged?
- Lighting & Color: What mood or atmosphere should the image have?
- Details: Clothing, materials, textures, weather, accessories, expressions, and other finishing touches.
Part 3. How to Write Seedream 5.0 Pro Prompts (Step-by-Step)
When people ask me how to write Seedream 5.0 Pro prompts, I recommend following the same structure every time. It keeps prompts organized, prevents missing important details, and makes it much easier to tweak results if the first generation isn't exactly what you imagined.
Step 1: Clearly Describe the Subject
I always begin with the most important element—the subject. Instead of using broad descriptions, I include specific details about appearance, clothing, pose, facial expression, and action.
For example:
Less effective: A girl in a forest
A young woman wearing a white linen dress walking through a misty pine forest at sunrise, long brown hair flowing in the breeze, carrying a woven basket.

The more clearly you define the subject, the more consistent your results will be.
Step 2: Add the Style and Color Palette
Next, I tell Seedream 5.0 Pro what artistic direction I want. This could be photorealistic, anime, cinematic, oil painting, watercolor, 3D render, or minimalist illustration.
I also include color preferences whenever they're important. Simple phrases like warm earth tones, pastel colors, high-contrast black and gold, or even specific HEX color codes help create a more consistent visual style, especially for branding projects.
Step 3: Define the Composition and Camera Angle
Composition has a huge impact on the final image, so I never leave it to chance.
I often specify details such as:
- Close-up portrait
- Wide-angle landscape
- Eye-level view
- Bird's-eye perspective
- Centered composition
- Rule of thirds
- Shallow depth of field
- 85mm portrait lens
These instructions help Seedream 5.0 Pro arrange the scene much more naturally and create images that feel professionally composed.
Step 4: Describe the Lighting
Lighting can completely transform the mood of an image. Whenever I compare two generations with identical prompts, the lighting is often what makes one look dramatically better than the other.
Some of my favorite lighting descriptions include:
- Golden hour sunlight
- Soft studio lighting
- Moody cinematic lighting
- Neon city lights
- Dramatic side lighting
- Overcast natural daylight
- Warm indoor ambient lighting
Adding just one lighting description can make your Seedream 5.0 Pro prompt feel much more polished.
Step 5: Add Fine Details
This is where I make the image feel realistic instead of generic.
Depending on the project, I may describe:
- Fabric and material textures
- Reflections on glass or water
- Hair movement
- Facial expressions
- Jewelry and accessories
- Weather conditions
- Background elements
- Surface details like wood grain or brushed metal
These finishing touches often make the biggest difference between an average AI image and one that feels carefully crafted.
Step 6: Include Text the Right Way
If your design contains text—such as a poster, advertisement, logo, or social media graphic—be as specific as possible.
I usually place the text in quotation marks and specify its font style, color, size, and position. For example:
A modern travel poster with bold white text reading "Explore Iceland" centered at the top in a clean sans-serif font.
Since Seedream 5.0 Pro has strong native text rendering, clear formatting instructions greatly improve accuracy and reduce the need for manual editing later.
Part 4. The Best Seedream 5.0 Pro Prompt Formula
When I first started experimenting with Seedream 5.0 Pro prompts, I tended to write everything that came to mind. The results were often inconsistent because the prompt lacked structure. After plenty of trial and error, I found that following a simple formula makes prompts easier to write, edit, and improve.
Here's the framework I use for almost every project:
Subject + Environment + Style + Composition + Camera + Lighting + Colors + Details + Text (Optional)
Think of it as a checklist rather than a strict rule. You don't need every element in every prompt, but including the most relevant ones helps Seedream 5.0 Pro understand exactly what you're aiming for.
A young fashion model wearing a beige trench coat walking through a rainy Tokyo street at night, photorealistic editorial photography, full-body shot, eye-level perspective, captured with an 85mm lens, cinematic neon lighting, cool blue and purple color palette, realistic reflections on wet pavement, detailed fabric texture, soft bokeh background, bold white text reading "Autumn Collection 2026" in the upper right corner.
Whenever my first generation isn't perfect, I usually adjust just one section of the formula—such as the lighting or composition—instead of rewriting the entire prompt. This makes it much easier to identify what improves the final image.
Part 5. Advanced Seedream 5.0 Pro Prompt Tips
Once you've mastered the basics, small prompt improvements can have a surprisingly big impact. These are a few techniques I use regularly to get more consistent, professional-looking results from Seedream 5.0 Pro.
Use Specific Visual Language
One of the biggest mistakes I see is relying on vague adjectives like beautiful, amazing, or high quality. While they sound descriptive, they don't tell the model what should actually appear in the image.
Instead, I replace subjective words with concrete visual descriptions.
For example:
Instead of: A beautiful luxury watch
A stainless steel luxury watch with a brushed metal case, sapphire crystal glass, black leather strap, intricate mechanical dial, photographed on a dark marble surface under soft studio lighting.
The second prompt gives Seedream 5.0 Pro far more visual information to work with, resulting in richer textures and more accurate details.
Keep Prompts Focused
It's tempting to squeeze every idea into a single prompt, but I've found that simpler, well-organized prompts often outperform overly complicated ones.
If a prompt includes multiple art styles, conflicting lighting directions, several camera angles, and unrelated subjects, the model has to make compromises. The result can look inconsistent or cluttered.
Instead, I focus on one main subject, one visual style, and one clear composition. If I want to experiment with different looks, I generate multiple versions by changing just one element at a time. This approach produces more predictable results and makes prompt optimization much easier.
Separate Generation and Editing Prompts
Another lesson I learned is that text-to-image and image-to-image tasks should be approached differently.
For text-to-image, I describe the complete scene because the model is creating everything from scratch.
For image-to-image or region editing, I only describe what needs to change. For example, instead of rewriting the entire prompt, I might simply instruct:
Replace the cloudy sky with a vibrant sunset while keeping the mountains, lake, and foreground unchanged.
Giving focused editing instructions helps Seedream 5.0 Pro preserve the original composition while applying only the desired modifications.
Use HEX Colors for Brand Consistency
If you're creating marketing materials, product mockups, or branded social media graphics, I highly recommend adding HEX color codes to your Seedream 5.0 Pro prompts. This is a simple trick I use whenever color accuracy matters.
Rather than describing colors as dark blue or bright orange, I specify the exact brand colors using HEX values. This helps maintain visual consistency across multiple generated images, especially when working on campaigns or client projects.
For example:
Modern technology conference poster, clean minimalist design, background color #0F172A, accent elements in #F97316, white typography, geometric shapes, soft gradient lighting, premium corporate branding.
Of course, HEX codes aren't necessary for every image. If you're generating fantasy artwork or casual illustrations, descriptive color phrases like warm autumn tones or soft pastel palette are usually enough. But for branding, advertising, and product design, using HEX values can make your AI-generated visuals look much more polished and consistent.
Part 6. Common Seedream 5.0 Pro Prompt Mistakes
Even after writing hundreds of Seedream 5.0 Pro prompts, I still occasionally run into results that aren't quite what I expected. More often than not, the issue isn't the model—it's the prompt. The good news is that a few small adjustments can dramatically improve image quality and consistency.
Here's a quick reference to the most common mistakes I see and how I usually fix them.
| Common Mistake | Better Approach |
|---|---|
| Using vague descriptions | Replace generic words like beautiful or cool with concrete visual details about the subject, environment, materials, and lighting. |
| Mixing too many art styles | Stick to one primary style, such as photorealistic, anime, watercolor, or cinematic, for a more cohesive result. |
| Forgetting to describe lighting | Include lighting conditions like golden hour, soft studio lighting, or neon city lights to define the image's mood. |
| Ignoring composition | Specify framing, camera angle, perspective, or focal length to help Seedream 5.0 Pro arrange the scene naturally. |
| Writing overly long, unfocused prompts | Organize your prompt using a clear structure and remove unnecessary or conflicting details. |
| Using generic color descriptions for branding | Use HEX color codes when consistency is important across marketing materials or product visuals. |
| Describing the entire image during editing | For image editing or image-to-image tasks, only describe the areas you want to modify while leaving the rest unchanged. |
Bonus Tip: Use Seedream 5.0 Pro in Edimakor.AI
Now that you know how to write Seedream 5.0 Pro prompts, the next step is finding an easy way to put them into practice. Personally, I like using Edimakor.AI because it brings the latest Seedream 5.0 Pro model together with other leading AI image models in one place. Instead of switching between different platforms, I can compare styles, refine prompts, and generate images more efficiently.
Whether I'm starting from a text description or improving an existing image, Edimakor.AI offers a streamlined workflow that's suitable for beginners and experienced creators alike.
Create Now
 Why Choose Edimakor.AI
- Latest Seedream 5.0 Pro model for high-quality AI image generation.
- Text-to-Image and Image-to-Image workflows to match different creative needs.
- Multiple popular AI image models available on one platform, making it easy to compare results and experiment with different styles.
- Fast cloud-based generation with no software installation required.
- High-resolution image output suitable for social media, marketing, and design projects.
- Simple, beginner-friendly interface that lets you focus on creativity instead of complicated settings.
- Flexible image settings, including aspect ratio and output size customization.
How to Generate Images with Seedream 5.0 Pro in Edimakor.AI
Step 1: Select Seedream 5.0 Pro
Open Edimakor.AI and choose Seedream 5.0 Pro from the available AI image models. You can start with either Text-to-Image or Image-to-Image, depending on your project.
Step 2: Enter Your Prompt or Upload an Image
Write your Seedream 5.0 Pro prompt, or upload a reference image for image-to-image generation. Then customize settings such as the aspect ratio, image resolution, and the number of images to generate.
Step 3: Generate and Download
Click Generate and preview the results. If you'd like to explore different creative directions, simply refine your prompt or switch to another AI model. Once you're happy with the output, download your favorite image in high quality.
Frequently Asked Questions about Seedream 5.0 Pro Prompt
A1: From my experience, the most reliable structure is: Subject + Environment + Style + Composition + Camera + Lighting + Colors + Details + Text (Optional). This organized format helps Seedream 5.0 Pro understand your creative intent more accurately and produces more consistent, high-quality images than writing unstructured descriptions.
A2: There's no perfect length, but I usually aim for 50–150 words. Instead of making prompts longer, focus on making them more specific. A concise prompt with clear visual details almost always performs better than a lengthy prompt filled with vague adjectives or repetitive instructions.
A3: While Seedream 5.0 Pro is designed to follow positive instructions very well, I generally get better results by describing exactly what I want rather than listing what I don't want. Clear, positive visual descriptions tend to produce cleaner and more predictable generations.
A4: Seedream 5.0 Pro has strong native text rendering capabilities, but prompt formatting still matters. I recommend placing the text inside quotation marks and specifying the font style, color, size, and placement. For example, include instructions like bold white text reading "Grand Opening" centered at the top in a modern sans-serif font.
A5: Not exactly. For text-to-image, describe the entire scene because the model is generating everything from scratch. For image-to-image or region editing, focus only on the elements you want to change. This helps preserve the original image while applying precise edits.
A6: In my testing, Seedream 5.0 Pro performs well across a wide range of styles, including photorealistic photography, cinematic scenes, anime illustrations, digital paintings, concept art, product photography, posters, logos, and marketing graphics. The key is to clearly specify your preferred style and maintain consistent visual instructions throughout the prompt.
Conclusion
Writing great Seedream 5.0 Pro prompts isn't about making them longer—it's about making them clearer. By describing your subject with specific visual details, defining the style, composition, lighting, and colors, and following a structured prompt formula, you'll generate more accurate and professional-looking AI images with less trial and error.
The best way to improve is through experimentation. Try changing one element at a time, compare the results, and gradually build your own prompt library for different creative projects.
If you're ready to put these techniques into practice, give Edimakor.AI a try. With the latest Seedream 5.0 Pro model, support for both Text-to-Image and Image-to-Image, and access to multiple top AI image models in a single platform, it's an easy way to transform your ideas into stunning visuals—all without switching between different tools.


Leave a Comment
Create your review for HitPaw articles