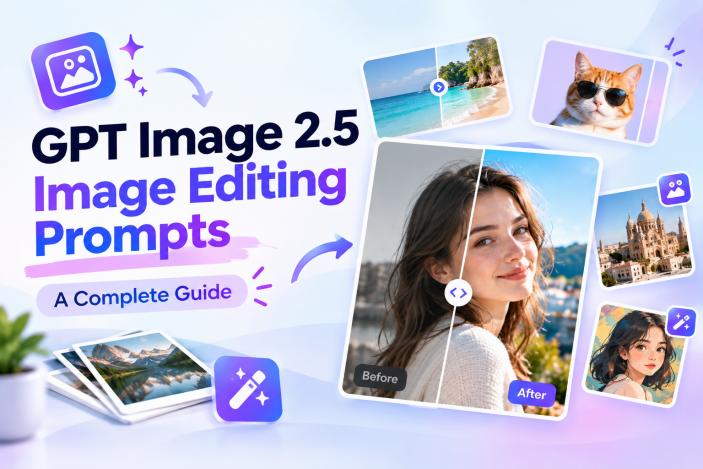
GPT Image 2.5 is released recently. It is said that GPT Image 2.5 is better for precise image editing. People can edit an existing photo with natural-language instructions. However, the prompt still determines how clearly the tool understands your request.
This guide covers the latest GPT Image 2.5 Photo Editing Prompts, a reusable prompt formula, 15 editing examples, and an alternative workflow with a simple tool.
What’s New in GPT Image 2.5 for Photo Editing
GPT Image 2.5 brings stronger image-generation and editing capabilities to ChatGPT. You can upload an existing image, describe the changes you want, select specific areas, and continue refining the result through additional instructions.
| GPT Image 2.5 Upgrade | What It Means for Photo Editing |
|---|---|
| More Precise Editing | Makes detailed changes to specific objects and areas easier to describe. |
| Sharper Image Details | Produces clearer fine details in generated and edited images. |
| Multi-Turn Editing | Lets you refine an existing result instead of starting over. |
| Selection Tool | Highlights a specific area before applying an edit. |
| Direct Editing | Allows you to describe an edit directly without selecting an area first. |
| Comments | Provides another way to give follow-up instructions during supported editing workflows. |
The selection tool is useful for localized edits, although selected areas may not always be perfectly precise. For complex changes, combining a selection with a detailed prompt can provide clearer instructions.
How to Write Effective GPT Image 2.5 Photo Editing Prompts
Good GPT Image 2.5 editing prompts should clearly separate what needs to change from what must stay the same.
1 Describe the Existing Photo
Identify the main subject, setting, composition, lighting, and important visual details. This gives the AI context before you request an edit.
2 Specify What to Change
State the exact object, person, background, color, or element you want modified. Avoid broad instructions such as “make it better.”
3 Preserve What Matters
Tell GPT what should remain unchanged. For portraits, mention facial identity, pose, expression, clothing, and skin texture.
4 Add Style and Constraints
Specify the desired visual style, lighting, realism, colors, proportions, and other limitations. At the same time, adding clear constraints to preserve important details and avoid unwanted changes.
5 Reusable Prompt Formula
Use this structure for almost any GPT Image 2.5 prompts:
Edit [specific element] in the uploaded photo by [requested change]. Keep [important elements] unchanged. Apply [visual style, lighting, or color] while preserving [composition, details, or realism]. Avoid [unwanted changes].
This format makes your GPT Image 2.5 Photo Editing Prompt specific without making it unnecessarily complicated.
15 GPT Image 2.5 Prompts for Every Kind of Photo Edit
The following AI photo editing prompts cover common edits, from removing objects to changing backgrounds, combining photos, and refining results across multiple turns.
Remove Unwanted Objects
Object removal is useful for cleaning portraits, travel photos, product images, and busy backgrounds. Describe the unwanted element and ask the AI to reconstruct the surrounding area naturally.

Remove all unnecessary people behind the main subject. Keep the subject, clothing, face, pose, lighting, and composition unchanged. Naturally reconstruct the buildings, pavement, shadows, and background details so the edited area looks like it was originally photographed without those people.
Remove the boxes, cables, loose objects, and visual clutter from this room. Preserve the furniture, walls, windows, flooring, lighting, and architecture. Reconstruct the cleared areas naturally with matching textures and shadows while keeping the original camera perspective.
Remove the unwanted text-like mark from the lower-right corner. Reconstruct the background naturally underneath it and match the surrounding colors, texture, lighting, and detail. Do not change the subject or any other part of the photograph.
Replace Objects in Photos
Object replacement changes one element while maintaining the surrounding composition. It works well for product concepts, interiors, and creative photo edits.
Replace the smartphone in the person’s hand with a modern premium black smartphone. Preserve the hand position, fingers, reflections, lighting, proportions, background, and camera angle. Make the replacement realistic and correctly scaled to the original device.
Replace the old table lamp with a modern minimalist white lamp. Keep the table, wall, room layout, shadows, and warm lighting unchanged. Match the new lamp’s perspective, scale, reflections, and shadows to the original scene.
Modify People in Photos
Portrait editing works best when you clearly identify the feature to change and explicitly protect the person’s identity.
Change the person’s hairstyle to shoulder-length wavy hair with natural volume and soft layers. Preserve the exact facial identity, face shape, skin tone, expression, clothing, pose, and background. Make the hairstyle follow the original lighting and perspective realistically.
Replace the person’s shirt with a tailored dark navy blazer and white shirt. Keep the face, hairstyle, body proportions, pose, hands, background, and lighting unchanged. Make the fabric folds, shadows, and fit look naturally photographed.
Transform Backgrounds
Background replacement can change the entire setting without rebuilding the main subject. Include lighting and perspective instructions for a more natural result.
Replace the current background with a clean luxury photography studio featuring a neutral gray backdrop. Keep the subject, clothing, face, pose, and proportions unchanged. Match the studio lighting, contact shadows, depth of field, and perspective to the original photograph.
Replace the background with a realistic European street during golden hour. Preserve the person’s identity, clothing, hairstyle, pose, and proportions. Match the warm sunlight, shadows, perspective, and depth of field, so the subject naturally belongs in the new environment.
Change Photo Style
Style transformation can give an ordinary photo a cinematic, vintage, or editorial appearance while preserving its original subject.
Transform this photo into a cinematic film still with natural contrast, subtle color grading, soft highlights, realistic shadows, shallow depth of field, and professional movie lighting. Preserve the original subjects, composition, facial identity, clothing, and important environmental details.
Convert this photograph into an authentic vintage 35mm film image. Add subtle grain, slightly faded colors, warm analog tones, and gentle contrast. Preserve the original composition, facial features, objects, and lighting direction. Avoid excessive filters or artificial textures.
Combine Photos Naturally
Combining multiple photos requires consistent scale, lighting, perspective, and color. Tell the AI how the separate subjects should appear together.
Combine the two uploaded portraits into one natural group photograph. Position both people beside each other with realistic proportions and matching eye level. Match their lighting, skin tones, shadows, perspective, and background so the result looks like one original photograph.
Edit Text in Images
AI image editing can also modify text-based visual content. Specify the exact replacement while asking the tool to preserve the existing design.
Replace the headline “WEEKEND SALE” with “SUMMER SALE.” Keep the same font style, size, alignment, color, spacing, shadows, background, and overall design. Do not change any other text or visual element.
Translate all visible English text into Spanish while preserving the original typography, font hierarchy, layout, colors, alignment, and graphic style. Keep logos, brand names, and non-translatable elements unchanged.
Multi-Turn Editing
Multi-turn editing is useful when the first result is close but needs additional changes. Instead of recreating the image, continue with targeted instructions.
Replace the background of this portrait with a modern luxury hotel lobby. Keep the person, clothing, pose, facial identity, and proportions unchanged. Use warm cinematic lighting and realistic depth of field.
Keep the current composition, background, lighting, and the person’s appearance unchanged. Replace the man’s current outfit with a refined, well-tailored dark suit, a crisp dress shirt, and a subtle tie. Keep his face, hairstyle, body proportions, pose, hand position, and expression exactly the same.
Keep the current outfit, background, pose, and facial features unchanged. Improve the lighting to create a soft, warm cinematic look with natural highlights and subtle shadows. Maintain realistic skin tones, suit details, and overall image balance.
How to Edit Photos with GPT Image 2.5 Editing Prompts
The basic editing workflow requires an uploaded image and clear instructions. You can then refine the generated result when additional adjustments are needed.
- Open ChatGPT and upload the photo you want to edit.
- Describe the exact change and include preservation instructions for important elements.
- Review the output and provide another prompt if something needs correction. Type your prompt very specifically when you want to focus on editing a particular area.
- Once the result is ready, save the edited image, and you can share or post it anywhere.
A Focused GPT Image 2.5 Alternative for AI Image Editing
GPT Image 2.5 is convenient for conversational edits, but a dedicated editing workflow can be useful when you need specific image-editing controls. HitPaw Edimakor combines AI image editing with broader creative tools, making it suitable for users who want to edit images and continue creating visual content.
Key Features of Edimakor’s AI Editing Tools
- AI Image Enhancer:Improve image clarity and overall visual quality.
- AI Background Editing:Replace or generate backgrounds using prompts and references.
- AI Object Remover:Remove unwanted elements from images.
- AI Inpainting: Select an area and describe the change you want to make.
- AI Image Restyler: Instantly restyle your image as anime, 3D, and more in one click. No prompts needed.


How to Use HitPaw Edimakor for AI Image Editing
Step 1: Open Image Editing
Install HitPaw Edimakor and launch the software. Go to “AI Image” and select “Image Editing” in the menu to access the available editing functions.
Step 2: Upload Your Image
Click “Import” to add the image you want to modify. Crop it if necessary before starting the AI editing process.
Step 3: Choose an Editing Tool
Select “Background” for background changes or “Inpaint” for targeted modifications. Brush over the required area and describe the change with a prompt.
Step 4: Generate and Save the Result
Enter your instructions and select “Generate”. You can remove and edit the background easily.
Or replace, add, or recolor elements in the image with Image Inpaint feature. Review the result and save the finished image from your creations area.
FAQs
A1: Yes. GPT Image 2.5 provides a selection tool for targeting a specific area. You can also describe the location directly in your prompt.
A2: Yes. You can ask it to remove people, objects, clutter, and other unwanted elements. Describe what should disappear and ask it to reconstruct the surrounding area naturally.
A3: Generation time varies depending on the request and system conditions. OpenAI notes that image generation can take a few minutes.
A4: Yes. Describe the background you want or select an area and provide editing instructions. You can also request a transparent background when appropriate.
Conclusion
Effective GPT Image 2.5 photo editing starts with clear instructions. The 15 prompts above cover common edits, including object removal, multi-turn refinement and more. For a focused alternative with background editing, object removal, inpainting, and enhancement tools, try HitPaw Edimakor .
Leave a Comment
Create your review for HitPaw articles