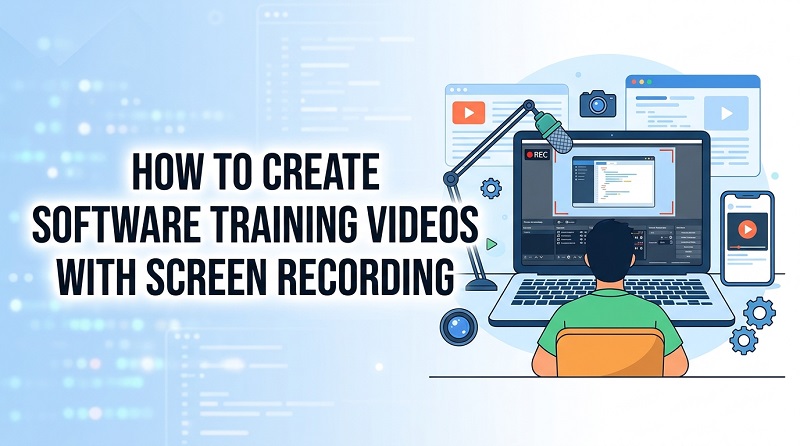
Learning new software can be frustrating when instructions are unclear or written guides are too complicated to follow. Software training videos make it easier for employees, customers, and new users to learn through clear, on-screen demonstrations. Instead of reading lengthy instructions, viewers can see exactly how each task is performed.
This guide explains how to create software training videos, from planning and screen recording to editing footage, adding subtitles, and sharing your finished video.
What Is a Software Training Video
A software training video is a visual guide that teaches viewers how to use a software application, platform, or digital tool. It typically combines screen recordings, voice-over narration, text instructions, and practical demonstrations to explain specific tasks or workflows.
An effective software training video typically has several key characteristics:
- Step-by-Step Demonstrations: Present software operations in a logical sequence so viewers can follow along and repeat the steps themselves.
- Clear and Concise Explanations: Use simple language and focused narration to explain features, settings, and workflows without overwhelming viewers.
- Visual Guidance: Highlight important buttons, menus, and interface elements with zoom effects, annotations, or on-screen text.
- Practical Examples: Demonstrate real tasks and common workflows to help viewers apply what they learn.
- Captions and Subtitles: Add synchronized subtitles to make instructions easier to follow and support viewers who prefer reading along.
- Structured Learning Goals: Focus on a specific task, feature, or workflow so viewers understand what they should learn by the end of the video.
What Do You Need to Create Software Training Videos
Before recording a software training video, prepare the following equipment and software to capture clear demonstrations and produce a polished result.
1 Monitor
A monitor with sufficient screen space and resolution helps viewers see software menus, settings, and on-screen text clearly. Close unnecessary windows and organize your workspace before recording.
2 Microphone
Clear audio helps viewers understand each step without confusion. A built-in microphone works for basic tutorials, while an external USB microphone can improve voice clarity and reduce background noise.
3 Webcam
A webcam is optional but useful if you want to appear on screen while demonstrating software features. Position it at eye level and ensure adequate lighting for a clear, professional-looking presentation.
4 Screen Recording Software
Choose a screen recorder that can capture the full screen, a specific application window, or a selected area. Microphone and webcam recording options are useful when you want to combine software demonstrations with spoken instructions or an on-screen presenter.
5 Video Editing Software
A video editor helps you remove mistakes, trim unnecessary footage, highlight important interface elements, and add narration and subtitles. HitPaw Edimakor offers screen recording and video editing tools to help turn raw footage into polished software training videos.
6 Stable Internet Connection
Reliable internet connection is important when demonstrating cloud-based applications, accessing online resources, or uploading your finished video to a learning platform or video hosting service.
With these essentials ready, you can move on to recording your screen and creating your software training video.
23M+
Downloads7.3M+
Satisfied UsersMake Software Tutorials Easily
- Capture software demonstrations with application recording.
- Trim clips, add visual effects, generate AI subtitles, and create AI voice-overs.
- Explore a rich library of effects, stickers, videos, music, and images.
- Export finished videos in multiple formats for easy sharing.
How to Make a Software Tutorial Video: Step-by-Step Guide
Creating a software training video takes more than screen recording. You need to clearly demonstrate each task, remove unnecessary footage, and make instructions easy to follow. Follow these five steps to turn a software workflow into a useful training video.
Step 1. Plan Your Software Training Content
Start by defining your training goals and choosing the software tasks to demonstrate. Prepare a short script that outlines each action and its explanation. If you need help getting started, an AI Script Generator can help you generate a draft based on your topic. Review the script, check its accuracy, and organize the steps before recording.
 You may also like:
Step 2. Record Your Screen and Software Workflow
Once your script is ready, the next step is to capture your software workflow. HitPaw Edimakor offers a convenient way to record your software demonstrations and edit the footage afterward.
Follow these steps to get started:
1: Download and launch HitPaw Edimakor. Open the screen recording tool and choose Application to capture the software you want to demonstrate.


2: In the recording control panel, select the application window and enable your microphone or webcam as needed.
3: Click the record button and follow your script. Move the cursor steadily and pause briefly after important actions so viewers can follow each step.
Step 3. Edit the Recording into a Clear Tutorial
When you finish recording, the footage is added directly to HitPaw Edimakor's editing timeline, so you can start editing without importing the video manually.
Once you finish recording, the footage is added directly to HitPaw Edimakor's editing timeline, allowing you to start editing right away. You can refine your recording and make your software training video easier to follow with the following editing options:
- Trim and Split Clips: Remove mistakes, long pauses, and unnecessary footage. Split the recording into sections to organize each software task.
- Add Text and Visual Effects: Use text labels, arrows, and zoom effects to highlight important buttons, settings, and interface elements.
- Edit Audio and Add Voice-Over: Adjust the original audio, remove unclear sections, or add voice-over narration to explain complex steps.
- Generate AI Subtitles : Automatically generate subtitles from speech, then review and correct technical terms, software names, and keyboard shortcuts.
-
Customize Subtitle Styles:
Use the Split Subtitles feature to organize subtitle segments and adjust their fonts, sizes, and styles for better readability.
Step 4. Export and Share Your Software Training Video
Before exporting, watch the finished video to ensure that the instructions are accurate, the narration is clear, and the subtitles match the on-screen actions. Check that interface text is readable and that passwords or other sensitive information are not visible.
Choose an export resolution that preserves screen details. For most software demonstrations, 1080p is a practical choice if the original recording supports it. Export the video in a widely supported format, such as MP4, for convenient playback and sharing.
Tips for Making Effective Software Training Videos
- Focus on One Task at a Time: Keep each video focused on a specific feature or workflow to make instructions easier to follow.
- Keep Screen Actions Clear: Close unnecessary windows, move the cursor steadily, and highlight important buttons or settings when needed.
- Use Simple Narration: Explain each action in clear, concise language and avoid unnecessary technical jargon.
- Add Accurate Subtitles: Use AI subtitle tools to generate captions, then check technical terms and synchronize the text with the demonstration.
- Use Practical Examples: Demonstrate real software tasks and explain common mistakes to help viewers apply what they learn.
- Review Before Publishing: Check the accuracy of instructions, audio clarity, subtitle timing, and screen readability. Remove any sensitive information before sharing.
FAQs About Software Training Video
A1: The best software depends on your training needs. Look for a tool that supports screen recording, video editing, audio narration, and subtitles. HitPaw Edimakor is a useful option for recording software demonstrations, editing footage, generating AI subtitles, and refining your final video in one workflow.
A2: Most software training videos work best at around 3–10 minutes, depending on the complexity of the topic. Focus on one task or workflow per video, and break longer training sessions into shorter tutorials so viewers can find the information they need.
A3: A microphone is recommended for clear voice-over narration, but you do not necessarily need to buy an external one. If you prefer not to record your voice, you can use text instructions, subtitles, or AI voice-over tools.
A4: Keep each video focused on a specific learning goal and demonstrate real tasks step by step. Use clear narration, highlight important interface elements, add readable subtitles, and remove unnecessary pauses. Practical examples and short, well-organized videos also help viewers stay focused.
A5: Yes. AI tools can help generate scripts, create voice-overs, produce subtitles, and simplify video editing. You can combine these features with screen recording to demonstrate actual software workflows. With HitPaw Edimakor, you can record your screen, edit the footage, and generate and customize subtitles to create a more accessible training video.
Conclusion
Creating software training videos becomes easier when you plan your content, record each step clearly, and edit the footage for better understanding. Add clear narration, readable subtitles, and practical demonstrations to help viewers follow along. With HitPaw Edimakor , you can record software workflows, edit your videos, and generate AI subtitles to create effective software training videos.
Leave a Comment
Create your review for HitPaw articles