Try grading a video by eye, without any reference point. It's harder. You end up nudging sliders back and forth, thinking, "Maybe a little warmer? Or was it better before?" That's where LUTs come in.
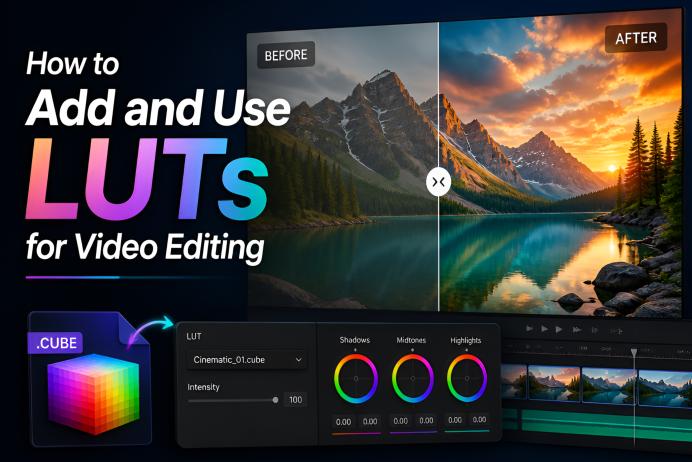
A LUT shows how your footage's colors should shift: tones, shadows, highlights, mood. Flat footage in, flat footage out. Right LUT in, and suddenly your video looks like it belongs on a bigger screen.
Here's what LUTs do, how to use LUTs, and a faster way to skip the trial and error entirely.
What Are LUTs in Video Editing?
LUT stands for "Look-Up Table." Sounds technical. It isn't. It's like a color recipe. Feed your footage in, and the LUT tells the software how to shift the tone, shadows, and highlights.
No more dragging ten different sliders around, hoping something clicks. One file, one click, new look. That's the whole appeal.
Editors who used to burn an hour manually grading a single clip now get most of the way there in seconds, then spend their time polishing instead of starting from zero.
What Does LUT Mean?
There are two types of lut for video, and they do different jobs. Mixing them up is a common beginner mistake.
- Technical or camera LUTs: These fix the flat, washed-out look straight out of your camera. Shoot in log format? Your footage looks gray and lifeless until a technical LUT brings it back to normal, viewable colors. Every camera brand has its own version, so the LUT needs to match your camera's log profile.
- Creative LUTs: These are the fun ones. They give your footage a mood: warm and nostalgic, cold and moody, bright and punchy, desaturated and cinematic. Apply these after your colors already look correct. Think of technical film LUTs as fixing your footage, and creative LUTs as styling it.
What Can LUTs Do for Your Videos?
LUTs can help you transform flat footage into a more stylish, consistent look. Discover how to choose and fine-tune LUTs, even if you're a complete beginner.
1. Add a film-inspired look
Many LUTs copy the color style of classic film stock, instant cinema vibes without owning actual film cameras.
2.Create a consistent visual style
Same LUT, every clip, same look throughout your whole project. It works best for YouTube channels or brand content.
3.Speed up the color-grading process:
You need a good starting point before beginning the color-grading LUT process of fine-tuning your footage.
How to Add and Use LUTs in a Desktop Video Editor
Professional color grading software can feel like flying a plane with zero training. Nodes, curves, wheels, scopes; it's a lot to take in if you just want your footage to look good. That's where HitPaw Edimakor comes in. It's built for people who want great color without needing a film-school background.
Key Features
- Custom LUTs: Drop the cube files, or get the built-in presets if you don't know where to start.
- AI Video Enhancer: Sharpens and cleans the footage before you touch color, so the LUT has good material to work with.
- AI Color Clone: The clone identifies the color automatically from the reference photo. No manual matching, no eyeballing hex codes.
- Free Video Filters: A quick-style library for those moments when you haven't picked a camera LUT yet, or just want to browse for ideas.


Want to know how to use LUTs? Check out these simple, effective steps to add and use LUTs for video editing.
Step 1: Prepare Your Footage First
Fix exposure and white balance before anything else. A LUT built on messy footage just makes messier footage; garbage in, garbage out applies here too.

Step 2: Import Your Video and LUT
Drop your clip on the timeline. Open the Color panel, then import the LUT file or pick a preset from the library.
Step 3: Adjust LUT Strength
Full strength almost always looks like too much. Reposition the slider back so it looks natural, not slapped on top of the footage like a filter from 2012.
Step 4: Fine-Tune the Final Result
You can modify the exposure, saturation, or skin tone after applying the LUT. This ensures the LUT video editing looks special and exclusive to the footage.
Bonus Step: Grading Color Faster with AI Color Clone
Don't want to test five different LUTs to find the right one? Upload a reference image you love, and AI Color Clone matches your footage to it. Done in seconds, not hours; great when you're grading a whole batch of clips and need them to match.
Common Mistakes When Using LUTs
Check out the common mistakes of using LUTs and how to fix them correctly:
1 Applying LUTs Too Early
Mistake: Slapping a LUT on before fixing exposure and white balance usually looks broken: blown-out highlights, crushed shadows, the whole mess.
How to fix: Correct the basics. Use the LUT as a finishing touch, not the foundation you're building on.
2 Using the Wrong LUT
Mistake: A LUT built for a different camera or lighting setup can wreck your colors; weird casts, crushed shadows, the works.
How to fix: Match LUTs to your camera's color profile when you can, or just test a few options before locking one in.
3 Stacking Too Many LUTs
Mistake: Layer LUTs on top of LUTs, and you'll receive detail-less footage that looks worse than when you started.
How to fix: Stick to one LUT per clip. Adjust from there with basic color tools instead of reaching for a second LUT.
4 Ignoring Skin Tones
Mistake: Some LUTs push color so hard that faces turn orange, red, or just plain wrong.
How to fix: Zoom into faces after applying a LUT. Nudge hue and saturation until skin looks like skin again, not a Halloween filter.
FAQs
A1: A file that instantly reshapes your video's colors based on a preset formula, saving you from manually adjusting every slider.
A2: It depends on the mood you're chasing:: warm tones, teal shadows, faded contrast, high-grain textures. There's no best, just the correct fit for your footage and your story.
A3: Check the license first. Some free LUTs are fine for commercial work, while others restrict you to personal use only, so it's worth the extra minute to check.
A4: Yes. Mobile camera and editing apps support LUT files on iPhone and Android, so you're not restricted to a desktop.
A5: A LUT is a quick preset shift. Color grading is the full, hands-on process of adjusting colors, often starting with a LUT as your launchpad, then refining from there.
Conclusion
LUTs are one of the fastest shortcuts to a polished look, and once you understand the basics, they're genuinely simple to use. Get the fundamentals down, dodge the common mistakes above, and your footage will start looking great.
Want an easy way in? Try Edimakor. Between the LUT tools, AI Color Clone, and preset filters, color grading stops feeling like a chore and starts feeling like the fun part of editing.
Leave a Comment
Create your review for HitPaw articles