Have you ever wanted to add seamless animations to your videos? You might want to animate the clips, their titles, or the audio. In any case, keyframes in Premiere Pro are the perfect solution! They allow you to create dramatic effects and subtle transitions to enhance your videos.
But how do they work exactly? Don’t worry! This guide explains how to add a keyframe in Premiere Pro in easy steps. You’ll also learn how to edit and remove it, and what to do when things go wrong!
Part 1. Keyframes in Premiere Pro
Premiere Pro keyframes are markers that define the start and end of an animation. These are specific points you add between frames to mark the original and the altered state of an effect. Premier Pro automatically generates frames between these two points. As a result, you end up with a gradual change in effect. Plus, you can apply these to any video element like clips, audio, text, effects, etc.
Part 2. How to Add a Keyframe in Premiere Pro
You can either add them directly to the timeline or use the Effect Controls panel. Below, I’ve explained these methods in detail along with step-by-step instructions.
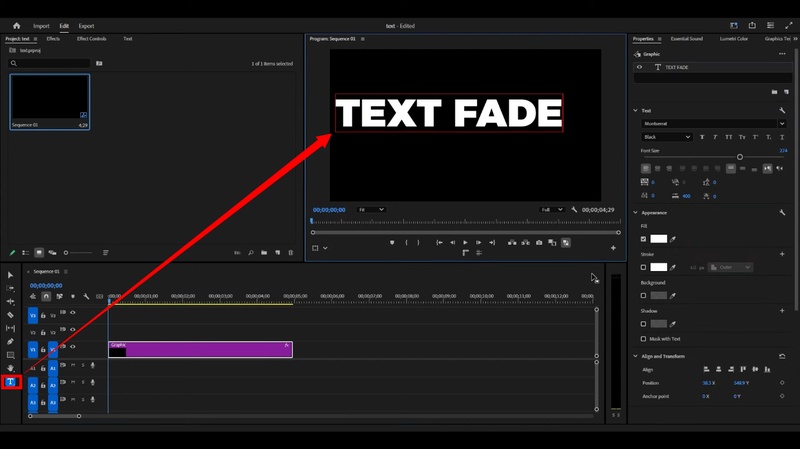
Method 1. Add Keyframes Using the Effect Controls Panel
The effect controls panel lets you adjust the values of each key frame more precisely. You will also tweak various parameters, such as position, scale, rotation, and opacity.
- Import the video you want to edit. Add it to the timeline and select it.
- Drag the header to the starting point of the effect. Then, go to the Effect Controls panel on the top left.
-
Click the tiny stopwatch icon next to the parameter you want to animate. This will add the first keyframe.

-
Adjust the value of the property. This will define the starting look of the effect.
-
Move the playhead to the area where you want the effect to end. Then click the “Add/Remove Keyframe” icon next to your desired property.
- A second keyframe will be added at the position of the playhead. Again, adjust the value of your chosen property for this point. This will animate the frames between the two points.
Method 2. Insert Keyframes In the Timeline Directly
This method lets you see the placement of keyframes alongside your video or audio tracks. Here are the steps for it.
- Import your media files and drag them over to the timeline.
-
Right-click the desired track. Select “Show Clip Keyframes.” Then, choose the property you want to edit.
- Zoom in on the timeline. You will see a horizontal line representing the selected parameter.
- Move the playhead to the position where you want the keyframe.
-
Go to the left of the track in the timeline. Click the “Add/Remove Keyframe” diamond icon to insert one at that position.
Part 3. How to Edit and Remove Keyframes in Premiere Pro
The above methods show you the basic operation of adding keyframes. You can take it a step further by editing their properties for a more professional change in effect. And if you change your mind, deleting them is also easy.
Editing Keyframes
Keyframes are all about creating appealing effects. And editing options in Premiere make it simpler. You can speed up or slow down the transition. Or make the interpolation more seamless.
Step 1: Create a Smooth Transition
- Click the starting keyframe. Right-click and choose “Temporal Interpolation.” Then select “Ease Out.”
-
Select the second keyframe. Then, right-click and select “Temporal Interpolation.” Click “Ease In” from the list.
Step 2: Adjust the Transition Speed
- Click on the ending keyframe and drag it towards the one preceding it to speed up the animation.
-
Select and drag the keyframe away from the preceding frame to slow down the effect.
Removing Keyframes
You can either use the shortcut keys or use the built-in options in Premiere to delete the keyframes. Use these steps:
- Click the keyframe you want to remove. Then, press the “Delete” key.
- Alternatively, select the keyframe. Then click the “Add/Remove Keyframe” icon from the Effects Control panel.
- For multiple keyframes, hold “Shift.” Then, click each keyframe you want to remove.
- Right-click in the timeline panel and choose “Clear.”
Part 4. Common Keyframe Issues and Fixes in Premiere Pro
Keyframes in Premiere Pro might be useful. But not free from their share of problems. Below, I’ve described the most common issues along with practical solutions.
1 Effects Moving By Themselves
This issue occurs when panning a still image. You push it in one direction, but it goes too far and then snaps back at the keyframe. What you can do is switch the first keyframe's interpolation to "Hold." This will prevent it from overshooting the target.
2 Keyframes Not Showing Up
Ever added keyframes, but they’re just… gone? It’s usually because your track height’s too small or you’ve got the effect view hidden. Just bump up the track height and turn on “Show Clip Keyframes.” They’ll pop right back into view.
3 Keyframes Out of Sync
If you drag a clip and your animation goes out of whack, your keyframes shifted along the way. In this case, turn on clip keyframe locking. Or move the clip and its keyframes together so everything stays in sync.
4 Effects Not Animating
If an effect just sits there doing nothing, you probably haven’t enabled animation. Drop at least two keyframes for that property so it actually changes over time.
Part 5. Easier Master of Keyframing Animation
The process of adding keyframes with Premiere is tedious and complex. Plus, your animations may not work as you expected. That’s where you need a more reliable tool to make your editing smoother.
Edimakor is the perfect tool for this purpose! It adds keyframes quickly with a single shortcut key. Then you can adjust the parameter values to build seamless transitions.
All this takes but a few minutes, no matter the complexity of the effects you aim to create. The best part? It has built-in AI tools to make your editing process a whole lot easier and fun!
Key Features of Edimakor Keyframing
- Animate images, videos, audio, text, and screen elements smoothly.
- Adjust size, position, rotation, volume, speed, and more.
- Replace clips easily while keeping the same keyframe settings.
- Let the tool auto-generate smooth transitions between keyframes.
- Use interpolation modes, including linear and curve keyframes.
Steps to Add and Edit Keyframes with Edimakor
Step 1: Download and install Edimakor on your computer. Launch it and click “New Project.” Then, click “Import” to add your clips and drag them to the timeline.


Step 2: Select the clip. Then, hold “Shift” and click on the clip where you want to add a keyframe. It will be added automatically.
Step 3: Select the parameter you want to animate from the right panel. These can be scale, opacity, position, and rotation. Drag the slider to adjust its value or input it manually.
Step 4: Now shift-click the second point on the clip to add another keyframe. Then go to the right panel and adjust the parameter’s value.
Part 6. FAQs about Keyframes in Premiere Pro
A1: The shortcut to insert a keyframe in Premiere is Ctrl+Shift+K on Windows and Cmd+Shift+K for Mac. This is for the Toggle Animation button in the Effect Controls panel. For Premiere Pro audio keyframe shortcut, hold down the Cmd key or Ctrl key. Then, click on the volume line within the clip to add a keyframe.
A2: You need to set the keyframes on one clip. Then copy it and paste the attributes on the rest of the clips in the timeline. Here’s how:
A3: This happens because they’re hidden in the Effect’s Control panel. What you can do is click the three horizontal lines next to “Effect Control.” Then, uncheck “Pin to Clip” to see your keyframes.
Conclusion
That wraps up our guide on how to add a keyframe in Premiere Pro. You can do it either through the timeline or using the Effect Control panel. But if you want an easier and faster solution, Edimakor can help you. Beyond keyframing, it offers many AI-driven editing tools. Click here to download and try it now!
Leave a Comment
Create your review for HitPaw articles