CapCut is a popular free video editor. It’s simple to use and full of effects, filters, and templates. But videos exported from the free version carry a watermark. That’s fine for casual clips. For brands and creators, it can look unprofessional.
The good news: you don’t have to live with it. This guide shows 6 practical ways for how to remove CapCut watermark.
Each method is easy to try and needs no advanced skills. Follow the steps that match your workflow. By the end, you’ll have cleaner, more professional videos ready to share today too.
Part 1: About Capcut Watermark
The CapCut watermark is a small label or logo added to videos edited with the app. It appears when you use free features, templates, or certain effects. It marks videos as edited with CapCut.
1 Types of watermarks in CapCut
There are three common placements:
- End-screen watermark after export.
- Embedded watermark inside transitions or effects.
- Template watermark inside free templates.
Each type can vary in size, opacity, and position.
2 Why Does CapCut Use Watermarks?
- Protecting Content: A watermark works like a digital signature. It protects CapCut’s tools and templates from being copied or misused.
- Brand Recognition: Each watermark carries the CapCut name. Every shared clip promotes the app and shows which editor was used.
- Traceability: Watermarks help track where a video was edited. This supports attribution and accountability online.
3 Why Does this Matter to Creators?
Watermarks affect viewer perception. Casual users may not mind them. But brands and influencers prefer clean, unbranded videos. Watermarks can distract or reduce perceived professionalism.
Part 2: How to Remove the Capcut Watermark?
Below, we have added 6 proven methods to remove the CapCut watermark.
1. Crop or Resize the Clip
Sometimes the CapCut watermark appears on the edge of your video. A simple fix is to crop that area. This is most effective in cases where the mark itself is small and it excludes anything meaningful.
It is essential to note that cropping removes part of the frame. You might lose faces, text, or action near the border. Check your shot first so you do not cut anything vital.
To avoid the problem, shoot with extra room around your subject. Frame a bit wider than you need. That will give you space to respot the watermark later and retain the main snapshot.
To remove CapCut watermark on PC, use the following steps.
Step 1: The first step is to use free video editing software.
Step 2: Import your video into the timeline now.
Step 3: Select the Crop tool.
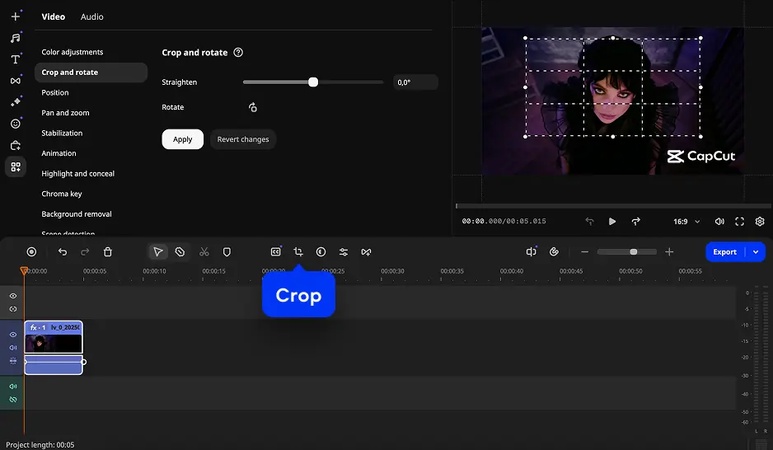
Step 4: Now, drag the corners until you remove the watermark.
Step 5: Lastly, apply your changes.
2. Delete the Ending Clip
You may also delete the CapCut watermark by just deleting the last part of your video. The watermark in many cases comes in the form of a brief outro at the end of clips, which are exported. Just cut that part, and only your main footage is left. This leaves your video clear and not with the end-screen mark.
These are the steps to remove a watermark in Capcut by deleting the final clip.
Step 1: Open the CapCut application and tap New Project.
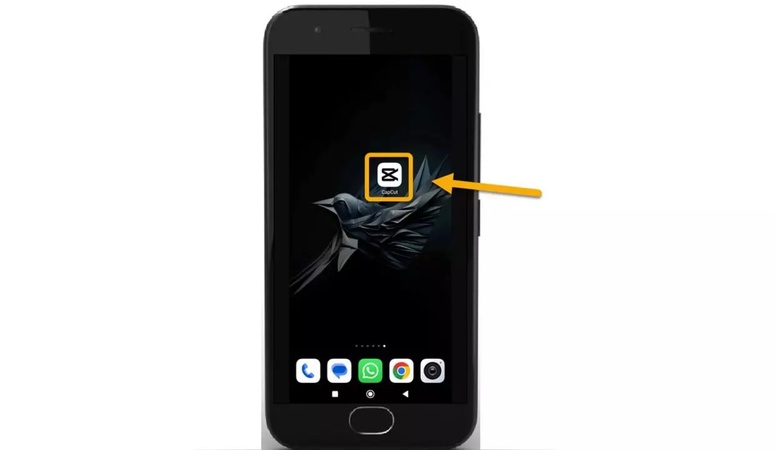
Step 2: Choose the video that you want to edit. Load it into the editor.
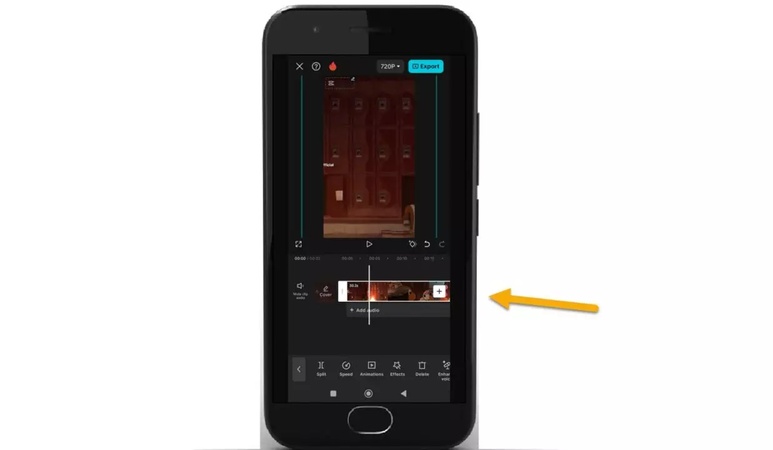
Step 3: In the timeline, scroll till the CapCut logo is at the bottom.
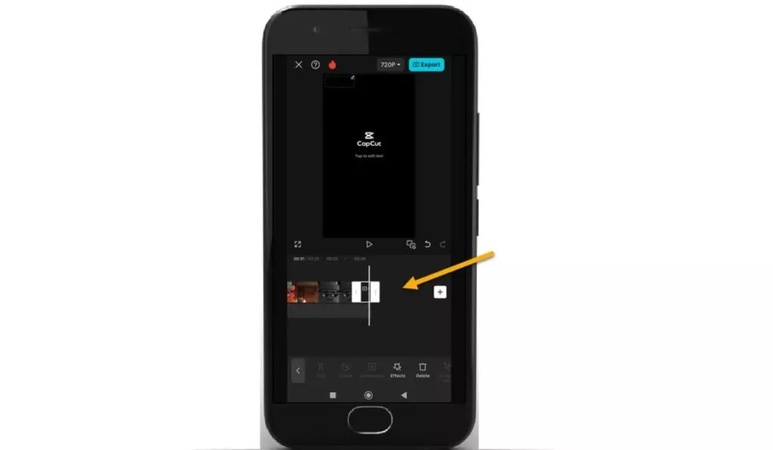
Step 4: Tap the watermark clip to choose it. Then hit the "Delete" button.
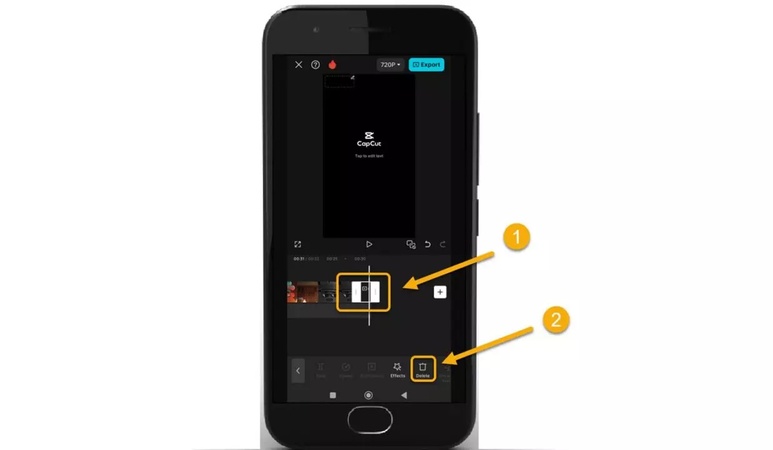
Step 5: Lastly, save the video without the watermark.
3. Blur or Add Stickers
Blur effect is another method of removing the watermark on CapCut. You make no cuts or crops, but blur the logo lightly and retain the rest of the frame undamaged. This maintains the size and quality of the original video, and the watermark becomes much less prominent.
Step 1: Add the video that you would like to edit to your track.
Step 2: Copy your video and place the duplicate on top of the original track.
Step 3: Open the “Effects” tab, choose a lens or blur effect, and apply it to the original clip.
Step 4: Select the copied video, then open the “Mask” option in the video tab.

Step 5: Resize the mask edges to cover the watermark section and tap on Reverse to blur only the logo.
Step 6: You can preview changes, and afterwards, export the video when you are satisfied with the results.
4. Use the Watermark Remover Tool
HitPaw Edimakor is a simple tool for removing watermarks. It works fast and does not need deep editing skills. Upload your clip and mark the watermark area. The tool analyzes the surrounding pixels. Then it fills the area to match the background. The result looks smooth and natural in most cases.
Edimakor also offers basic editing, like trimming and resizing. The interface is clear and easy to learn. You can finish a quick edit in minutes. For creators who want a tidy final file, it is a solid option. It saves time and keeps your workflow moving. Try a test clip first to see how it performs on your footage.
Step 1: Download and install Edimakor on your computer. Open it and click "Remove watermark" from the main interface or Toolbox.

Step 2: Choose the media type that you'd like to remove watermark. Then upload the image or video and choose the watermark remover method.

Step 3: Click "Remove" button and the watermark will be erased quickly without compromising your image/video. You can find it from the "Result" section.
5. Remove Watermark from Templates
Wondering how to remove CapCut watermark without Pro? You can erase it by clicking on the template. Follow the steps below.
Step 1: When you start a project on a template, you will see a CapCut logo on the right side of the top of your screen.
Step 2: Select export, Save and Share to TikTok.

Step 3: CapCut will direct you to TikTok. Your video will pop up and tap “Next”.
Step 4: Tap “Everyone can view this post”. Switch it to “Only you”.

Step 5: Tap “Drafts” to add your post to your drafts.

Step 6: Finally, open your phone’s camera roll. You will see your video without the watermark.
6. Upgrade to Capcut Pro
The easiest way to get rid of the CapCut watermark is to upgrade to CapCut Pro. Pro accounts export videos without the watermark. To upgrade, open CapCut and go to the Pro section. Pick a plan — monthly or annual — then complete the payment to activate Pro features.

Conclusion
Removing the CapCut watermark is easy once you know your options. You can crop edges, trim the ending, blur the logo, or use a dedicated remover tool. Templates and the Pro upgrade offer official ways to export watermark-free videos. Each method has its pros and cons. So test first to check what works best for you.
Plan your shots with extra space to avoid problems later. For a guaranteed clean file, upgrade to Pro. These choices make it simple to learn how to remove the CapCut watermark and keep your videos polished. You can also try HitPaw Edimakor for quick, seamless removal.
Leave a Comment
Create your review for HitPaw articles


