Want to make outstanding videos but don't know how? Reversing a clip is one of the easiest ways to grab attention. But many editors open DaVinci Resolve and feel overwhelmed.
Too many panels. Too many buttons. You only want a simple reverse, yet the process seems confusing. Don’t worry!
This guide shows you exactly how to reverse a clip in DaVinci Resolve step by step. It also gives you a faster option if the software feels too heavy.
By the end, you’ll know three proven methods plus an easier alternative. You’ll be able to reverse any clip quickly and with confidence.
Part 1: How Do You Reverse a Clip in DaVinci Resolve?
Below are the top 3 practical methods to reverse a clip in DaVinci Resolve. Have a look at them.
1 Use Change Clip Speed
The following are the steps to reverse a clip in DaVinci Resolve by reversing the clip speed.
Step 1: The First step is to start DaVinci Resolve. Then open a Media pool and import your video. Drag the clip over to the timeline.
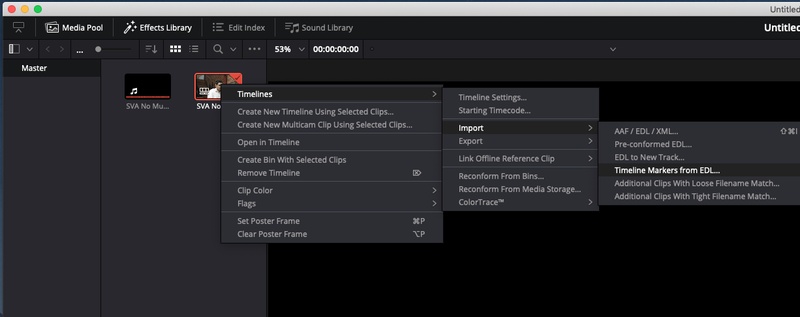
Step 2: Right-click the clip on your timeline. Choose Change Clip Speed from the menu.
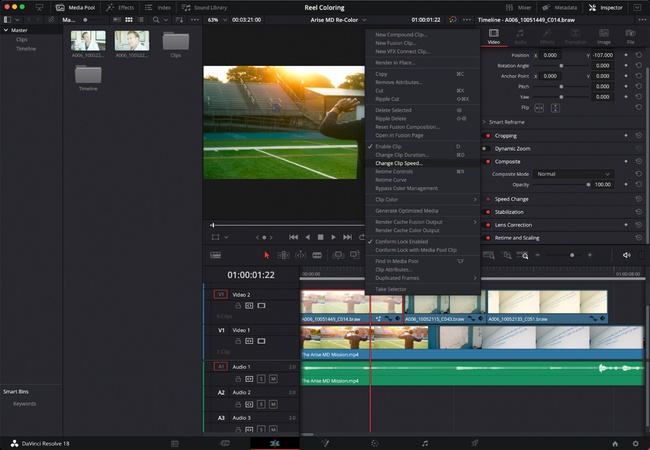
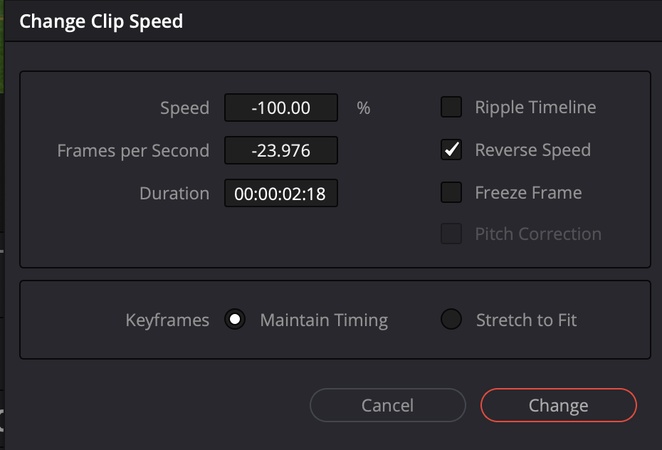
Step 3: Check Reverse Speed in the Change Clip Speed dialog box. Click Change.
Step 4: Lastly, run your video clip in the timeline. Make sure it is in reverse and synchronized with your project.
That’s all about this method. It’s pretty easy to reverse a clip in DaVinci Resolve by changing the clip speed. Now, let’s move to the following practical method on how to reverse a clip in DaVinci Resolve.
2 Use Retime Controls
The second way of reversing a clip in DaVinci Resolve is through retime controls. It is a way of making adjustments more subtly. Consequently, the reverse effect can easily be fine-tuned. Nonetheless, retime controls are slightly complex for beginners of DaVinci Resolve.
These are the steps to reverse a clip in DaVinci Resolve with retime controls.
Step 1: To begin with, right-click on your video clip and check Retime Controls. Retime Controls are also available through the shortcut ⌘R (or command + R on Windows).
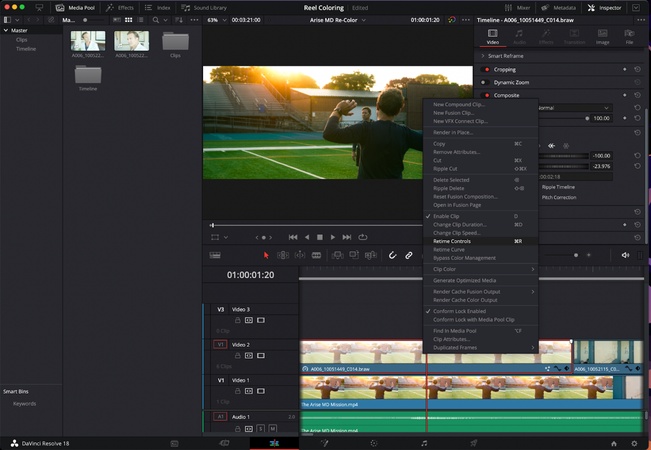
Note:
The right forward arrows denote that your clip is moving forward. But the arrows to the left show that the clip moves in the reverse direction.
Step 2: Select the arrow at the bottom of your clip. It will open a small drop-down menu. Click the Reverse Segment. It will rewind your video clip.
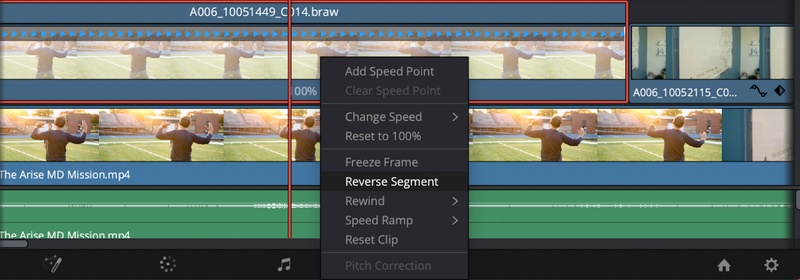
Voila! You now know how to reverse a video clip in DaVinci Resolve using Retime Controls.
3 Use Inspector Tool
The third method is to use the Inspector tool. It provides you with a comprehensive set of options to reverse your video clip in DaVinci Resolve. It even allows you to reverse the video without affecting the audio.
But then there are too many choices for a beginner. Finding the settings and other editing tools can also be time-consuming.
Step 1: Select the Inspector button on the Edit page. It appears on the top right of the page.
Step 2: Click the Inspector button, and then the Panel opens.
Step 3: In this step, visit the Video tab and locate the Speed Change section within it. Expand it.
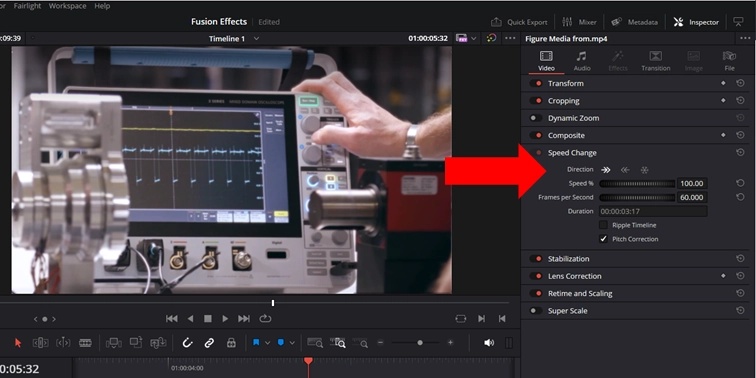
Step 4: Then click on the leftward-pointing arrow to initiate the reverse effect on your video.
In the Inspector Video menu, you can also add slow motion and other speed change effects.
Part 2: Easier Alternative to DaVinci Resolve to Reverse Video
Editing videos shouldn’t feel like a chore. Many people open DaVinci Resolve and get lost in menus. It’s powerful but heavy. Sometimes you only want to reverse a clip or make a quick edit. HitPaw Edimakor makes that easy. It’s built for people who want speed and clarity.
You install it, open it, and start. No steep learning curve. No long setup. The interface is clean. Each tool is in place. You can make an overall polished video even the first time.
Reversing a video takes one click. Just drag in your clip, hit reverse, and watch it play backward instantly. You can trim, cut, or add effects right away. Everything loads fast. The program doesn’t slow down your computer.
You can also adjust audio, add voiceovers, or tweak background music without extra steps. It supports many formats. So you can export for social media, YouTube, or personal use.
HitPaw Edimakor is light but not limited. It gives you the essentials in a clear layout. You spend less time guessing and more time creating. For anyone who finds DaVinci Resolve too heavy, Edimakor is a friendlier choice.
Standout Features of Edimakor Video Reverser
- Drag-and-drop timeline: Set and position clips where you want them with ease.
- 1-Click Reverse: 1-Click reverse instantly and flip any video back.
- Smooth effects and transitions: Add clean effects and seamless scene changes with ease.
- Easy audio editing: Adjust sound, trim tracks, or record voiceovers without extra tools.
- Runs on normal PCs: Edit smoothly without needing a high-end computer.
- Wide format support: Work with many file types and export in the format you need.
- Real-time preview: See changes immediately while you edit.
How to Reverse a Video Clip with Edimakor for Free
Step 1: Download, install and open Edimakor on your computer. Start from new project and upload your video file.
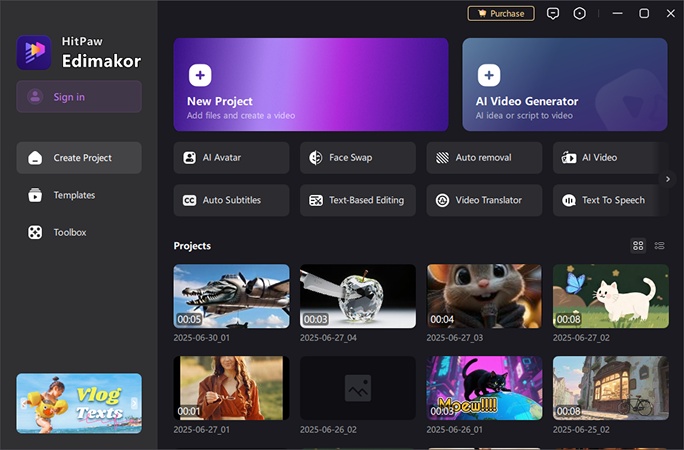
Step 2: Drag the video to the timeline and click the Reverse icon.
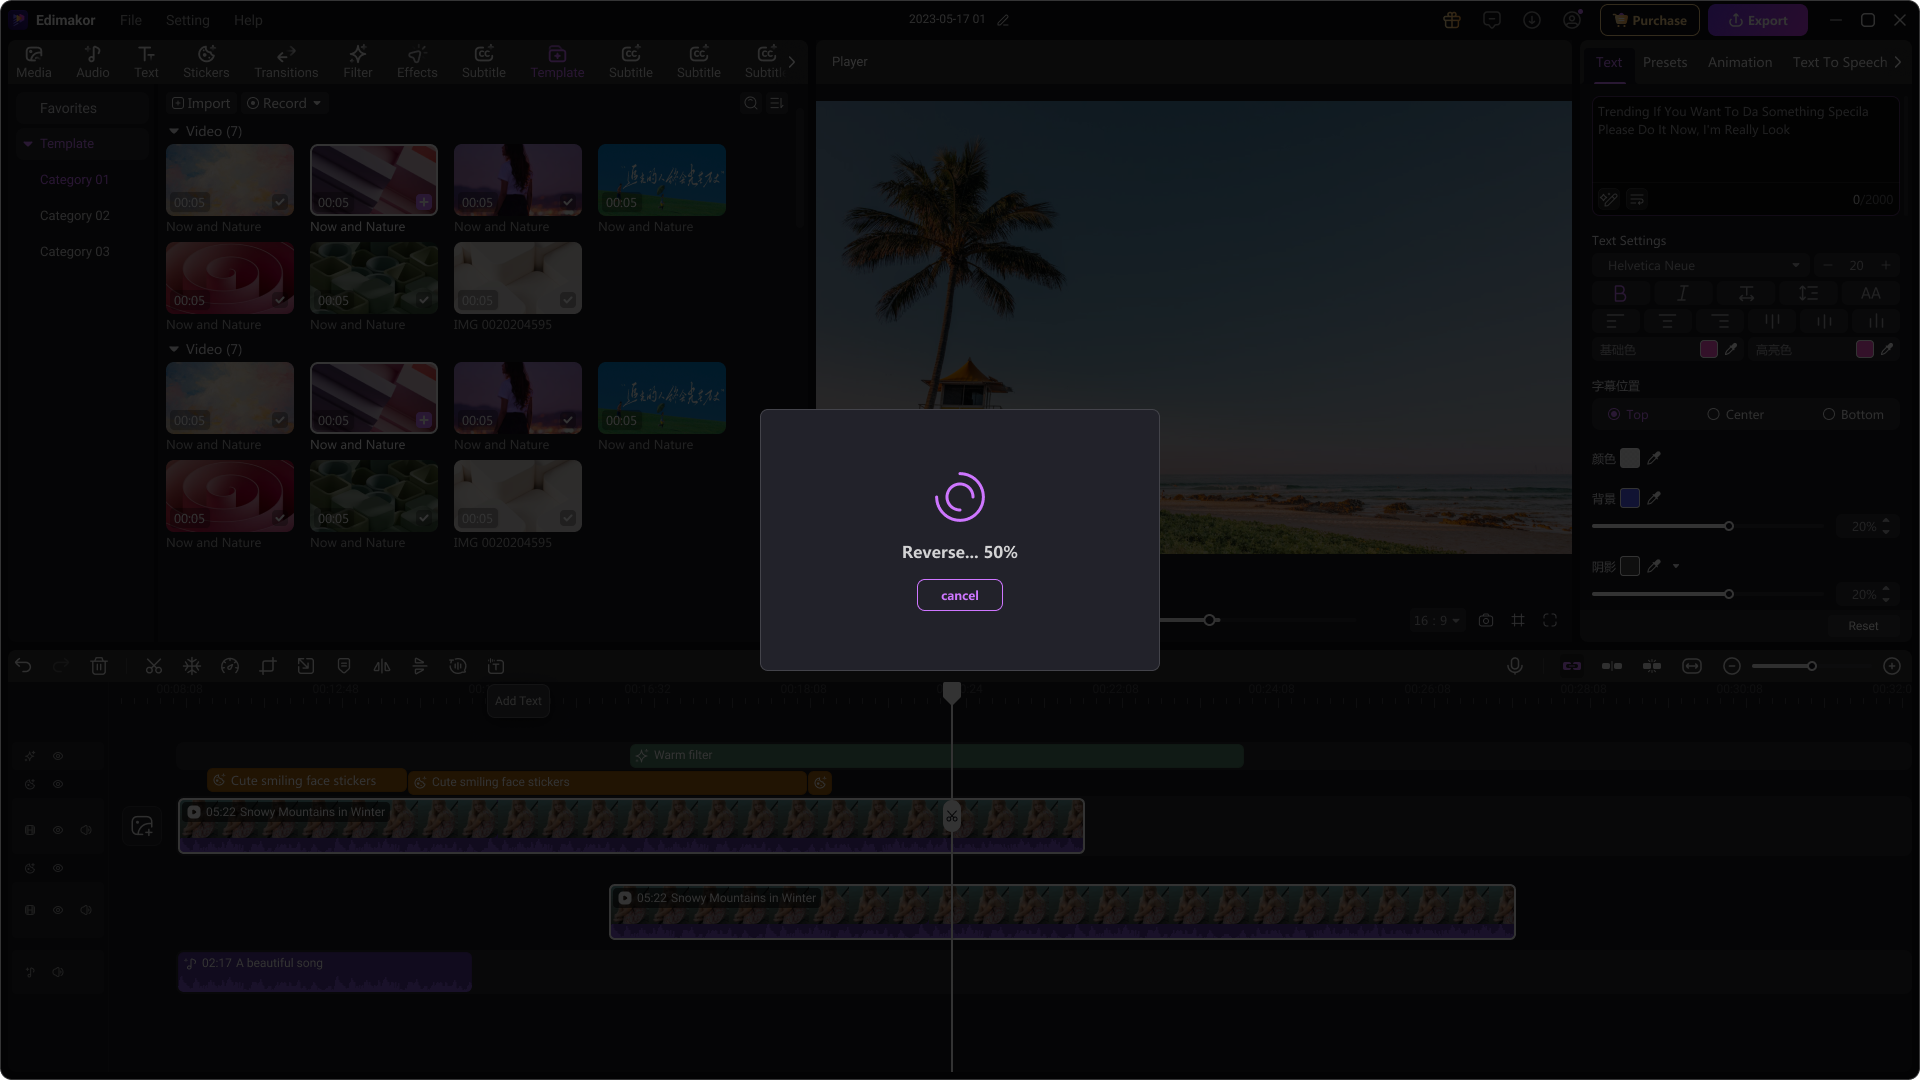
Step 3: Edimakor will soon reverse your video. You can preview and then export it for further use.
Conclusion
Reversing a video can be easy. You can use Change Clip Speed, Retime Controls, or the Inspector to learn how to reverse a clip in DaVinci Resolve. Each method works, but takes time to set up. HitPaw Edimakor is faster. It reverses clips with one click.
It runs smoothly on normal computers. It supports many video formats. You don’t need to learn complex menus. Pick the right tool that fits your work. With the right software, you edit less and can create more. Your videos look polished without the stress.
Leave a Comment
Create your review for HitPaw articles
