Looking to create a dramatic reverse effect for your video? Reversing is a powerful trick to turn an ordinary clip into something creative and eye-catching. When used correctly, it can build cinematic effects or a dramatic slow motion – just like you've seen in action movies and social platforms like TikTok and YouTube.
Adobe Premiere is a useful tool to create this effect. But how does it work exactly? And how can you achieve smooth and professional results? This guide offers a complete guide on how to reverse video in Premiere. You'll find detailed steps for both Premiere Pro and Rush, as well as a much easier alternative.
Part 1. How to Reverse Video in Premiere
Reversing a video in Premiere Pro lets you add a creative style to your project. You use the Speed/Duration panel for this task. This panel lets you control playback direction, speed, and how audio behaves.
With it, you can reverse clips, adjust speed, keep audio quality, and smooth motion through interpolation. You must adjust these properties manually. There’s no Premiere Pro reverse clip shortcut. But the main advantage is flexibility. You can test different parameters to achieve smoother results.
Here’s how to reverse a video in Premiere Pro.
Step 1. Import Your Video Clip
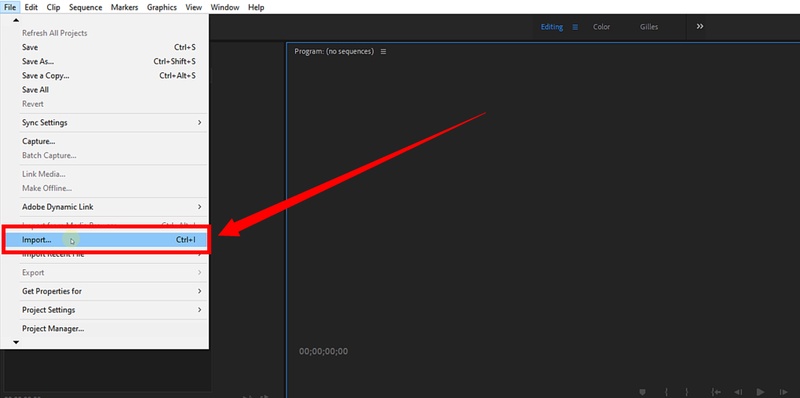
Open Adobe Premiere Pro. Go to the “File” menu and choose “Import.” Then select the video you want to reverse and upload it to the software.
Step 2. Add Clip to Timeline
Drag the imported video clip onto the timeline. Then, right-click the clip and choose “Speed/Duration” from the context menu.
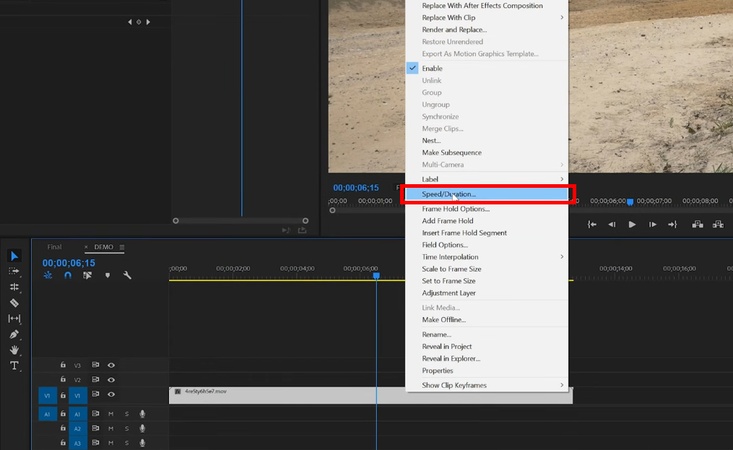
Step 3. Enable Reverse Video
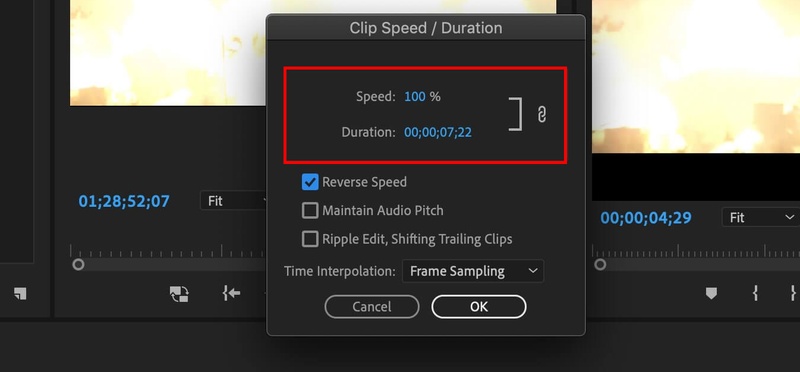
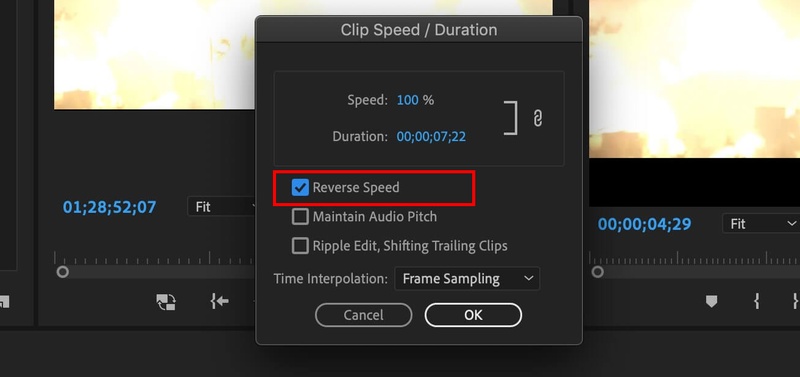
A pop-up window for the Speed/Duration panel will appear on your screen. From here, check the “Reverse Speed” box to reverse clip in Premiere.
Step 4. Adjust Playback Speed
Now that the reverse speed option is on, you can adjust its speed. Type the specific percentage you want next to “Speed.” Then, click “OK” to apply changes. For reference:
- 100% is normal reverse speed
- 50% means half speed (slower)
-
200% is double speed (faster)

Step 5. Adjust Distorted Audio
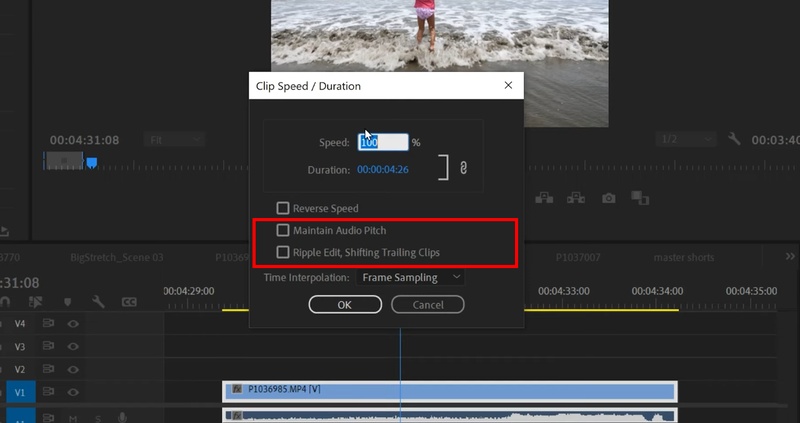
- Once you reverse the video, the clip’s audio also plays backwards. To keep speech or music natural, turn on “Maintain Audio Pitch.”
- Next, check the option for “Ripple Edit, Shifting Trailing Clips.” It will automatically remove gaps created during editing.
Step 6. Use Time Interpolation for Smooth Playback
Click the dropdown menu for “Time Interpolation.” Then, choose one of the options:
- Frame Sampling: To keep timing accurate when changing the length.
- Frame Blending: To create a smooth motion in duplicated frames.
- Optical Flow: To add new frames for a seamless slow-motion effect.
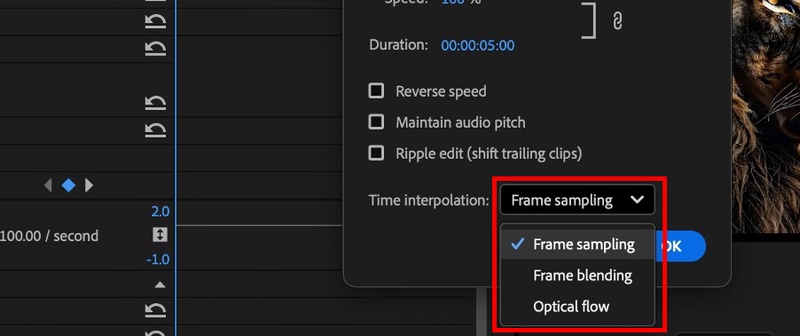
Experiment with these options to match the look and feel of your project. Once satisfied, hit OK. Now, your reversed clip is ready to use.
Part 2. Easier Tool to Reverse Video with Edimakor
Adobe Premiere may be a powerful editing program. But it has several drawbacks. For starters, you need a high-performance computer to work with it. The interface is also complex. So, if you're a beginner, it's not the tool for you. Even basic edits can feel difficult because of a steep learning curve. As a result, you may find Premiere Pro slow and tiring.
Edimakor offers a much simpler alternative for video reverser. It is a professional video editing software, but without the complexity. With Editmaker, you can easily adjust the speed and duration of your reversed clips. You can slow down playback for a cinematic effect. Or, speed it up to add some drama. Plus, you can maintain the original tone of the clip during the process. Additionally, Edimakor offers several AI tools that make editing more efficient and creative.
Key Features of Edimakor
1. Free Reversing and Editing Solution
Reverse any video in 1 click and for free. You can manually edit all elements of your videos. It lets you trim, split, rotate, and crop videos. Plus, you can add seamless transitions or creative effects and filters to upscale your footage.

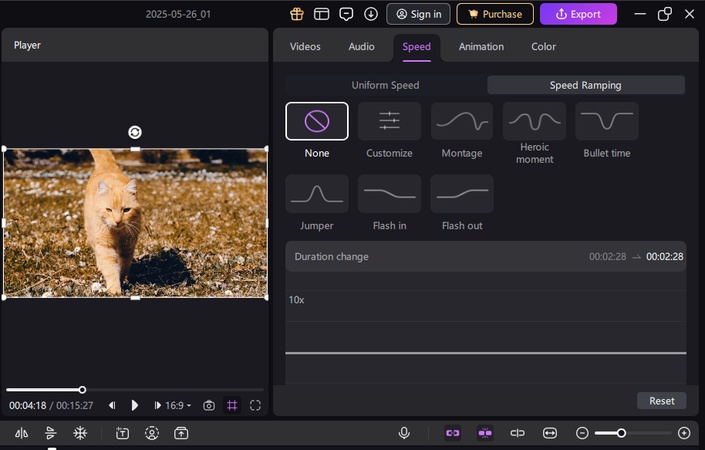
2. Speed Ramping
You can create the speed ramp manually for dramatic speed changes. Otherwise, you can choose from six preset templates while maintaining the original tone.
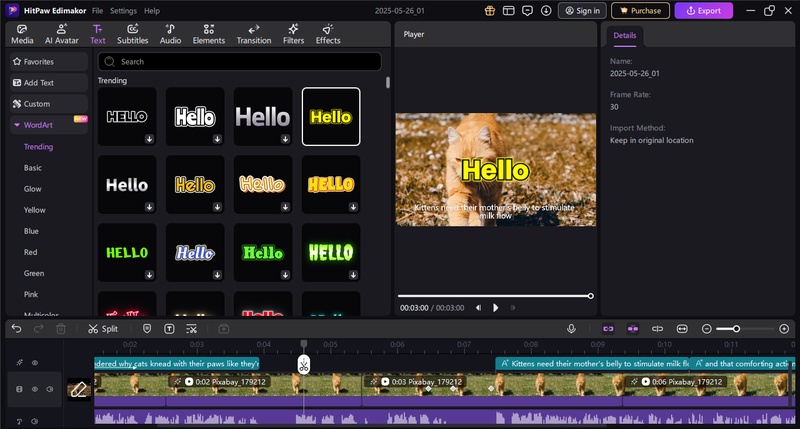
3. Add Text to Video
Give your videos a narrative with customizable text presets and styles. Choose from over 1000 fonts. Edimakor also lets you auto-generate subtitles and convert text to animations.
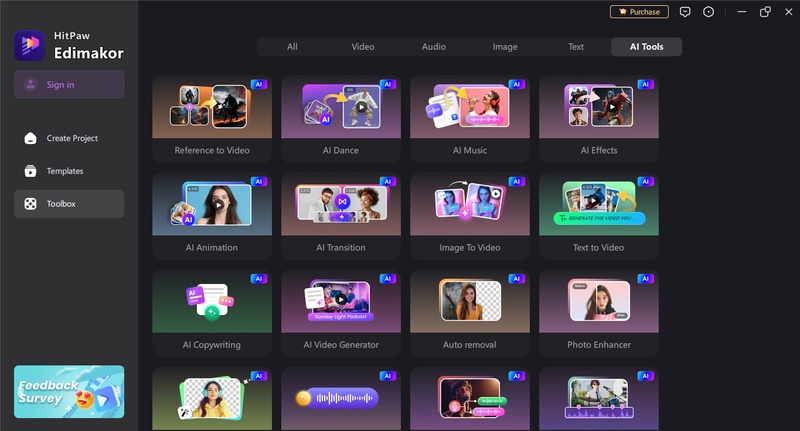
4. Smart AI-Driven Tools
With built-in AI, you can convert an image or text to video and generate new images. Edimakor also lets you remove clips automatically by deleting the text, swap faces, convert text to speech, and more.
Bonus: How to Reverse Video in Adobe Rush
Adobe Premiere Rush is a basic video editing app for quick content creation. It lets you trim clips and add transitions. You can also adjust audio with ease. However, it does not have advanced tools available in Premiere Pro. This includes the lack of a built-in option to reverse video playback.
As of September 2025, Adobe Rush still does not offer reverse playback on desktop or mobile. Many users have requested this feature in Adobe forums. But no update has added it yet. So, if you’re wondering how to reverse video in Premiere Rush, you must rely on a workaround to create this effect.
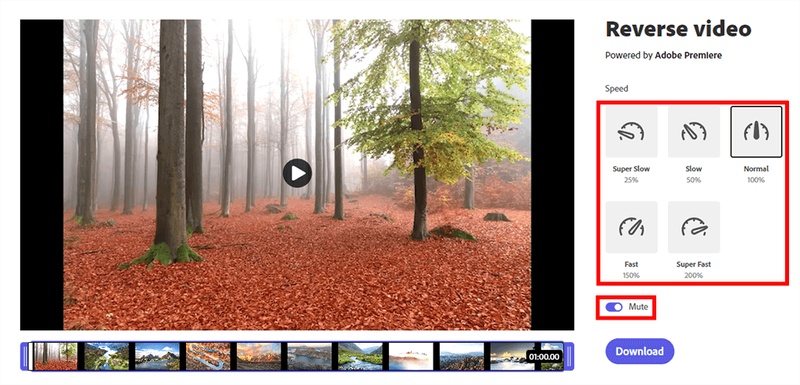
Option 1: Use Adobe Express (Free)
Adobe Express provides a quick reverse tool online:
- Sign in to your Creative Cloud Adobe Express account.
- Select “Reverse Video.” Then, upload your clip.
- Choose a playback speed like normal, slow, or fast. Then, click “Download.”
-
Import the reversed file back into Adobe Rush for further editing.

Option 2: Use Premiere Pro (Subscription-Based)
If you have a Creative Cloud subscription, you can export your project from Rush to Adobe Premiere. In Rush, all you need to do is select Share > Export to Premiere Pro. Then, you can reverse the clip using the Speed/Duration menu. Then bring it back into Rush if needed. This method adds a few extra steps. But they can give you the results you’re seeking.
Conclusion
That’s all about how to reverse video in Premiere. We’ve explained the process for both Premiere Pro and Premiere Rush. Adobe Rush does not currently have a reverse feature. But you can use Premiere Pro to make it possible.
And if you want an easier way to edit and enhance your videos, Edimakor is just the tool you need. It has all the tools you need to create dramatic effects and get your videos noticed online. Ready to get started? Download it now to edit your videos smarter!
Leave a Comment
Create your review for HitPaw articles

