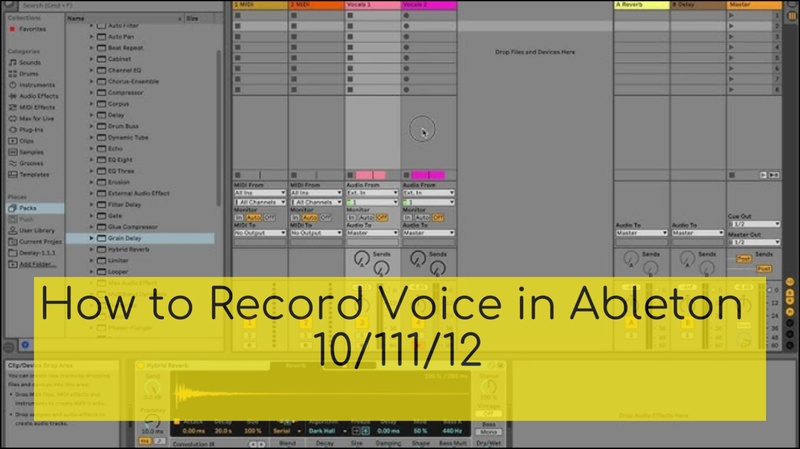
Learning how to record voice in Ableton Live 12, 11, and 11 is simpler than you think. Whether you’re creating music, podcasts, or voiceovers, this guide will help you record high-quality vocals effectively.
How to Record Voice and Audio in Ableton
Recording voice and audio in Ableton Live is a straightforward process, whether you’re working with vocals, instruments, or MIDI. You can capture high-quality recordings for your music or audio projects with a few easy steps. Here's a detailed guide on how to record voice in Ableton Live 10:
-
Step 1: Configure Your Recording Device
Start by connecting your computer to all required recording devices, including mixers, audio interfaces, and microphones. Make sure your devices' drivers are up to date to prevent incompatibilities. To obtain a clear signal, plug your instrument or microphone into a channel on your audio interface and set the gain.
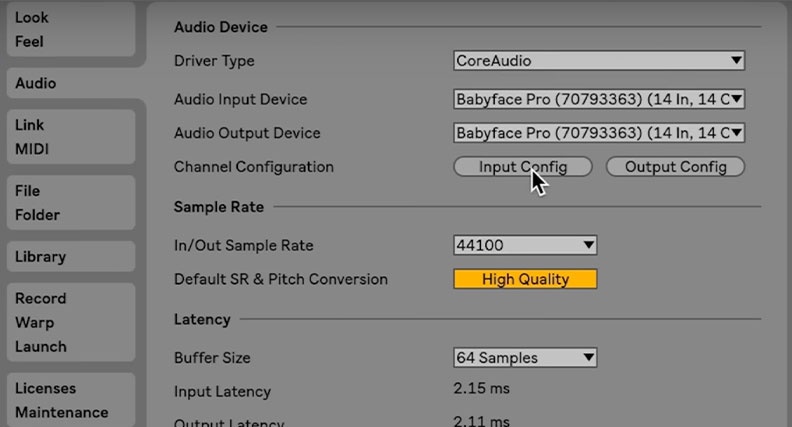
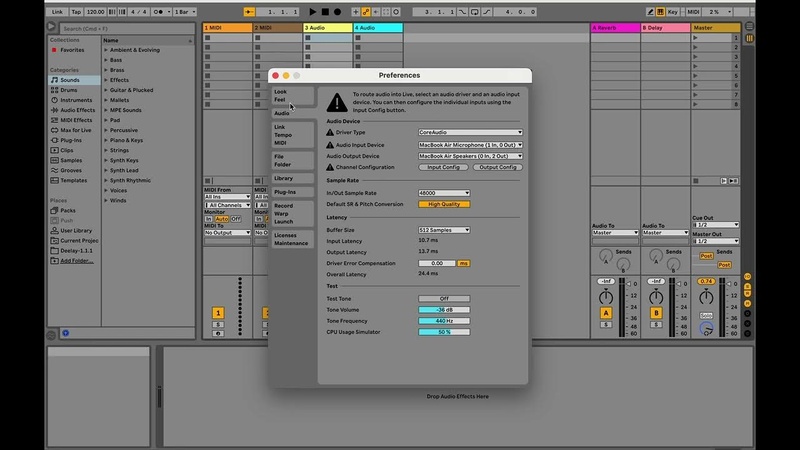
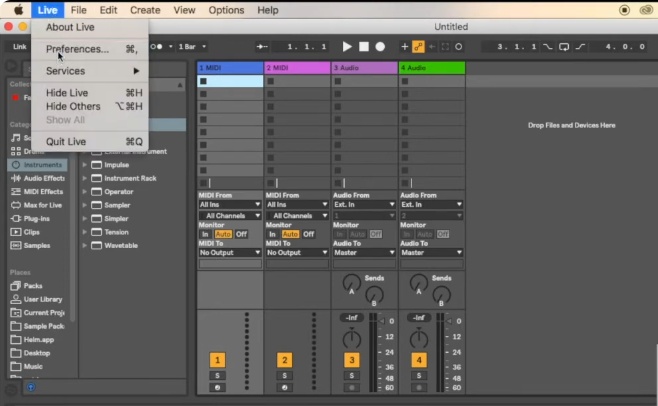
Press CTRL+ Windows or CMD+ Mac to open Ableton Live and select the Audio tab under Preferences. To enable Ableton to accept audio signals, choose the Audio Input Device of your choice.

-
Step 2: Choose Your Audio Tracks
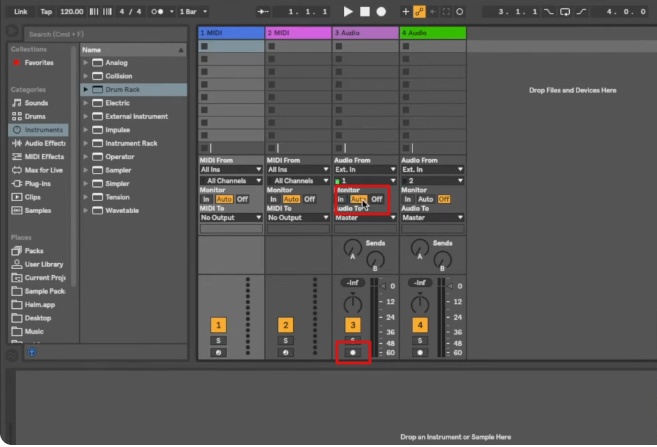
MIDI and audio tracks are pre-installed in Ableton Live when you start a new project. Go to Create > Insert Audio Track or Insert MIDI Track if you require more. To receive the signal for external devices, choose Ext. under the Audio track.
By hitting M or selecting the keyboard icon located in the upper right corner of Ableton Live, you may also enable your computer keyboard as a MIDI input. Select the audio interface's input channel to which your instrument or microphone is connected. If Ableton Live is not displaying the levels correctly, adjust the input gain.

-
Step 3: Arm Your Track
You must click the Arm button to arm the track before you can start recording. This button is a little circle icon that can be found in the upper right corner of the screen in Arrangement View or at the bottom of the track mixer in Session View. Ableton Live will detect that the track is armed when it is prepared for audio recording. This step is crucial because without the track armed, the recording will not start.
-
Step 4: Utilize the Metronome
You can maintain synchronization in your recording by using the metronome. By selecting the Metronome button located in the upper left corner of Ableton Live's screen, you can activate it. In order to allow yourself time to get ready before recording begins, you can also select a count-in value, which is typically 1 bar. This feature is particularly useful for musicians and singers who require exact time when recording.
-
Step 5: Record Audio
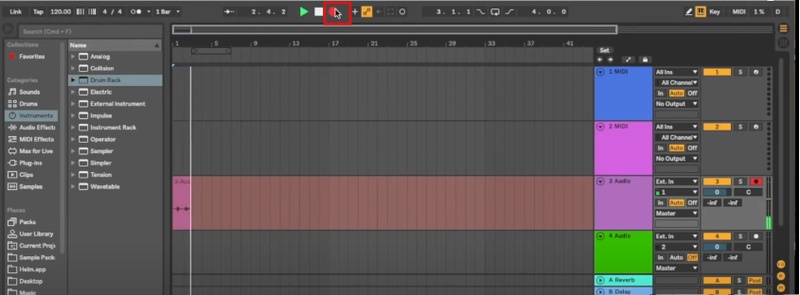
Recording in Ableton Live can be done in either Arrangement View or Session View. Click the red Record button at the top of the screen to record in Arrangement View. Using the playhead's current location on the timeline, Ableton will begin recording.

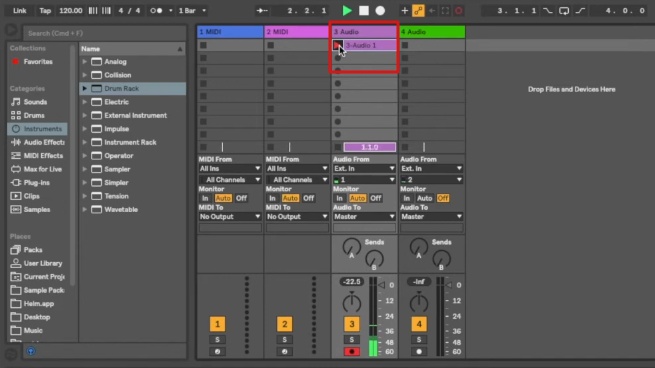
To end the recording, click Stop. To record audio, choose a slot on a track with Arm enabled in Session View, then click the Record button inside the slot. After finishing, you can pause the recording and apply several effects to improve the quality of your audio. If you want to know how to record voice in Ableton Live 11 or how to record voice in Ableton Live 12 then the process is the same except few options.
HitPaw Edimakor (Video Editor)
- Create effortlessly with our AI-powered video editing suite, no experience needed.
- Add auto subtitles and lifelike voiceovers to videos with our AI.
- Convert scripts to videos with our AI script generator.
- Explore a rich library of effects, stickers, videos, audios, music, images, and sounds.

How to Record Audio Only in Abelton
Recording audio-only tracks in Ableton Live is a straightforward process that involves selecting the correct input device, arming your track, and starting the recording session. Here’s a simple step-by-step guide to get you started on how to record voice in ableton live 10:
-
Step 1: Choose the Audio Input Device
You must first decide the audio input device you want to use. When you select the Live tab, a drop-down menu will show up. Selecting Preferences will bring up a new window. Select the device of your choice from the Audio Input Device box after navigating to the Audio tab. Verify that it is correctly connected and that Ableton Live can identify it, whether it is an AudioBox USB or another interface.

-
Step 2: Arm the Track
The next step is to have your audio track ready for recording. To hear your audio input while it is being recorded, set the Monitoring option to Auto. Next, select the track you want to record by clicking the Arm button, which is a circular icon. By doing this, Ableton Live is informed that the track is prepared to record audio from the input device of your choice.

-
Step 3: Use the Arrangement View to Record Audio
Click the Record button at the top of Ableton Live's interface if you would rather record in the Arrangement View. From the playhead's location on the timeline, the recording will start. Depending on your input source, begin speaking, singing, or playing. Press the Stop button next to the Play button when you are finished.

-
Step 4: Use the Session View to Record Audio
Choose a space on an armed track to record in Session View. To begin recording, click the Record button at the start of the slot. To stop the recording when you are done, push the Stop button at the bottom of the slot. THe process to learn how to record voice in ableton live 11 or how to record voice in ableton live 12 is same but they have some additional features.

How to Set Up a Microphone in Ableton?
Setting up a microphone in Ableton Live is essential for recording vocals, instruments, or other audio inputs. To ensure high-quality recordings, you must properly connect and configure your microphone through an audio interface. Here’s how to do it:
-
Step 1: Connect Your Audio Interface
Start by utilizing the proper cable to connect your computer to your audio interface. Make sure your computer recognizes the device correctly and install any required drivers or software that came with it. Make sure the gadget is prepared for usage and start Ableton Live after connecting.
-
Step 2: Configure Audio Preferences
Click Live, Preferences, Options then Preferences to access Preferences after launching Ableton Live. Choose your audio interface from the Audio Input Device dropdown option on the Audio tab. To access the needed inputs in Ableton, make sure they are enabled.

-
Step 3: Configure and Test Your Mic
Press CTRL + T to create a new audio track, or choose Create > Insert Audio Track. Choose the appropriate input channel for your microphone and click Ext. In. under the Audio From section. To make sure that the microphone is functioning properly, arm the track for recording, adjust the gain on your audio interface, and then speak or sing.
Where Is the Record Button in Ableton?
The record button in Ableton Live is a red circular button in the control bar at the top centre of the screen. It is mostly used for recording in the Arrangement view. Clicking the red button in this window starts recording from where the playhead is on the timeline.
In contrast, the record button in the Session view is a hollowed-out circle inside each clip slot that is intended just for recording MIDI or audio clips. For efficient recording in both views, it is essential to comprehend the distinctions between these buttons.
In Conclusion
Learning how to record voice in Ableton 12,11,10 is a straightforward process that allows you to capture high-quality audio for various purposes. By setting up your microphone properly, arming the correct tracks, and using the right settings, you can achieve excellent recordings. For an even smoother experience and to enhance your audio projects, consider using HitPaw Edimakor (Video Editor) . Its powerful editing features can take your recordings to the next level.
HitPaw Edimakor (Video Editor)
- Create effortlessly with our AI-powered video editing suite, no experience needed.
- Add auto subtitles and lifelike voiceovers to videos with our AI.
- Convert scripts to videos with our AI script generator.
- Explore a rich library of effects, stickers, videos, audios, music, images, and sounds.

Home > Video Editing Tips > How to Record Voice in Ableton Live 2026
Leave a Comment
Create your review for HitPaw articles



Yuraq Wambli
Editor-in-Chief
Yuraq Wambli is the Editor-in-Chief of Edimakor, dedicated to the art and science of video editing. With a passion for visual storytelling, Yuraq oversees the creation of high-quality content that offers expert tips, in-depth tutorials, and the latest trends in video production.
(Click to rate this post)