You can make a sky change photo editing by altering the sky in your images. This process is now quicker, simpler, and more realistic thanks to AI picture editors. The greatest methods for replacing sky in 2025 will be covered, regardless of whether you are editing on a computer, mobile device, or web platform.
Part 1: How to Do Trending Sky Change Photo Editing
With the help of trending sky change 4k photo editing, you can quickly swap out drab skies for colorful ones. Professional, 8K-quality edits are easily achievable with AI-powered tools like HitPaw Edimakor.
How to Change the Sky with Google Nano Banana AI
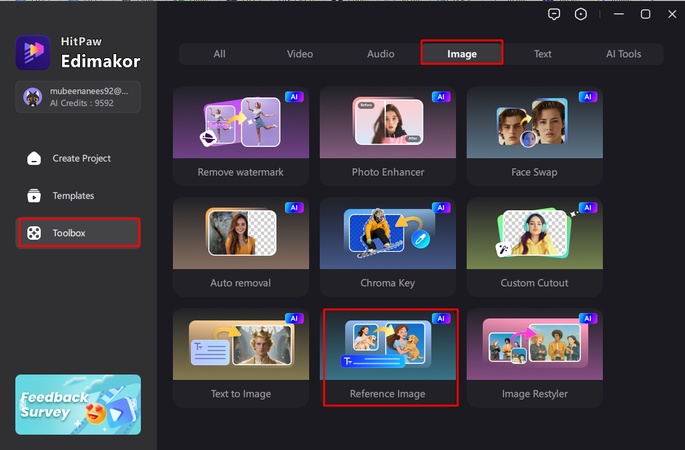
Step 1: Open Edimakor and Select AI Reference Image
Launch HitPaw Edimakor, navigate to the Toolbox's AI Image Generator , and choose Reference Image.
Step 2: Import Your Reference Photo
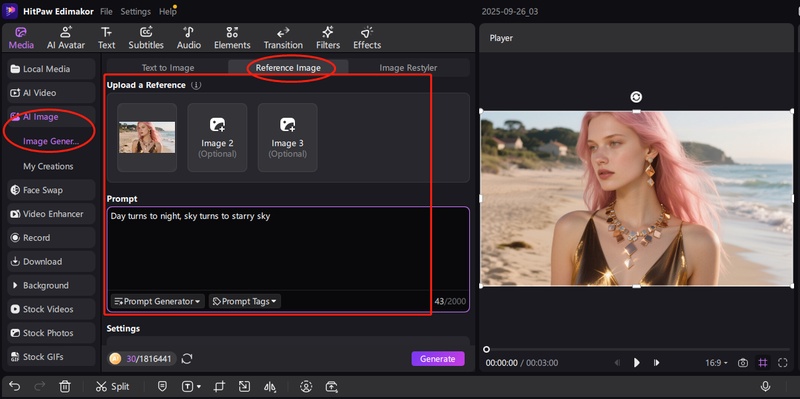
Select AI Google Nano Banana from the model option for sophisticated sky tweaking. To add the picture where you wish to alter the sky, click Upload. You can add up to three reference photographs for accuracy, and Edimakor supports HD and 4K images for more detailed images.
Step 3: Enter a Prompt and Choose Output Quantity
Write a thorough prompt outlining the intended sky shift. For more detailed instructions, you can also utilize the Prompt Generator. After choosing the output quantity, press the Generate button.
Step 4: Preview the Results and Get the File
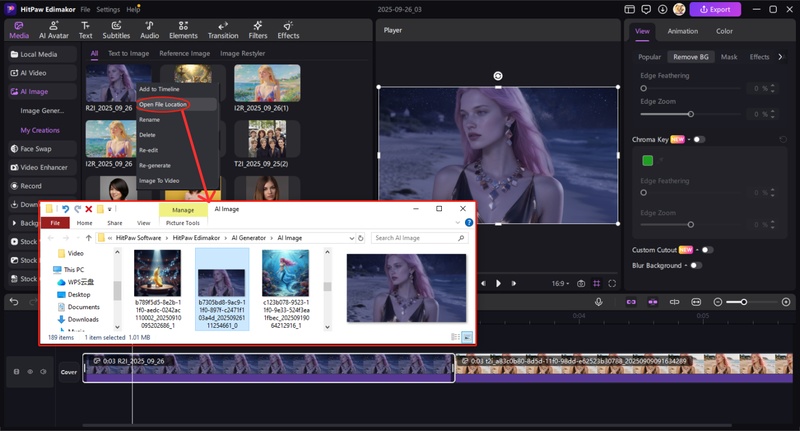
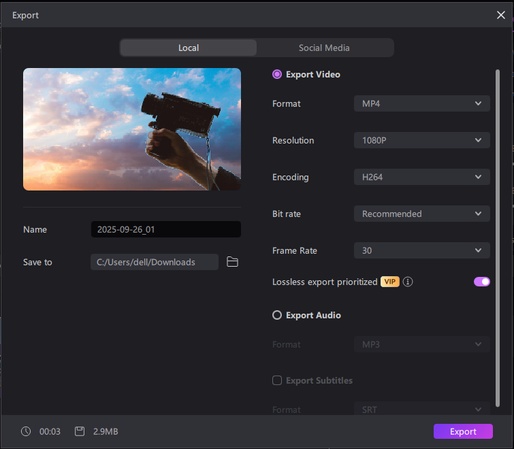
Click Export in the upper-right corner once the preview appears to be correct. Modify the quality, format, and resolution of your photograph, then get the saved file in the default location.
Step 5: Further Edit the Sky Changed Photo
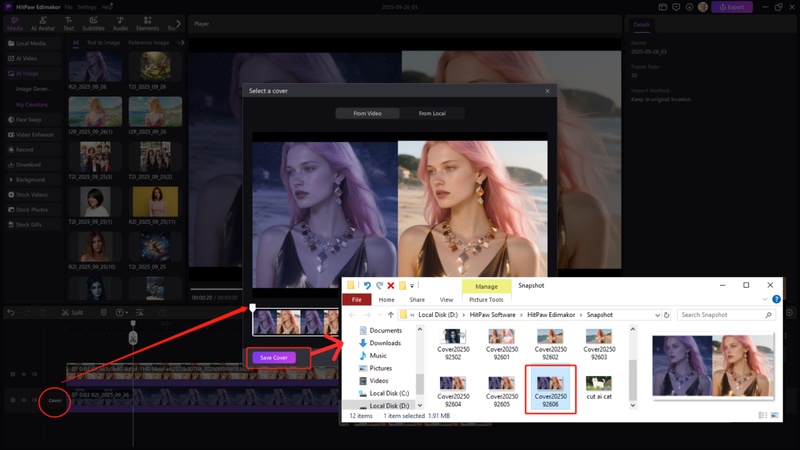
If you want to add text or sticker on the photo and save as an image. You can click the “Cover” button at the left coner. Then save it as a cover.
How to Change the Sky with AI Cutout
Here are the steps to use HitPaw Edimakor, a perfect sky change photo editor:
Step 1: Launch Edimakor and Select the Custom Cutout Tool
Launch HitPaw Edimakor, navigate to the Toolbox, and choose the Custom Cutout tool from the Image area.
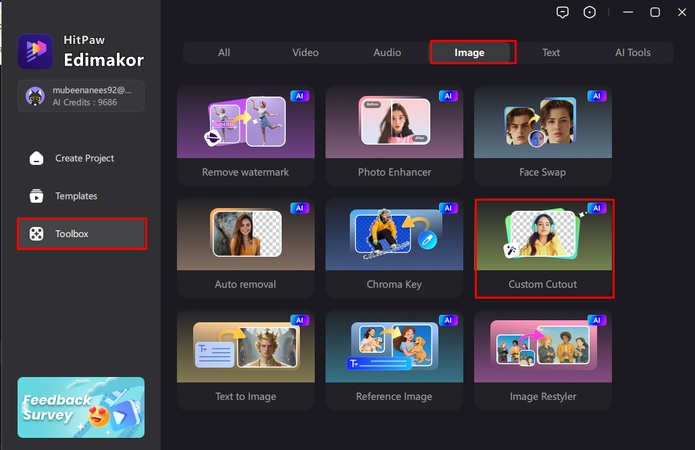
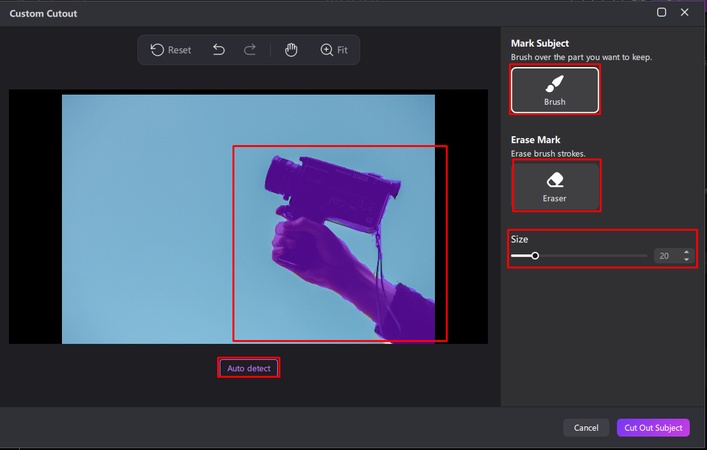
Step 2: Open the Custom Cutout Tool
Mark the subject you wish to retain using the brush and eraser tools in the pop-out window. You can save time by rapidly identifying the subject using the Auto Detect option, after which you can select Cut Out Subject.
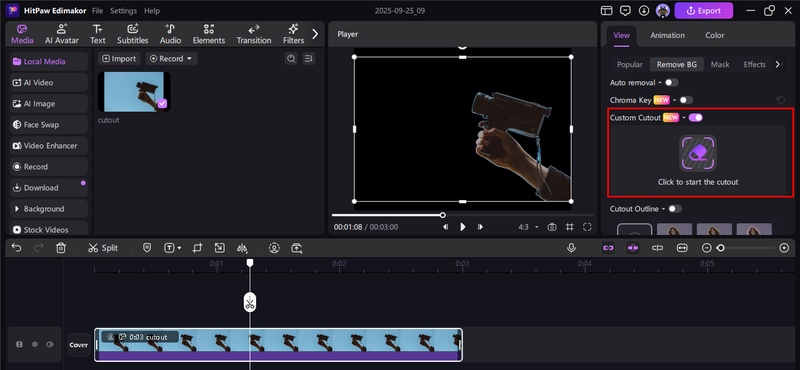
Step 3 Refine Your Cutout
Include the picture in your timeline. To fine-tune the results as often as necessary until you are happy, change the properties from the Image panel or click the Custom Cutout icon.
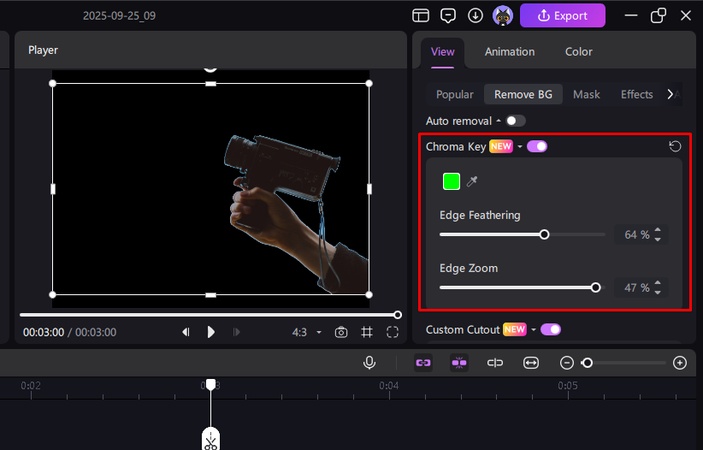
Step 4: Remove the Background
To isolate your topic, choose the image, select Remove BG from the top-right View panel, and then press the Chroma Key option.
Step 5: Add a New Sky
Add a background image of the sky to the timeline. To make the replacement appear natural, make sure your subject layer remains above the sky layer.
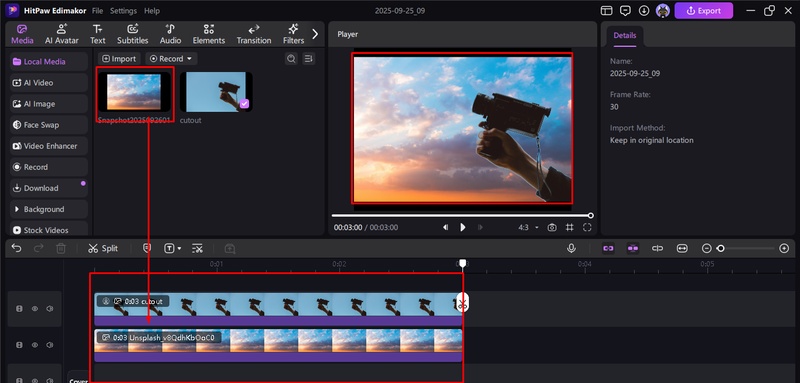
Step 6: Preview and Export
After the sky replacement becomes seamless, preview your work and click Export to save the finished product.
How to Do Sky Editing in Lightroom
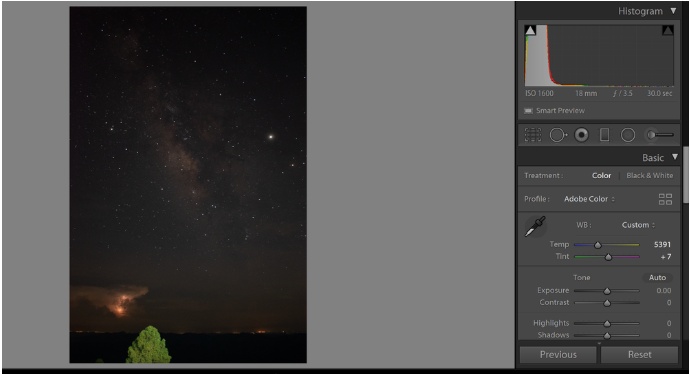
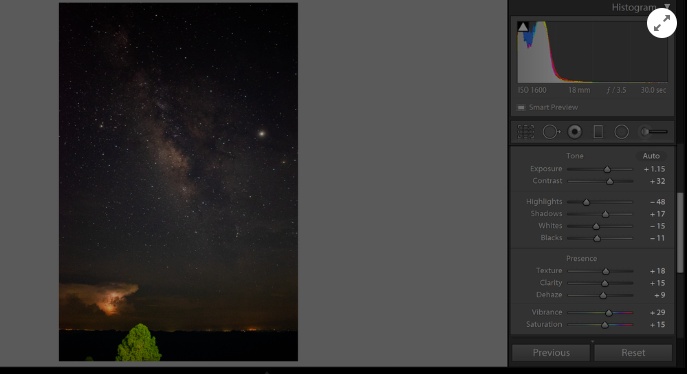
Here are the steps to learn how to edit sky photos in Lightroom:
- In order to achieve a balanced perspective, start by cropping the image to straighten the horizon.
- To naturally increase the colors of the sky, adjust the White Balance and apply a warm tint.
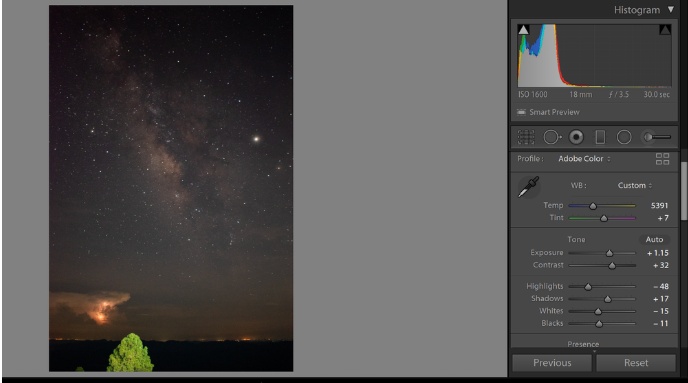
- To make stars and details pop out, add contrast and slightly increase exposure.
- To get depth and well-balanced tones, adjust the highlights, shadows, whites, and blacks.
- To improve overall image contrast and deepen blacks, use the Tone Curve tool.
- To create crisper, more realistic night skies, add a little Texture and Clarity.
- In order to minimize light pollution without creating additional noise, use the Dehaze slider judiciously.
- Carefully increase saturation and vibrance to create vibrant, eye-catching Milky Way colors.
How to Edit Sky in a Photo in Photoshop
Here is the Photoshop’s most trending sky change 16k photo editing tutorial
-
Above your backdrop image, add a new blank layer to apply all sky modifications.

- To create a transparent gradient with a black foreground, select the Gradient Tool and select Foreground.
-
To get a seamless transition effect, drag the gradient downward from the top of the sky.

- For better sky contrast, switch the gradient layer's mix mode to Overlay.
-
To manage where modifications are applied, apply a layer mask to the gradient layer.

- To eliminate gradient from objects, people, or trees, use the black Brush Tool.
-
After adjusting the mask edges and fine-tuning the gradient strength, save your finished, improved image.

Part 2: How to Do Trending Sky Change Photo Editing Online
Trending sky change 8K photo editing online can be done using sky change AI photo editor websites. With simply basic cloud-based editing and no complicated software required, you can upload your photo, choose your sky designs, and get results right away.
Trending Sky Change 8k Photo Editing Online
- To begin altering sky photos online, use your browser to go to the SnapEdit website.
- Click the Upload option, then choose your photo from the device's storage to upload it.
- Choose a sky that matches your photo by selecting the Sky option and looking through several skies.
-
Once you are happy with the new sky effect, download the finished image in 8K resolution.

Trending Sky Change 16k Photo Editing Tutorial
- Take a look at the Photoroom website, which offers sophisticated 16K sky replacements.
- You can upload your photo by choosing it from the local image storage on your device or gallery.
- To quickly replace the current background sky, click Sky and choose Replace.
- You can use AI to create a custom sky or add one from your smartphone.
-
After adjusting the sky's blending, brightness, and position, download your 16K modified image.

Part 3: How to use the sky change photo editing app
Mobile users can edit more easily with Sky Change apps. To turn your shot into a polished, viral masterpiece, just install it, upload it, and apply sky filters or AI-powered presets.
How to Do Sky Change Photo Editing on iPhone
- Download Quickshot from the App Store and open it on your iPhone
- Select the image from your library that you wish to alter by tapping Import.
-
Choose an option from the Sky list, then tap it to apply it right away.

How to Do Sky Change Photo Editing on Android
- Install LightLeap from Google Play and launch the app on your phone.
- Tap the Open button or the plus sign to import your photo.
- To browse effects, pick the Sky option from the toolbar at the bottom.
-
For realism, select a sky and then use the blending, brightness, and contrast sliders.

To Sum Up
AI-powered tools have made modifying sky change photo editing easier than before. The outcomes appear natural and striking whether viewed via your computer, through apps, or online. One of the most dependable options for 2025 editing needs is HitPaw Edimakor (Video Editor) , which provides professional-quality sky replacement in easy stages.
Leave a Comment
Create your review for HitPaw articles


