Creating a time lapse video is an exciting way to showcase gradual changes quickly. From sky time-lapse videos to bustling cityscapes, this guide covers everything you need to know about making impressive time-lapse videos.

What Is Time-Lapse Video
Individual frames are taken at a significantly lower frequency than what is played back in time-lapse videos, which are an artistic type of photography. Slow-moving processes appear to be happening quickly when the recorded frames are played at normal speed, creating a sped-up representation of real-time.
Consider filming a scene of clouds drifting across the sky for an hour, for example. The clouds seem to be speeding across the sky when they are replayed in a few seconds, creating a captivating effect.
-
Examples of Time Lapse Video:
-
Sky Time Lapse Video: Capturing cloud formations, sunsets, star trails, or the transition from day to night.

-
Mumbai Rain Time Lapse Video: Recording heavy rainfall or monsoon clouds rolling over the city, creating a dramatic scene.

-
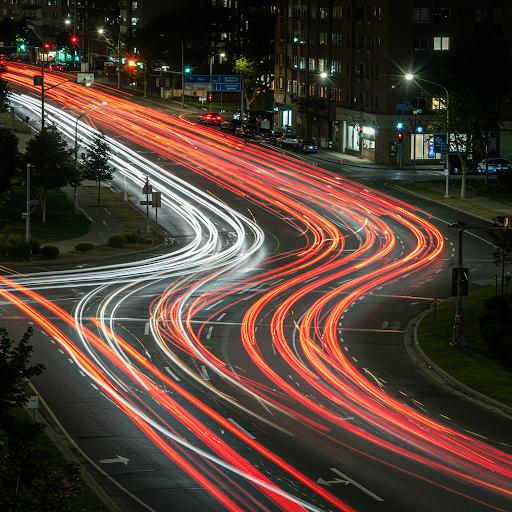
Cars on the Road Time Lapse Video: Showing traffic movement over time to illustrate urban life and its dynamic pace.

-
How to Take Time-Lapse Video | Time-Lapse Photography
Imagine standing at the edge of a bustling cityscape or a tranquil meadow, watching the world pulse with life in slow, unseen rhythms. Time-lapse photography transforms these subtle dances of light, shadow, and motion into a fleeting visual symphony. Here’s how to take time-lapse video masterpiece, step by step, blending artistry with technical precision.
-
Step 1. Gathering Your Tools: The Time-Lapse’s Kit
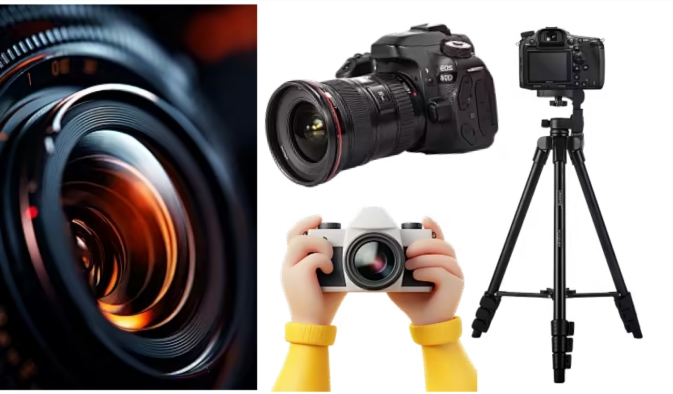
Every creator needs their instruments, and the time-lapse artist is no different. Begin by choosing your lens to the world:
-
The Mighty Camera : A DSLR or mirrorless camera, with its manual controls and intervalometer, is the painter’s brush for detail. But don’t underestimate the humble smartphone or rugged action camera—they’re gateways for beginners or adventurers braving windswept cliffs.
-
The Steady Hand : A tripod, your silent ally, guards against tremors, ensuring each frame aligns like threads in a tapestry.
-
The Heartbeat of Time : An intervalometer, whether built-in or clipped to your camera, dictates the rhythm of your shots. For epic sagas spanning hours, an external power source whispers, “Keep going.”
-
Memory’s Vault : Stockpile memory cards—they’ll cradle thousands of moments waiting to be stitched together.

-
-
Step 2. Setting the Stage of Camara
-
1. Composition:
-
Choose a compelling subject and composition. Consider the movement of your subject and the overall scene.
-
Plan your shot, thinking about how the scene will change over time.
-
-
2. Camera Settings:
-
Manual Mode: Use manual mode to maintain consistent exposure throughout the time-lapse.
-
Aperture: Choose an aperture that provides the desired depth of field.
-
Shutter Speed: Use a shutter speed appropriate for the lighting conditions.
-
ISO: Keep the ISO as low as possible to minimize noise.
-
White Balance: Set a fixed white balance to avoid color shifts.
-
Image Format: Shoot in RAW format for maximum flexibility in post-processing.
-
-
3. Interval:
-
The interval between shots depends on the speed of the subject.
-
Slow-moving subjects (clouds, plants): Longer intervals (e.g., 10-30 seconds).
-
Faster-moving subjects (traffic, crowds): Shorter intervals (e.g., 1-5 seconds).
-
-
4. Stability:
Ensure your camera is securely mounted on a tripod to prevent any movement.
-
Step 3. The Quiet Vigil: Record the Time Breathes
Press start. Now, the world unfolds without you. Your camera, a faithful scribe, documents each flicker of change. Walk away, but return occasionally—to nudge a stray leaf, to marvel at the light’s slow pivot. Hours compress into minutes; dawn becomes dusk in the blink of an eye.
-
Step 4. Weaving the Tapestry: From Stillness to Motion
In the dim glow of post-processing, your still images awaken. Import them into editing software like Edimakor , where they’ll ripple into life.
Choreography : Sequence the frames—a parade of moments.
Rhythm : Choose a frame rate. 24fps hums with cinematic warmth; 30fps sharpens the pulse.
Polishing : Adjust colors until skies sing. Stabilize any wobbles, crop to perfection. Here, a flicker becomes a story.

How to Convert Normal Video to Time-Lapse
Converting a regular video to a time-lapse can be an exciting way to speed up footage and capture long processes in a short, dynamic clip. Using tools like HitPaw Edimakor, you can achieve this effect effortlessly. Here's a step-by-step guide on how to make a normal video to time lapse:
-
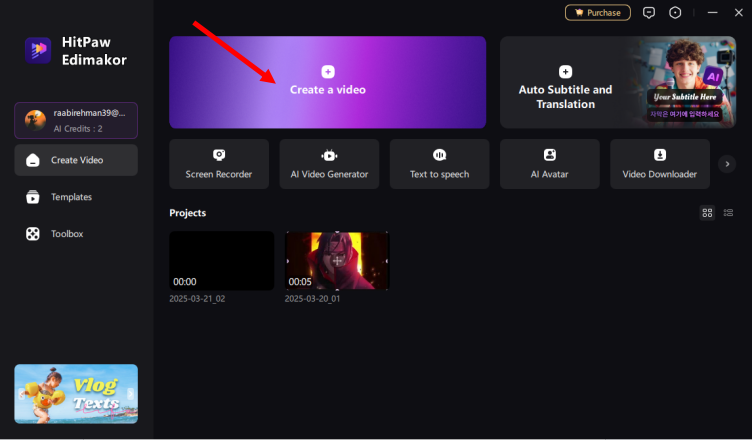
Step 1: Open HitPaw Edimakor and Import the Video
Start by installing HitPaw Edimakor on your PC. Choose the Create a Video option from the main interface. To turn a regular video into a time-lapse, click the Media tab, select the import option, and upload the video. A variety of video formats are supported by the software.

-
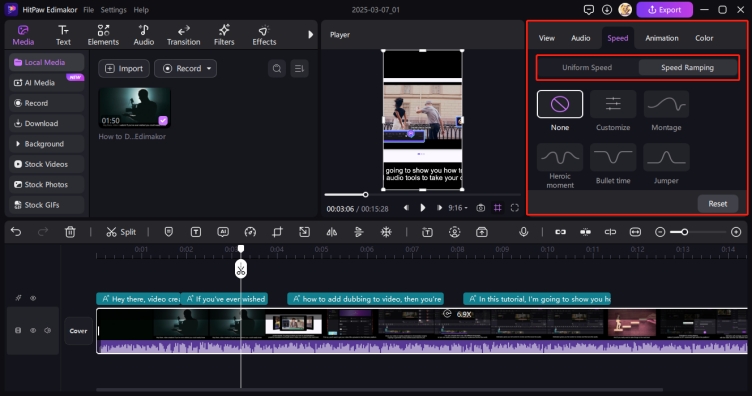
Step 2: Modify the Speed of Playback
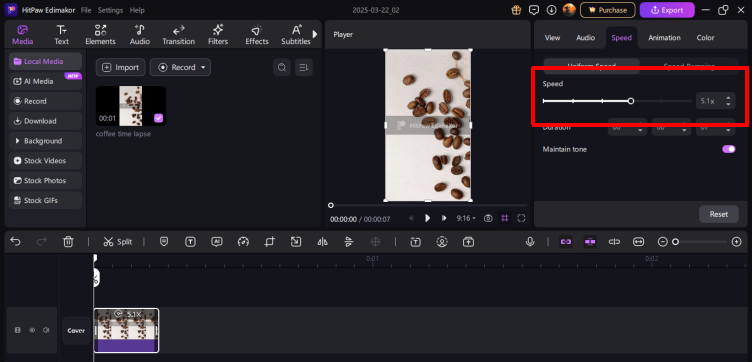
Go to the speed modification option after importing your video. Depending on the time-lapse effect you want, you can speed up the playback by 5x, 10x, or even more. Try varying the speed till you get the right effect if you are trying to distil a lengthy movie into a short, interesting clip. If you simply want to apply the effect to some parts of the video, you can also clip or cut certain bits.

-
Step 3: Preview and Export
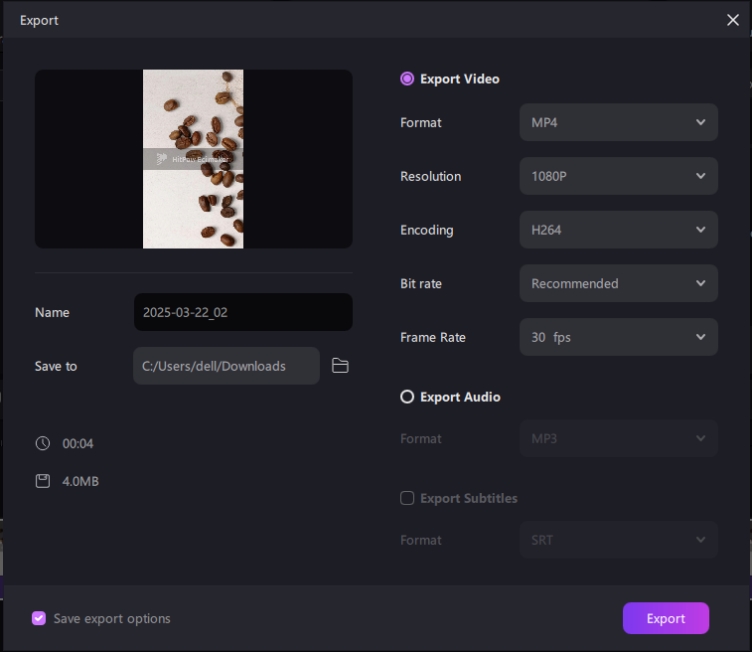
To make sure the result is what you want, preview the edited video after you have changed the playing speed. Enhance the time-lapse by adding music, effects, or filters as needed. Once you are happy, select the Export option and save the video to the folder of your choice. Additionally, you can choose the output format and quality to suit your needs.

How to Convert Time-Lapse Video to Normal Video
There are instances when you may need to convert a time-lapse video back to regular speed. Whether it’s for detailed analysis or restoring the original pace, HitPaw Edimakor makes the process simple. Here's how to convert time lapse video to normal video:
-
Step 1: Import the Time-Lapse Video
Launch HitPaw Edimakor , then choose the Create a Video option from the menu. To convert a time-lapse video, upload it through the Media tab. The program works with a wide range of file types, so it can be used with practically any time-lapse video you own.
HitPaw Edimakor (Video Editor)
- Create effortlessly with our AI-powered video editing suite, no experience needed.
- Add auto subtitles and lifelike voiceovers to videos with our AI.
- Convert scripts to videos with our AI script generator.
- Explore a rich library of effects, stickers, videos, audios, music, images, and sounds.

-
Step 2: Reduce Playback Speed
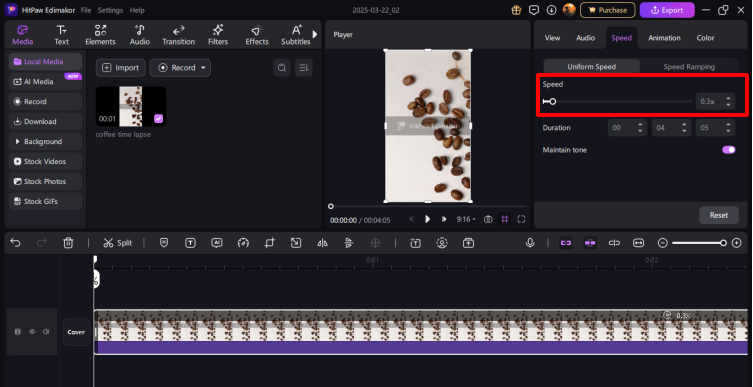
Look for the playback speed modification feature after your movie has been posted. Reduce the playback speed gradually until the video appears in real-time or at the speed you want to achieve to slow it down and convert it to regular speed. While making adjustments, be sure to preview the video to guarantee accuracy.

-
Step 3: Export Your Video
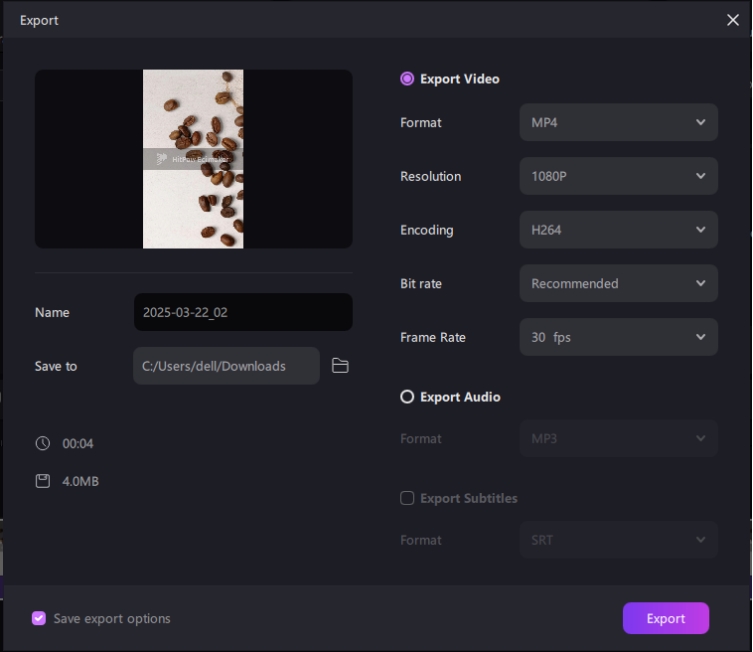
Once the playback speed has been successfully adjusted, use the preview option to verify the output. Export the video to the location of your choice if you are happy with the outcome. If required, you can also change the output format and resolution.

How to Create Time-Lapse Video on Mobile
Creating time-lapse videos on your mobile device is a simple and efficient process. Just follow these steps to create time lapse video and capture mesmerizing time-lapse footage:
-
Step 1: Open your Camera
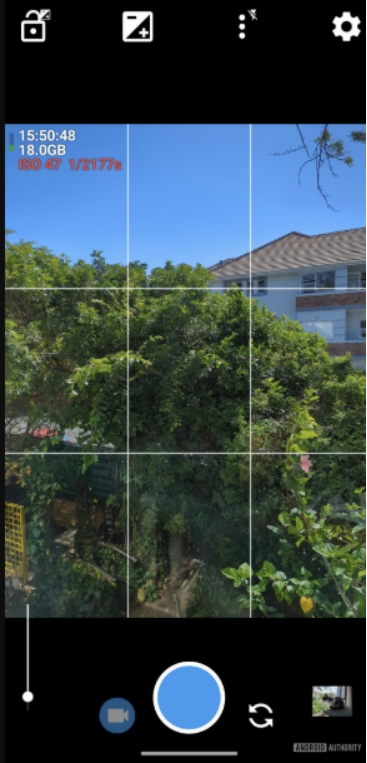
Open the built-in camera app on your smartphone after unlocking it. Choose the Video option to make sure you are in the video mode.

-
Step 2: Choose the Time-Lapse Option
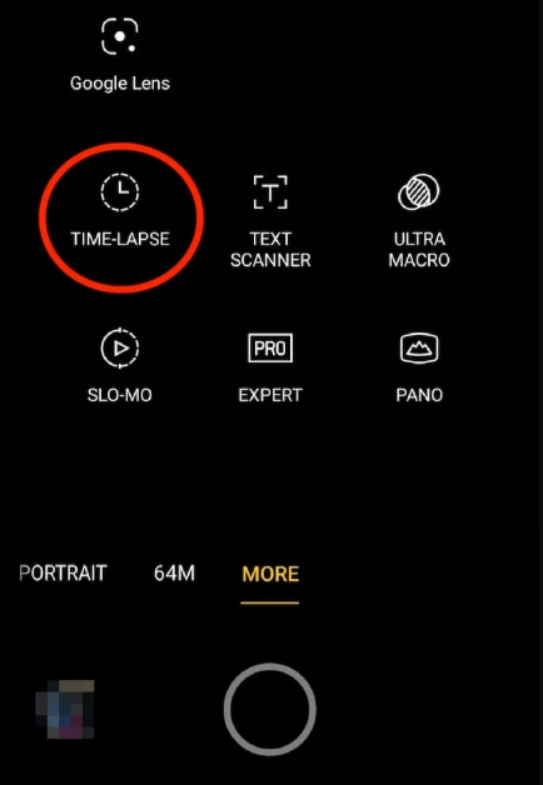
Find the time-lapse mode by navigating through your camera's options. Depending on the camera interface on your device, this option is typically accessible in addition to other modes like Slow-Mo or Panorama.

-
Step 3: Make Your Smartphone Stable
To prevent shakiness, mount your smartphone on a tripod or another sturdy surface. For the production of fluid and excellent time-lapse videos, this steadiness is essential.
-
Step 4: Begin Recording
Press the record button and let your camera record the scene for a long time. Your time-lapse will be more dramatic and aesthetically pleasing the longer the recording.
-
Step 5: Edit and Save
Save the video after you are done recording. By using smartphone editing tools to modify your footage and add music, and filters, or change the playback speed, you can further improve it.
How to Turn Video Into Time-Lapse on iPhone
Converting a regular video into a time-lapse on an iPhone is simple and convenient, especially with the right app. While iMovie is a popular choice, using third-party apps like Slow Fast Slow offers an even easier experience. Follow these steps to turn video into time lapse iphone and achieve impressive time-lapse effects:
-
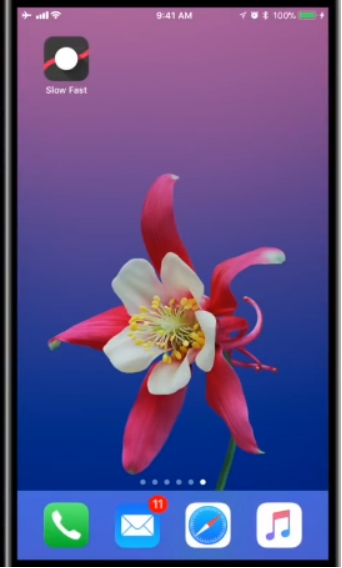
Step 1: Install Slow Fast Slow
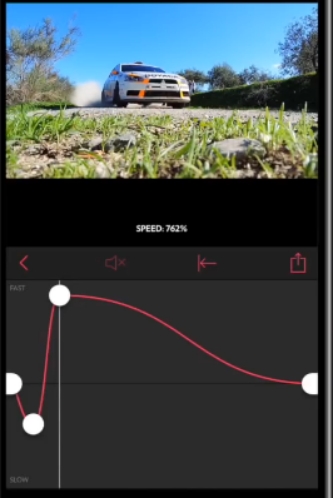
After the installation is finished, launch the Slow Fast Slow app that you downloaded from the App Store. This program is ideal for making time-lapse videos because it is specifically made to change the playing speed.

-
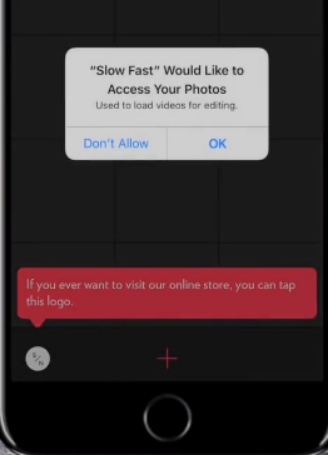
Step 2: Import Your Video
Download the Slow Fast Slow app from the App Store and open it once the installation is complete. This app is specifically designed to adjust playback speed, making it perfect for creating time-lapse videos.

-
Step 3: Adjust Video Speed
To adjust the playback speed, use the app's UI. By drastically increasing the pace, you can compress lengthy footage into a shorter, faster clip and produce the iconic time-lapse effect.

-
Step 4: Export Your Time-Lapse Video
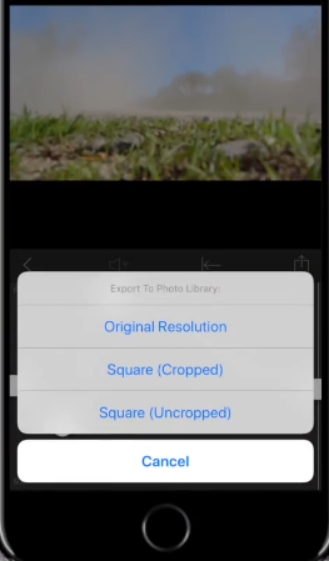
Export your time-lapse film in its original quality if you are happy with the outcome. You can share it straight from the app or save it to your Photo Library.

How to Edit Time-Lapse Video on Android
Editing a time-lapse video on Android is easy and efficient using apps like Movavi Clips. Follow these steps to learn how to edit time lapse video on android to enhance and perfect your video:
-
Step 1: Download Movavi Clips
Get Movavi Clips from the Google Play Store. To open the app after installation, tap its icon. The software offers an intuitive user interface and robust editing capabilities to improve your time-lapse video.
-
Step 2: Upload Your Videos
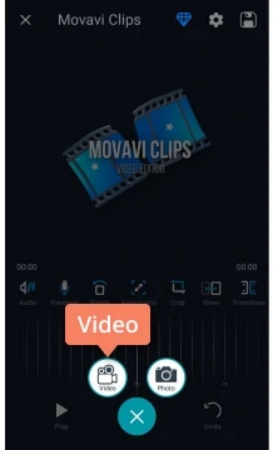
Choose Video by tapping the Plus button at the bottom of the screen. After selecting the video to edit, select Start Editing. You have the option to maintain the original aspect ratio or choose a different one.

-
Step 3: Cut or Trim the Video
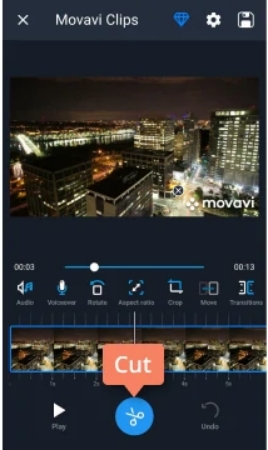
Find the desired cut point by scrolling the timeline if you want to eliminate undesired pieces. To split the video, use the Scissors icon. To remove the undesirable portion, swipe down on it. Make a second cut and swipe down on the chosen piece to cut out the central portion.

-
Step 4: Include Modifications and Filters
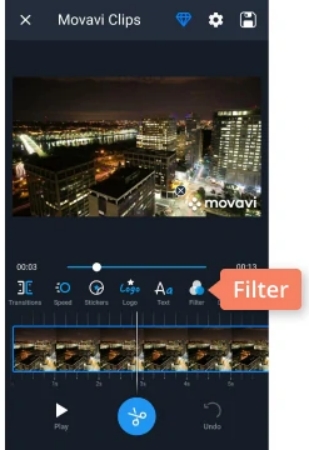
Tap the Filter option from the toolbar to apply filters. View the preview after selecting your preferred filter. The Adjustments option also allows you to manually change the saturation and brightness. After you are happy, click Apply.

-
Step 5: Include Music in Your Video
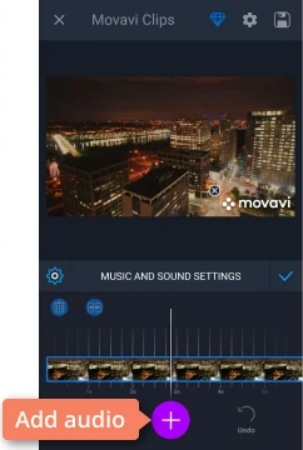
To choose where the music begins on the timeline, tap Audio. You can utilize the app's free tracks or select one from your device. Drag the timeline to change the track position after selecting Add. Use the Scissors symbol to cut the music if it exceeds the length of your video, then press the Trash Can to remove the extra portion.

-
Step 6: Save and Export Your Video
Once you're done editing, tap the Floppy Disk icon in the top-right corner. Choose Save and wait for the processing to complete. You can also share the edited video directly to social media from the app
To Conclude
Creating a time lapse video can be a rewarding experience, whether you are capturing beautiful sky scenes, bustling city life, or gradual artistic processes. From using professional photography tools to converting videos on your computer or smartphone, the possibilities are endless. Software tools like HitPaw Edimakor (Video Editor) make it even easier to convert and edit your videos, allowing you to bring your creative vision to life.
HitPaw Edimakor (Video Editor)
- Create effortlessly with our AI-powered video editing suite, no experience needed.
- Add auto subtitles and lifelike voiceovers to videos with our AI.
- Convert scripts to videos with our AI script generator.
- Explore a rich library of effects, stickers, videos, audios, music, images, and sounds.

Home > Video Editing Tips > How to Take Time-Lapse Video | Sky Time-Lapse Video
Leave a Comment
Create your review for HitPaw articles






Yuraq Wambli
Editor-in-Chief
Yuraq Wambli is the Editor-in-Chief of Edimakor, dedicated to the art and science of video editing. With a passion for visual storytelling, Yuraq oversees the creation of high-quality content that offers expert tips, in-depth tutorials, and the latest trends in video production.
(Click to rate this post)