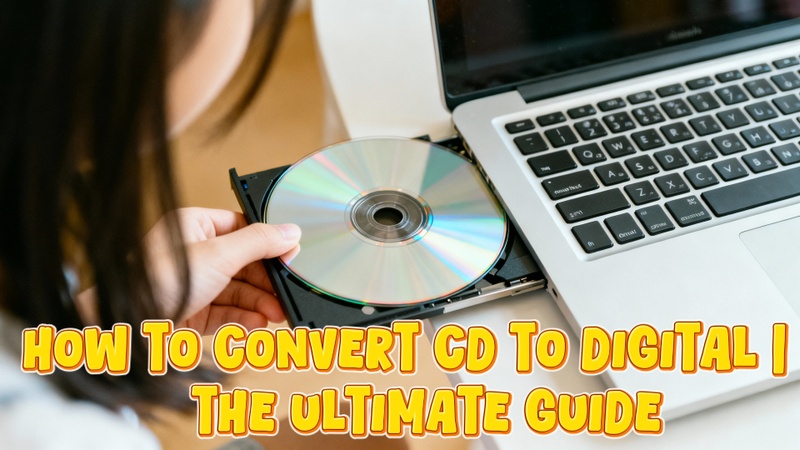
In 2025, the best approach to save your data, videos, or music is to convert cd to digital. Since CDs are becoming obsolete, digitizing them ensures that they can be accessed on modern devices. This tutorial explains how to rapidly and safely turn your CDs into high-quality digital files.
Part 1: What You Need to Convert CDs to Digital
A computer, a CD/DVD player, conversion software, storage space, and a well-organized plan are all necessary to effectively manage your digital assets before converting CDs to digital format.
1 Benefits to Convert Your CD Collection
You can protect your favorite music, movies, or data from scuffs and damage with best software to convert CD to digital. Additionally, it makes sharing across several devices simple. You may modify tracks, make playlists, and enjoy high-quality media without worrying about losing your collection because everything is digitally stored.
2 Necessary Equipment and Software to Convert CDs
1. A Laptop / Computer / Audio Recorder
To manage the conversion process, you will require a dependable laptop or PC. To read CD data, execute conversion software, and save high-quality digital files without experiencing performance problems, it should have sufficient processing power and storage capacity.
2. The CD/DVD Drive
You might require an external CD/DVD drive because the majority of contemporary laptops no longer come with built-in drives. These let your system easily read and extract data from your physical CDs and connect via USB.
3. Software for CD Ripping
For high-quality conversion of CD audio or data files to digital formats like MP3, FLAC, or WAV, use cd ripper software like Windows Media Player, iTunes, or specialized CD ripper programs.
4. Cloud Backup or File Storage
Store your contents on an external hard drive, SSD, or cloud storage service like Dropbox or Google Drive after converting your CDs to guarantee security and convenient access from anywhere at any time.
5. Software for Editing or Enhancement
Tools like HitPaw Edimakor can be useful if you wish to clean up audio or video files after conversion. It enables you to organize, edit, and improve your converted material to create a polished, contemporary digital collection.
Part 2: How to Convert CDs to Digital | USB
Using a USB device to convert cd to mp3 makes it simple to share, back up, or move your favorite albums. It is easy, quick, and guarantees that your music is always with you.
Step 1: Insert Your CD and Open the Software
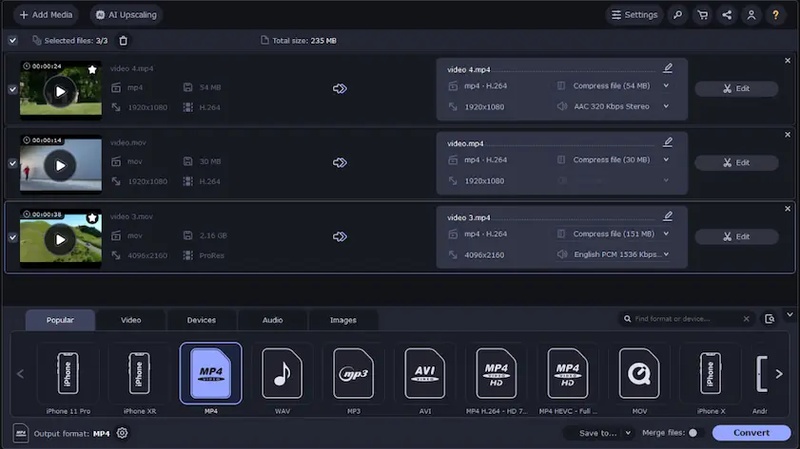
After inserting your CD into the built-in or external CD drive, open Movavi. The program will instantly read the disk when it is opened and display every track that can be converted into a digital file.
Step 2: Choose Your Digital Format
Choose your favorite digital music format to convert rip cd to digital. Before beginning the ripping procedure, you can optionally select your USB device as the file destination.
Step 3: Begin the Ripping Process
Click Start or Rip to begin the conversion. The CD material will be extracted and encoded into the chosen format by the software. To save files directly, make sure your USB stays connected during the operation.
Step 4: Organize and Save Your Files
Check the stored files on your USB drive after the ripping process is finished. Put them in folders according to artists or albums. These files are now playable on smart TVs and automobiles alike.
Part 3: How to Convert CDs to Digital | CD Drive
You will require ripping software and a functional CD drive in order to know how to convert cd to digital. You can keep your data, music, or films in high-quality, easily accessible forms thanks to this technique.
Step 1: Insert Your CD and Open the Software
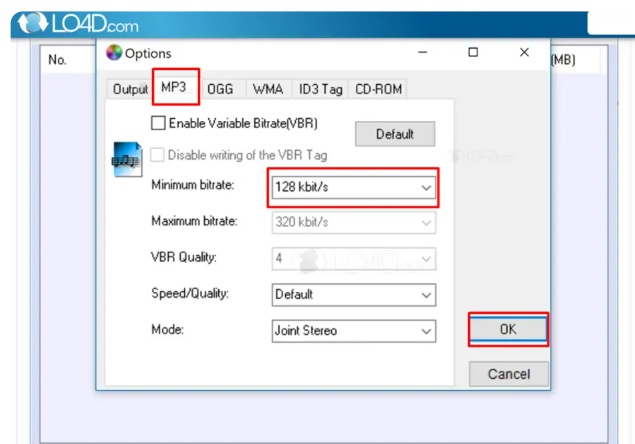
After inserting your CD into the computer's CD drive, visit LO4D. The website will help you recognize the CD and show its contents, including the duration, track names, and conversion-ready formats to convert cd to mp3.
Step 2: Choose Your Digital Format
Before ripping, select the output format that best suits your needs, such as MP3, WAV, or FLAC. While WAV or FLAC maintain superior audio quality for professional use, MP3 is best for daily listening.
Step 3: Begin the Ripping Process
To start the rip cd to digital conversion process, click the Rip or Start button. The CD files will be extracted and converted to digital format by the software. It usually only takes a few minutes, depending on system performance and file size.
Step 4: Organize and Save Your Files
After the conversion is finished, arrange the digital files into folders according to genre, artist, or album. For convenient access and long-term preservation of your media collection, store them on your computer, an external drive, or cloud storage.
Part 4: How to Convert CDs to Digital | Audio Record
When other methods fail or you prefer a manual approach, recording audio directly from your CD is another way to digitize your collection with better control over quality and format.
1 Using the Computer's Built-In App
- Put the audio CD you want to convert into the CD drive on your computer.
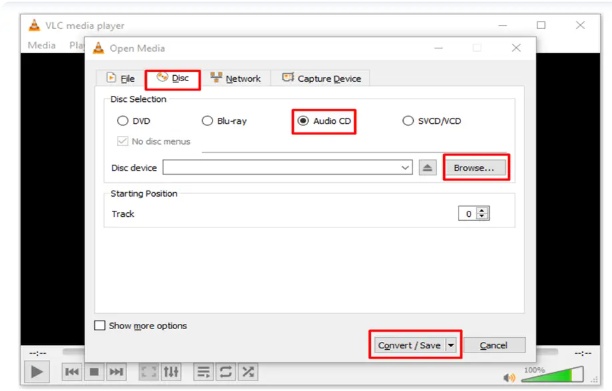
- Open VLC Media Player, a dependable and free program that works with both Windows and macOS.
- Select Convert/Save from the Media menu.
- Click the Convert/Save button once more. In the Convert window, select MP3 from the Profile dropdown.
- Click Browse to choose your destination folder and give the output file a name.
- Click Start to start the conversion process. VLC will extract and convert the CD tracks into MP3 format, saving them to the folder of your choice for convenient playback on any device.
2 Using Edimakor Built-in Audio Recorder
Step 1: Put the audio CD into your CD drive and start Edimakor on your PC.
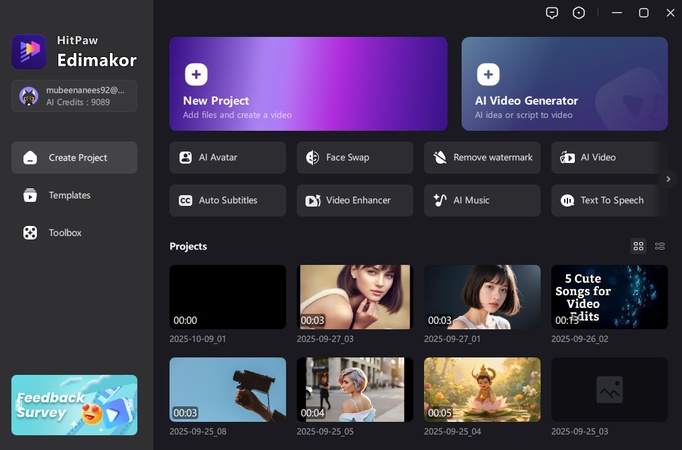
Step 2: In Edimakor, select the Record option from left menu bar. Hit Audio option and record the CD track.
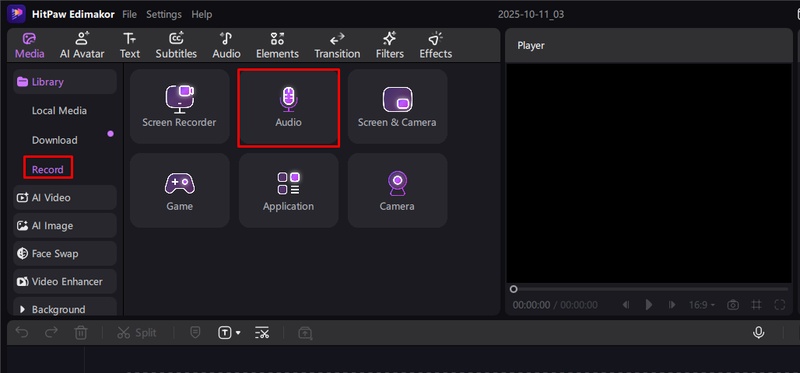
Step 3: As you record the CD track using Edimakor's audio capture tool, play the music you wish to digitize.
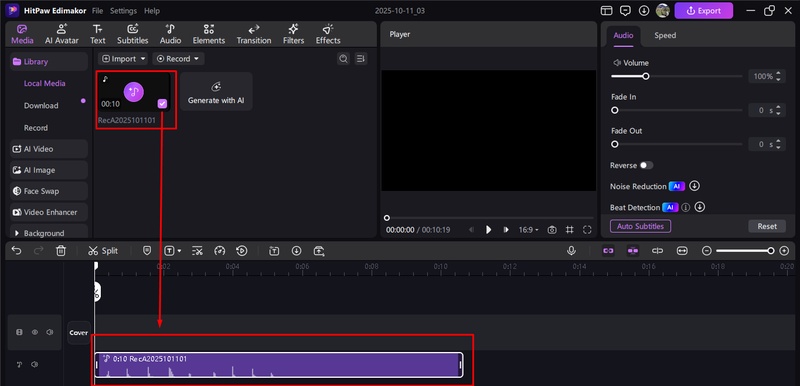
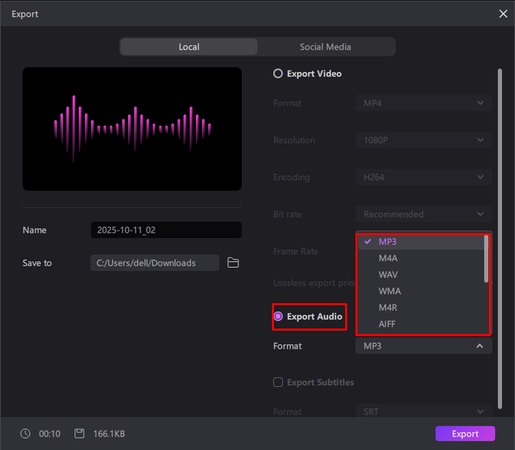
Step 4: When the recording is finished, end the session and save the file in the format of your choice.
Part 5: How to Transcribe Audio to Lyrics Automatically
Using an AI-powered transcription tool, such as Edimakor's Auto Lyric function, can save hours of work when you want your audio or songs to have perfectly matched lyrics without any human intervention.
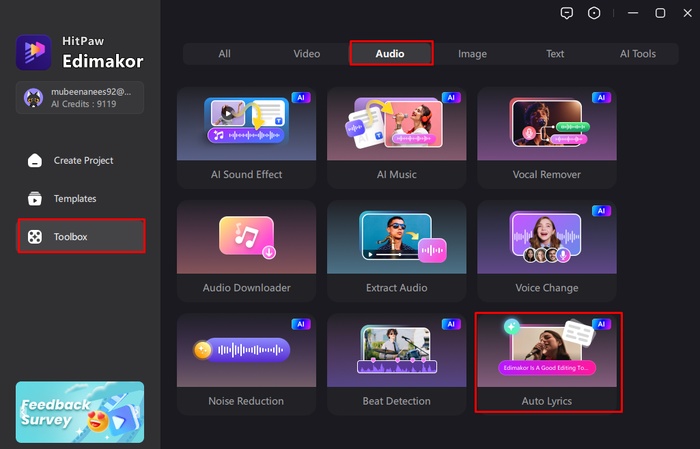
Step 1: Open Edimakor and Select Auto Lyric
Open HitPaw Edimakor on your Mac or Windows computer. Choose Auto Lyric from the Audio category in the Toolbox section. Any audio or song file can have its music lyrics automatically detected by this app.
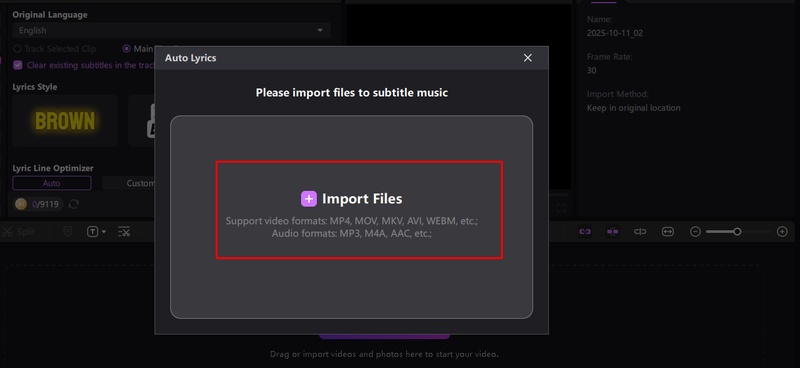
Step 2: Import Your File
Select the music or audio track you want to add by clicking Import File. With its compatibility for numerous formats, Edimakor guarantees seamless processing of audio recordings, podcasts, and music.
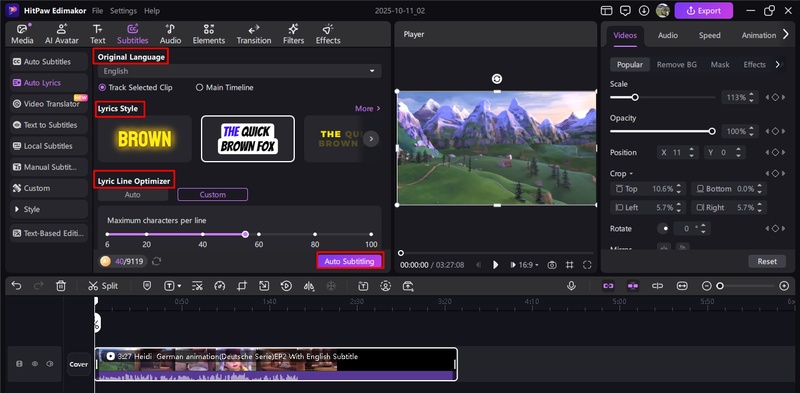
Step 3: Select Original Language and Style
Select the audio's original language to guarantee precise lyric transcription. Next, select a style for the lyrics and activate the Lyric Line Optimizer. You can manually adjust it by specifying the maximum number of characters per line, or you can set it to Auto. To allow Edimakor to process the lyrics automatically, click Auto Subtitling.
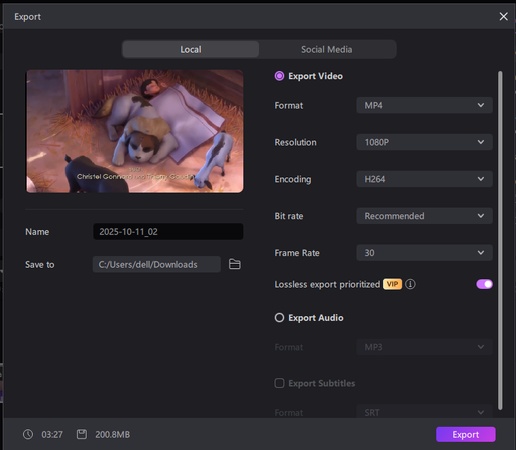
Step 4: Export the File
Preview the finished product after your lyrics have been created and synchronized with the audio. Click Export to save the finished file if you are happy. It can be exported as a text file, an SRT subtitle, or a video with lyrics, making it ideal for sharing or altering at a later time.
Key Takeaways
Turning your old CDs into digital treasures is that easy. You can enjoy to convert cd to digital at any time and from any location if you use the proper technique. Try HitPaw Edimakor (Video Editor) , your one-stop shop for updating and improving your digital collection, for better video editing or sound corrections.
Leave a Comment
Create your review for HitPaw articles


