Final Cut Pro has been one of the popular tools when it comes to editing. The clean interface and plenty of useful features keep creators sticking to this tool.
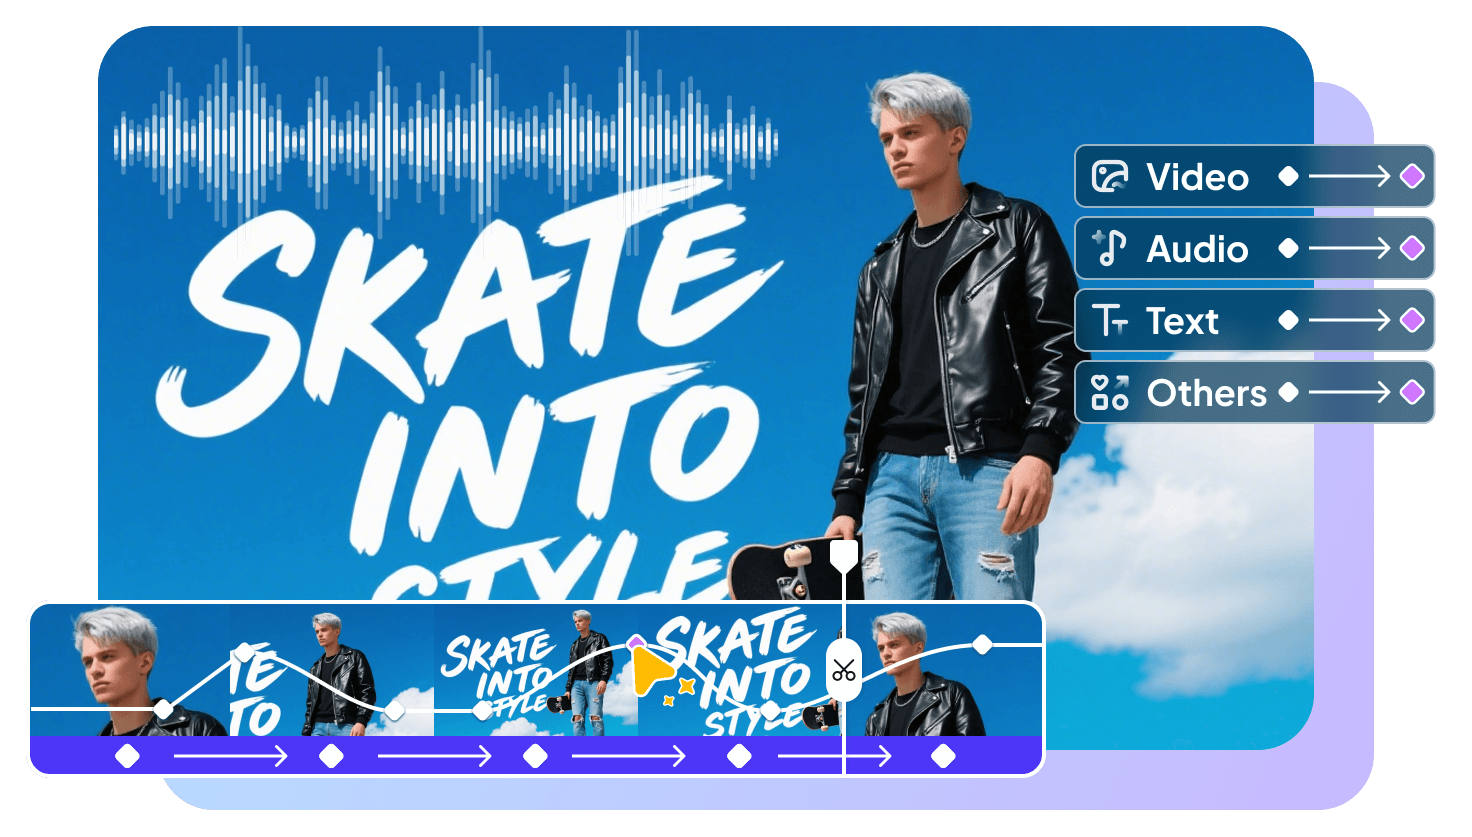
But here's the part most beginners miss: "Keyframes." They're small markers you drop on the timeline. They change the parameter values at that point. You can make them control movement, add effects, and audio in ways that make your edits stand out.
In this guide, we will show you a step-by-step guide for how to add, edit, and remove keyframes in Final Cut Pro. We'll cover video, audio, and even look at an easier alternative if Final Cut feels heavy. By the end, you'll know exactly how to use keyframes without stress.
Part 1: How to Add Video Keyframes in Final Cut Pro
You can add video keyframes Final Cut Pro in two simple ways. The first is doing it manually, where you place each marker yourself. The second is automatic, letting the software add them for you. Let's walk through both!
1 Add Keyframes Manually
Sometimes you want full control over your edits. That's when adding keyframes by hand makes sense. It lets you decide exactly where changes start and stop.
Here is how you can add keyframes manually:
( Note: These steps are for Video Inspector. If you want to see how to add the keyframes in the timeline, you can see Part 4 . Follow the same steps for video keyframes.)
- Open your project in Final Cut Pro and select the clip in the timeline.
- Press "Control + V" or go to "Clip" > "Show Video Animation" to open the keyframe tracks.
-
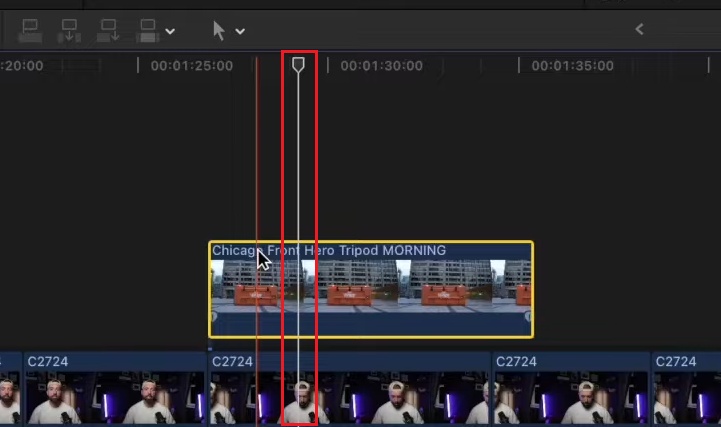
Move the playhead to the frame where you want your first change.

-
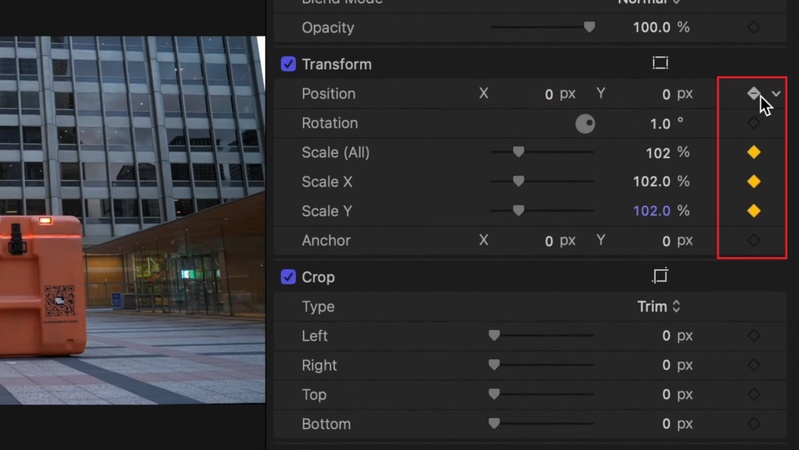
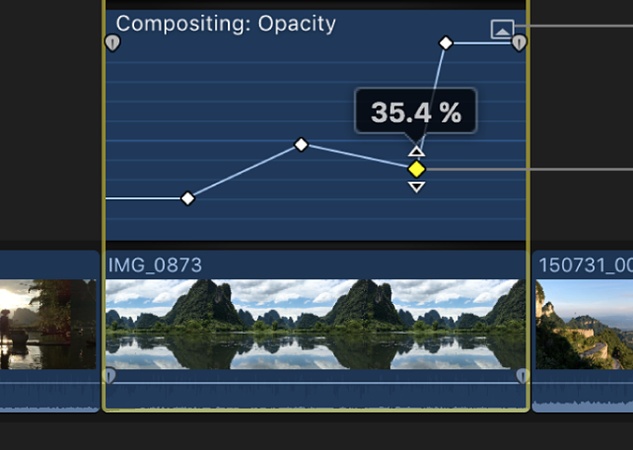
You will see a small diamond appear next to each parameter - that's your keyframe. Click it to add the parameters relevant to the change you want at the selected point.

- Or, open the "Inspector" on the right (press Command + 4). Next to any video setting, click the small diamond button labeled "Add Keyframe."
- Move the playhead forward, then adjust the setting (motion, opacity, etc.). Final Cut will automatically drop a new keyframe.
- Repeat the process until your clip has the movement or effect you want.
2 Add Keyframes Automatically
This method saves time by letting Final Cut create the keyframes for you across a range. You don't need to add them manually; the software will do the hassle.
Here is how to add a keyframe in Final Cut Pro automatically:
- In the timeline, select your clip and press " Control + V" to open the Video Animation editor.
-
Click the small triangle called the Disclosure button next to a parameter (like Opacity) to expand its line.

-
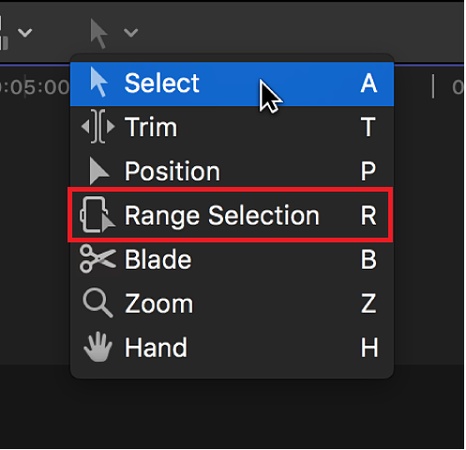
Choose the
"Range Selection tool"
from the toolbar at the top-left of the timeline (or press
R
).

-
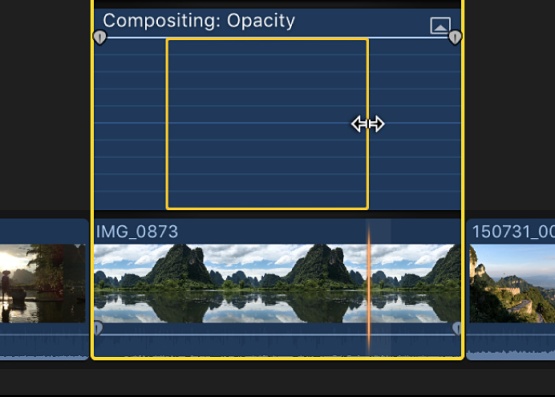
Drag across the parameter line to highlight the range you want to animate.

-
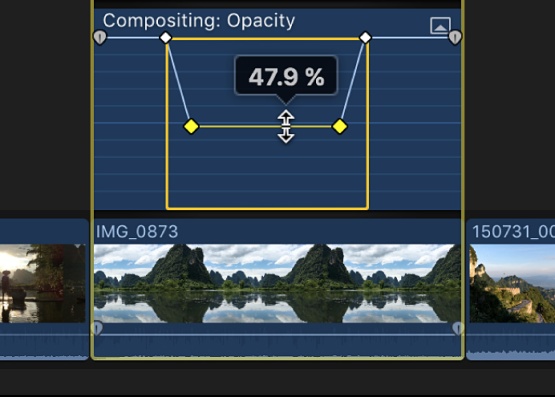
Grab the line inside that range and drag it up or down to change the value.

-
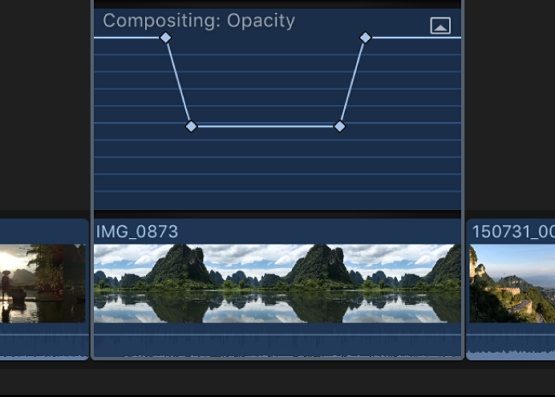
Final Cut will automatically add keyframes at the start and end of the range.

- Adjust as needed - the software takes care of dropping the keyframes for you.
Part 2: How to Edit Keyframes in Final Cut Pro
Once your keyframes are in place, you may want to tweak them. Final Cut Pro makes it easy to view, move, or delete them whenever you need. Let's go through the basics.
How to view keyframes in Final Cut Pro
- Click on the clip in your "Timeline."
- Press "Control + V" or go to "Clip > Show Video Animation." This opens the Video Animation editor above your clip.
- Look for each effect or setting on your clip. Click the little arrow next to it to expand.
- Small diamonds on the control line mark your keyframes. That's where the changes happen.
How to delete keyframes in Final Cut Pro
- Open the Video Animation editor for your clip (Control + V).
- Find the keyframe you want to remove. It looks like a diamond on the line.
-
Click the diamond to select it.

- Press "Option + Shift + Delete." The keyframe disappears right away.
- To remove several, Shift-click the diamonds first, then press the same shortcut.
How to Modify Final Cut keyframes
- With the Video Animation editor open, expand the setting you want to change.
- Click the diamond keyframe you want to adjust.
-
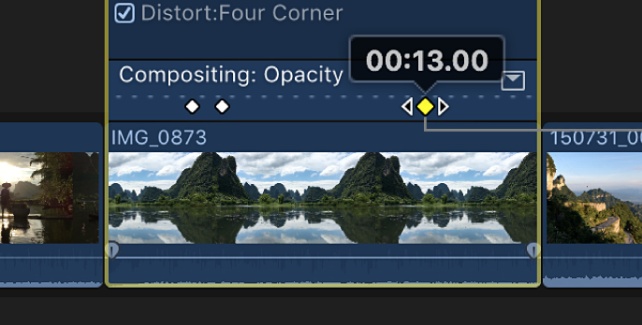
Drag the diamond left or right to change the parameter position in time.

-
Drag it up or down to adjust its value, like scale or opacity.

- Watch the number pop up as you drag - it shows the new value.
Part 3: How to Add Audio Keyframes in Final Cut Pro
Keyframes aren't just for video. You can use them with audio, too. They let you fade music, lower background noise, or fine-tune volume at any point in your clip. Let's look at how to add audio keyframes step by step.
Step 1: In the timeline , select your audio clip. Then go to the top menu and choose "Clip" > "Show Audio Animation" (or press Control-A ). You'll now see the Audio Animation editor open below your clip.
Quick way: Control-click the clip in the timeline and choose "Show Audio Animation."
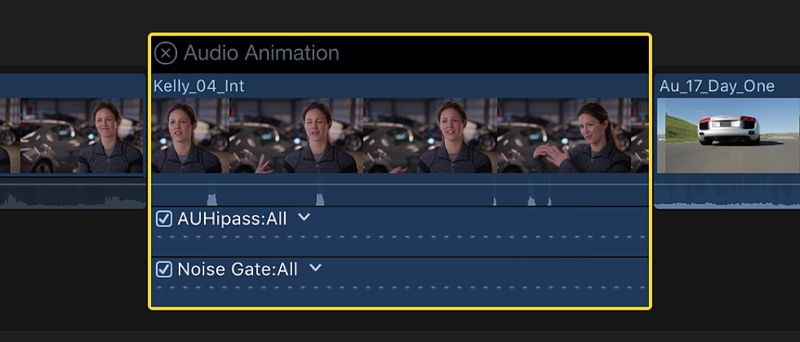
Step 2: For effects (like EQ, reverb, or others), each one has its own lane in the Audio Animation editor.
Click the little "triangle" next to the effect's name to expand and pick a parameter, or click "All" if you want to see every keyframe at once. You can also open the Audio Inspector on the right to find these parameters.
Step 3: To add a keyframe, " Option-click" (or press Option-K ) on the horizontal control line where you want the change to happen.
-
For volume only:
Option-click directly on the volume line inside the audio clip.

- For effects: Option-click inside the parameter lane you expanded in the Audio Animation editor.

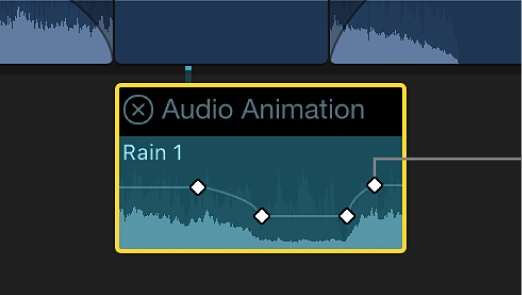
Step 4: Once added, your keyframes appear as white diamonds . Drag them up or down to adjust volume, or along the timeline to change when the effect happens.
- Gray diamonds mean the keyframe is for another parameter.
- Double diamonds mean multiple parameters were set at the same spot.

Part 4: Best Alternative to Final Cut Pro Keyframes
HitPaw Edimakor is a simple, powerful alternative to keyframe Final Cut Pro. It focuses on easy keyframing for beginners and creators. You can set position, scale, rotation, and opacity with clicks. Edimakor auto-generates smooth transitions between keyframes for you.
It also lets you replace media and change backgrounds per keyframe. The interface shows each parameter in its own animation lane. If you need more power, Edimakor adds AI tools and presets. Try it free to test keyframing speed and usability yourself.
Edimakor Keyframe Features
Here are some of the other features related to keyframes in Edimakor:
- Edimakor keeps keyframes easy, so you don't feel lost.
- You can move, resize, spin, or fade clips using simple keyframes.
- Want a smooth speed-up or slow-down? Speed ramping has you covered.
- Audio isn't left out - fade music, drop volume, or cut noise over time.
- Effects and transitions feel alive when you keyframe their timing and strength.
- The best part? You see every change right on the timeline.
Steps to Add Keyframes Using Edimakor
First, you need to download and install the Edimakor software on your desktop. Then, follow the instructions given below:
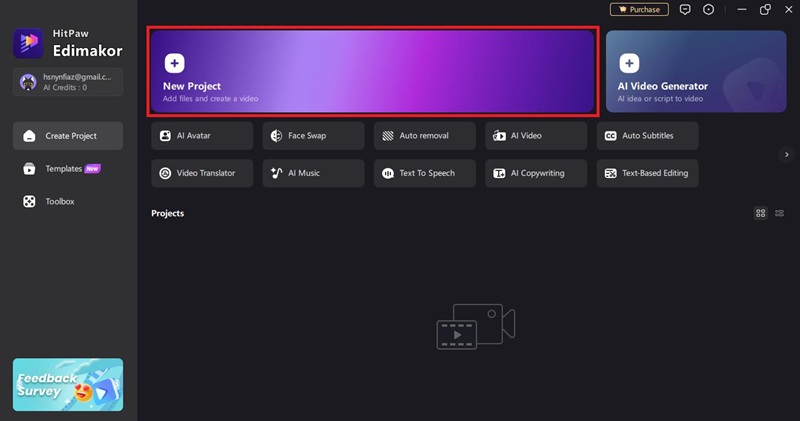
Step 1: After installation, open Edimakor and click the "New Project" button on the homepage.
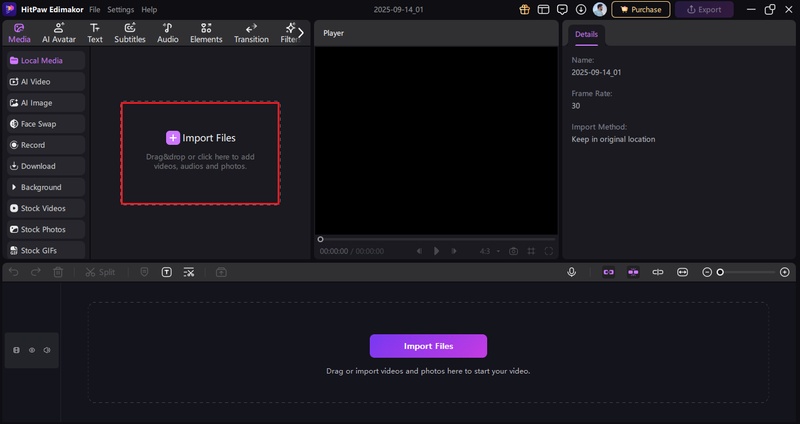
Step 2: After clicking the new project button, Edimakor will take you to the editing mode. Here, click the "Import Files" button and select the video in which you want to add keyframes.
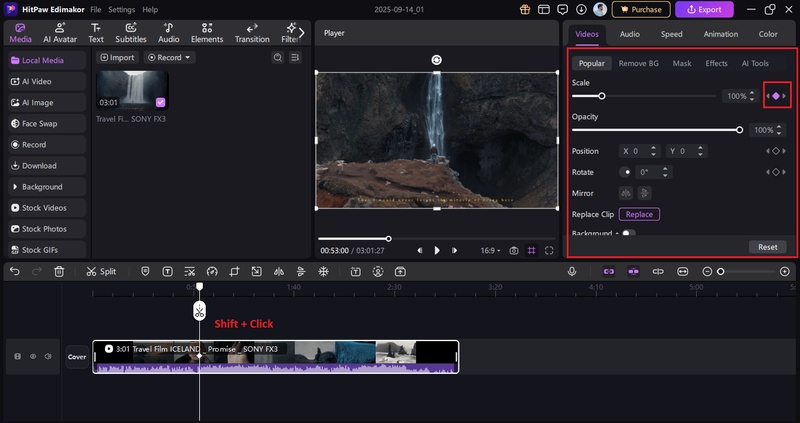
Step 3: Once the video is imported, click and drag it onto the timeline. Now hold the "Shift" button and click on the timeline where you want to add the keyframe. A diamond icon will appear right away on the timeline.

Step 4: Next, move to the editing panel and click the diamond icons to select which parameters you want to add to the keyframe. You can adjust these parameters' values as per your preference. This is how you add keyframes in Edimakor.
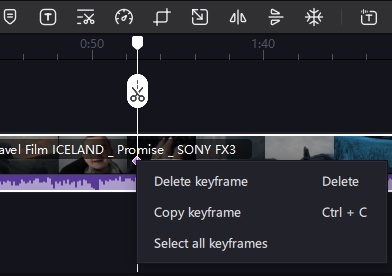
Step 5: You can also select and move the keyframe anywhere on the timeline. If you want to delete or copy it, just right-click on it and select from the options.
If you want to know how to edit the resource after adding the keyframes, click here.
Conclusion
Keyframes might look tricky at first, but now you know the basics. In Final Cut Pro, you can add, edit, and remove them for both video and audio. That means smoother motion, cleaner effects, and better control over sound. If adding keyframes in Final Cut Pro feels too heavy or complex, there's an easier path.
Edimakor gives you the same power without the stress. You can animate, speed ramp, fade audio, and see changes in real time. Simple, clear, and fun to use. Want to try it yourself? Download Edimakor today and make editing feel hassle-free.
Leave a Comment
Create your review for HitPaw articles
