Have you ever wished to slide text across the screen or slowly zoom in on a face in your video? Keyframes are useful in this situation. Even if you are new to video editing, you can quickly add keyframes to your videos with Edimakor. Let us go over how to do that step-by-step.
How to Add a Keyframe Mark
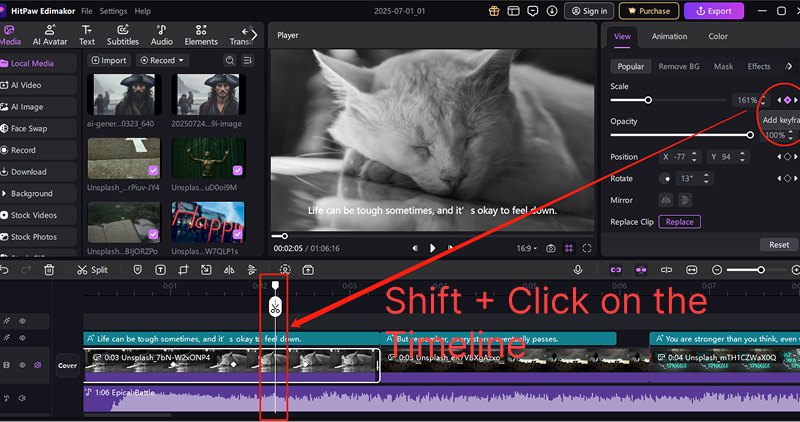
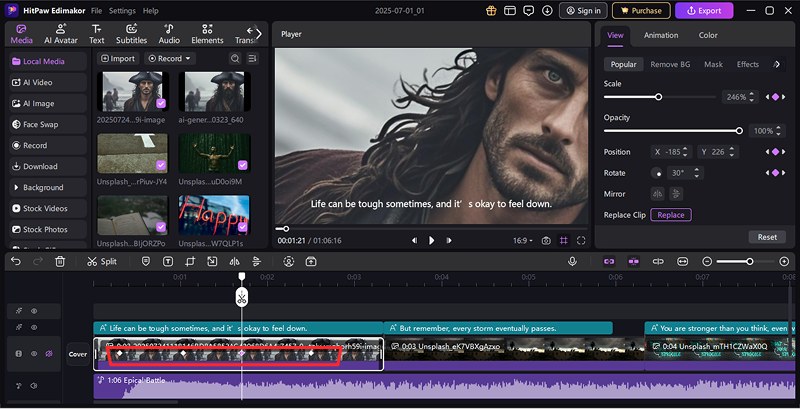
Hold Shift + Click on the Timeline where you want the animation or effect to begin, then select Add Keyframe mark from the editing panel to adjust motion, opacity, or transitions. This is how you add keyframes in Edimakor.
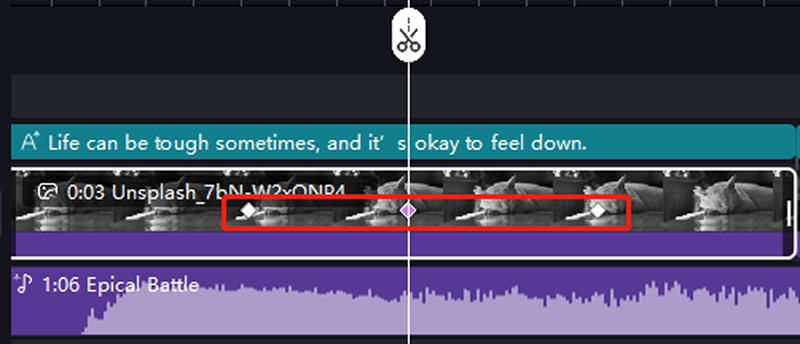
A diamond-shaped icon will appear on the timeline at the precise moment you add a keyframe in Edimakor. This diamond is completely modifiable, making it more than just a marker. By just selecting it, you can move it, remove it, or even copy and paste it if necessary.
Edit the Resource After Adding the Keyframe
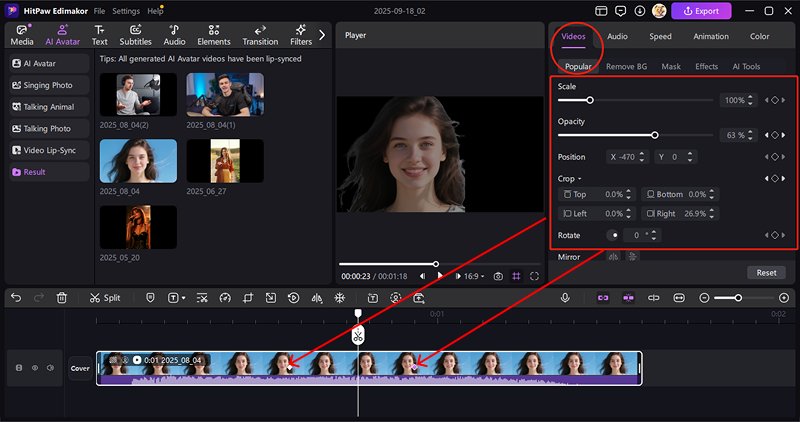
Then, you can visually determine which keyframe you are working on in the properties window by selecting the diamond icon, which glows purple. When adjusting your animations, the two little triangle buttons adjacent to it provide a convenient shortcut for quickly going to the previous or next keyframe.
Within the control panel on the right-hand side, you can easily change the movement, size, opacity, effects, and other properties of the object where the purple diamond icon is located, creating smooth transitions and animations for the visuals in your video.
Common Application Scenarios:
- Focusing on/zooming in on a specific area or person (for How-To videos);
- Character/object movement animation: A character walks from the left to the right of the screen; bullet text slides in horizontally;
- Subtitle/text entry and exit: Text slides in from the bottom of the screen and then slowly moves upward and fades out;
- Camera pan/tracking: Simulates a camera tracking a moving object;
- Transition animation design: UI elements slide in/out when switching between pages.
Keyframe a Mask
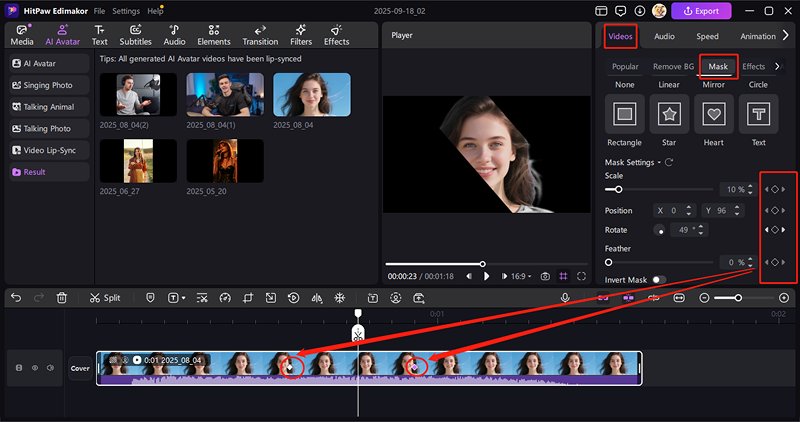
Select a clip and go to the top-right panel: Videos>Mask. Scroll down and adjust the mask settings for each keyframe. You will get stunning visual effect with keyframes and mask!
Replace the Image/Video in the Keyframe
You must first choose the desired clip from the timeline in order to replace an image or video without changing the timing or keyframe settings. Next, select the View option from the interface's upper-right menu bar. The Replace Clip option is located under the Popular menu. When you click on it, a little box will open where you may specify the location of the new media.
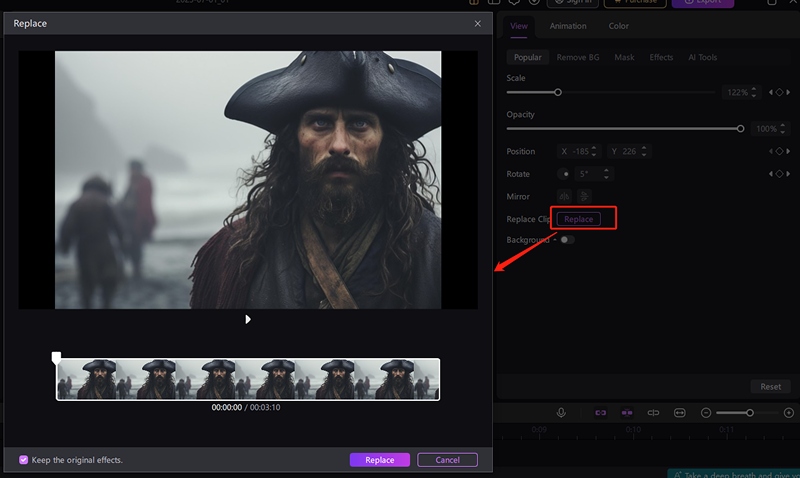
Click Replace after you have chosen the placement region. You can then use your device to upload a new picture or video file. All keyframe movements and transitions will be preserved as the freshly added video is seamlessly put into the precise location of the prior clip. This facilitates updating visuals without having to start from scratch.
Change the Background After Selecting a Keyframe
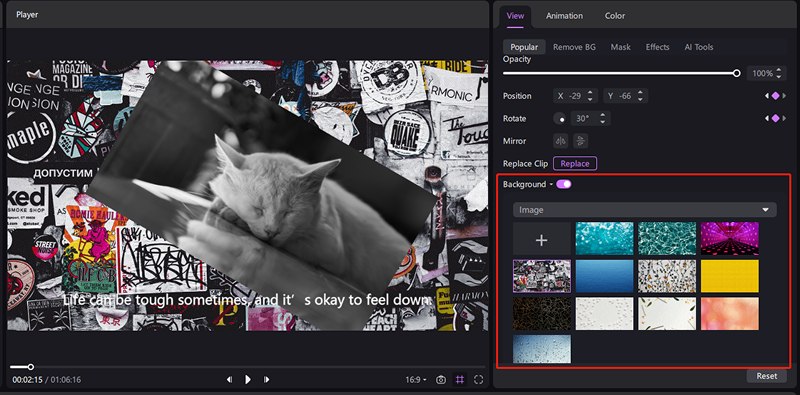
Choose the keyframe clip you want from the timeline, then navigate to the View panel located in the upper-right corner of the screen. You can locate the Background feature under the Popular page. Gaussian Blur, Colour, and Image are the three background-changing modes that are visible when you turn this option on.
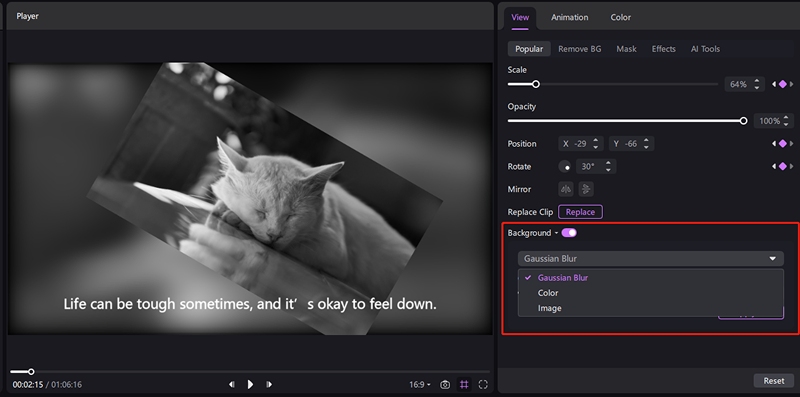
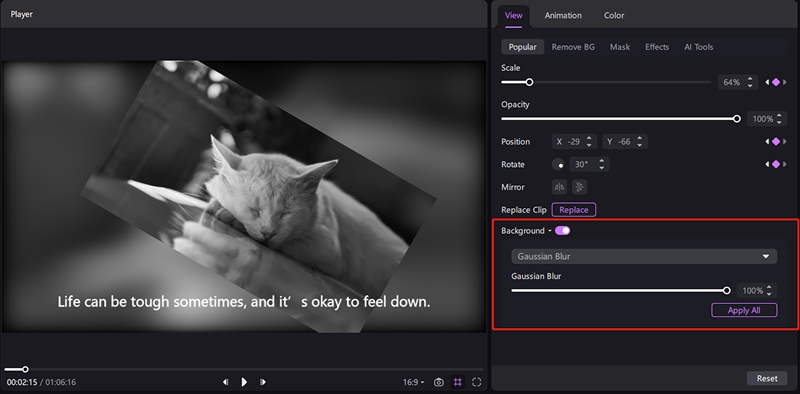
Gaussian Blur: This setting allows you to change the blur intensity using a slider. For a professional depth-of-field effect, you can either completely blur the background or make it slightly softer.
Colour Option: You can select and apply a solid backdrop colour that complements your visual theme from a palette of pre-set colours that will show.
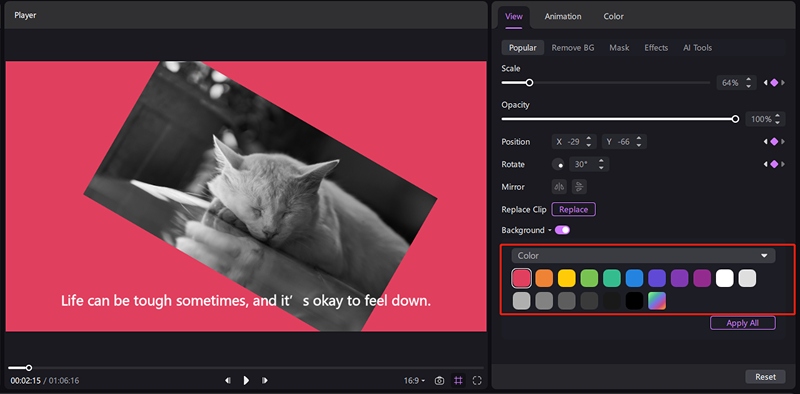
Image Option: You can upload a new image from your device or choose from the stock backdrop images that Edimakor currently has. This makes it possible to maintain aesthetic coherence or precise branding.
Remove the Background while Keeping the Keyframe
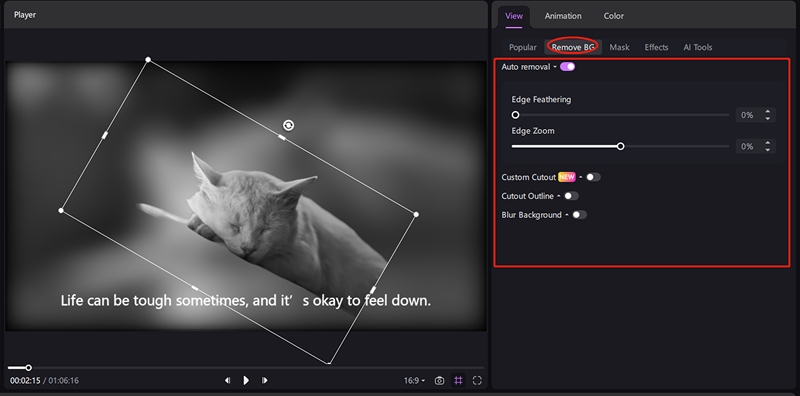
Selecting the clip on the timeline is the first step in removing the background from it while keeping your current keyframes and motion data. Next, select the View option from the menu on the right. Search for and select the Remove BG option.
Several techniques for background removal will now be displayed to you. Auto Removal option automatically detects and removes the background using artificial intelligence. Custom Cutout provides more control by enabling manual selection of the region to eliminate or keep.
Cutout Outline technique adds a stylised outline around your subject. Blur Background adds a blur effect to the background, softening it rather than completely eliminating it.
Add a Mask while Keeping the Keyframe
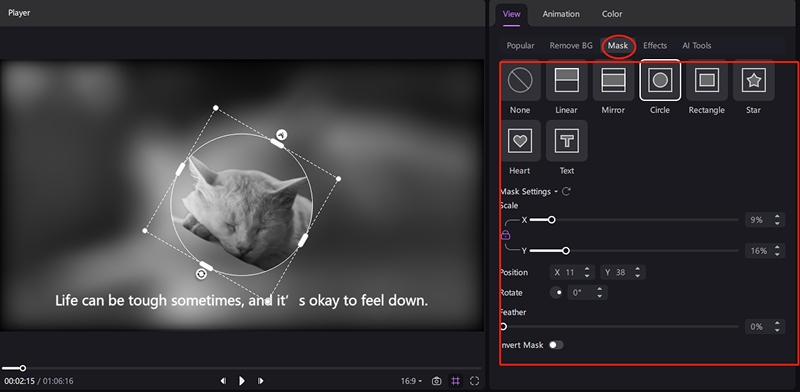
Start by choosing the clip in the timeline if you wish to apply a mask effect to a particular section of your movie while keeping keyframes intact. Click on the Mask option after selecting the View section from the menu on the right.
There are a number of masking styles available here, such as None, Linear, Mirror, Circle, etc. Adjustable feathering, position, and scale settings are included with every style of mask. You can adjust the mask's appearance and location with these parameters.
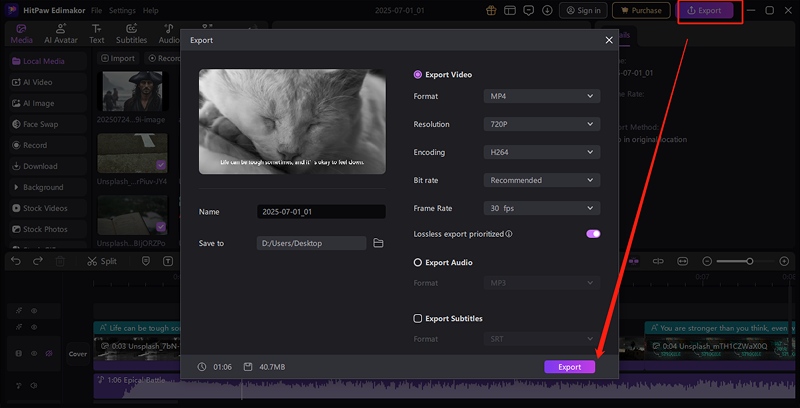
Export the Video
When your transition or animation is finished, it is time to export your work. In the interface's upper-right corner, click the Export button. Select the resolution, frame rate, and video type (MP4, MOV, etc.) that you like most. Choose a destination folder and rename your file. To render and save your altered movie, click the Export button once more in the lower-right corner of the export screen.
If you want to add motion and vitality to your content, Edimakor's keyframes are a game-changer. Without the need for complicated software, the tool offers you complete creative control over everything from zoom-ins to sliding text effects. With a few clicks, you may make your own original video animations by playing with various features.
