Most of the time, as a Mac user, how to record a video of yours on a Mac is a vital skill if you have to make a video on tutorials and hence the need of a video screen capture Mac tool. But, only a few people are aware that this can be done very easily without and with the help of third-party tools.
Part 1: How to Record a Video of Yourself on a Mac
HitPaw Edimakor is one of the best softwares that can be used to capture video Mac. The tool is exceptional as compared to many other tools in the market. It is a powerful screen recording tool that allows users to record video from webcam, computer, or iOS devices.
Step 1. First, you need to download Edimakor and install it on your computer. This program supports Windows 11/10/8/7 64 bit, MacOS 10.13 and later version.
Step 2. Open HitPaw Edimakor and select the "System Audio" option.
Step 3. Click the "Start Recording" option. You will see a new screen from which you can select different options, such as Entire Screen, Window, and Chrome Tab.
Step 4. Once you are done, click the red "Stop" option, and your recording is done.
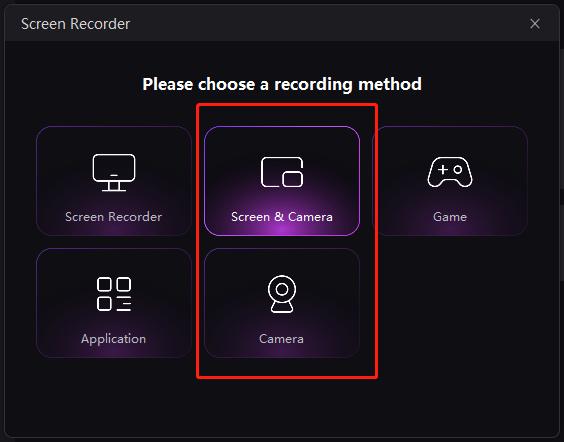

Part 2: How to Record Yourself Presenting a Powerpoint on Mac
If you want to know how to record on PowerPoint Mac effortlessly and without much trouble, then you are highly recommended to try using third-party software for this purpose. In that regard, we believe that the best tool for you is the HitPaw Edimakor.
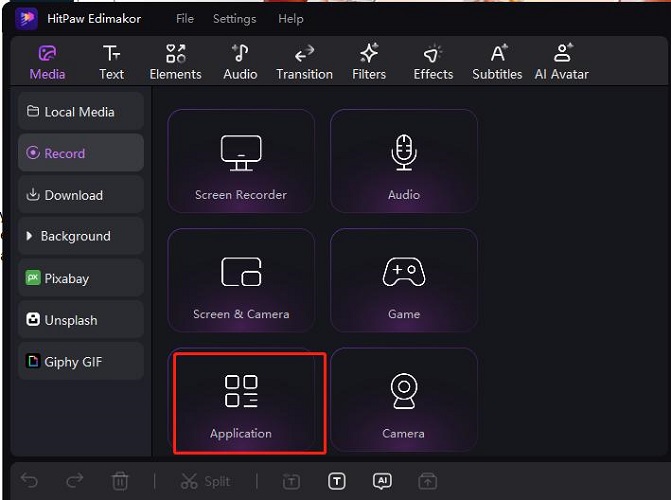
Step 1. Launch the software and select the “Application” option from the home page.
Step 2. Next, you need to select the part of your screen that you want to record. Single-click to select the entire screen or long-click to define a certain area of your screen.
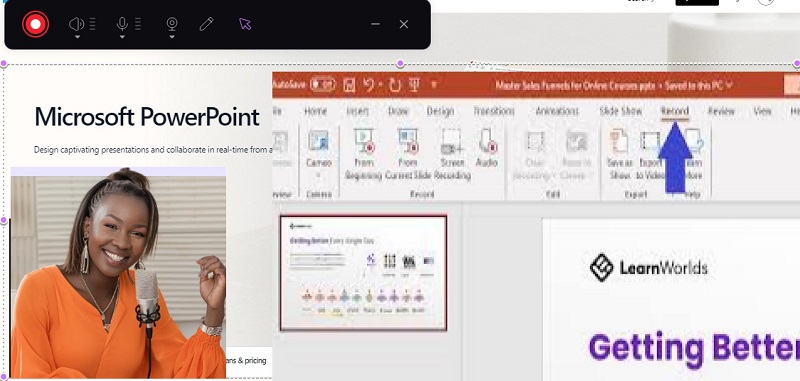
Step 3. Hit the Record button to begin recording your presentation. You may use the Pause and Resume buttons from the recording toolbar to assist you during the recording. And you can take screen shot, add annotation, highlight, arrow the area you need.
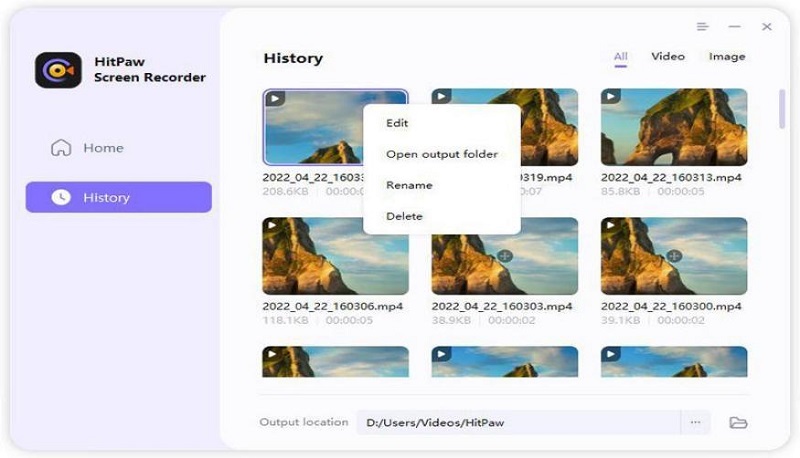
Step 4. Once your presentation is complete, hit the Stop button to end your recording. Afterward, you’ll be able to trim your recording according to your preferences. Select “Open output folder” to open the destination folder on your recording.
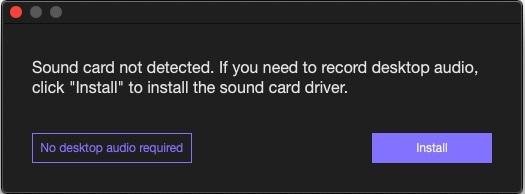
If you’d like record PowerPoint presentation with audio and video on Mac, please follow the onscreen instructions to install the sound card driver.
Part 3: How to Record Yourself Playing a Game on Mac[Live-stream]
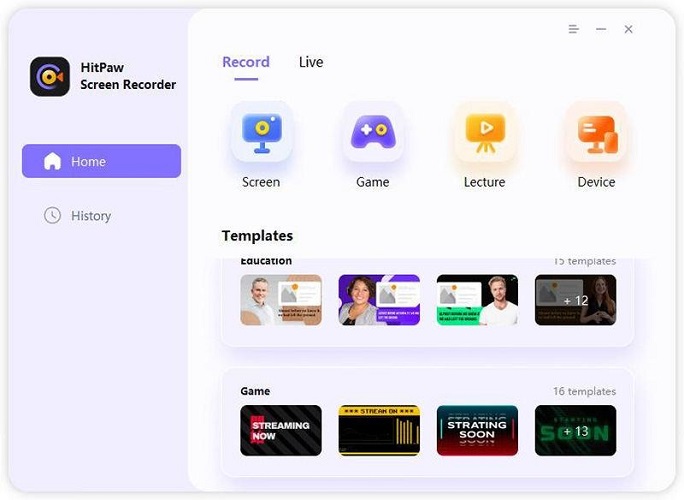
If you are looking for to know that how to record gameplay on PC/Mac, we highly recommend HitPaw game recorder for you. Here, HitPaw Screen Recorder helps record game with a stunning solution, you can easily capture keystrokes while recording.
Step 1: Download the live-Steamer
Step 2: Select the Game
Step 3: Enable Keystrokes
Step 4: Start to Record
First of all, download Edimakor Screen Recorder.

Next, go back to the main interface and click on Record Game feature. A toolbar will pop up, click the drop-down box and select the game you want to record. You also need to keep the game window/application window open during the recording process (i.e. don't minimize it).
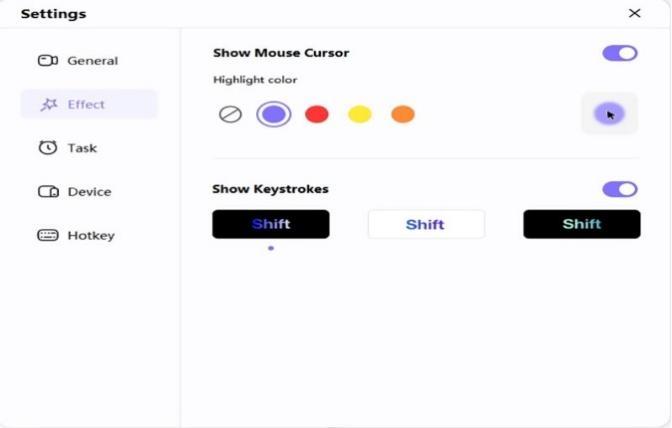
To capture keystrokes, click on the Capture keystrokes icon on the toolbar or click the Setting icon which is displayed on the bottom right corner. Then, go to Effects option, enable Show Keystrokes function and choose a style you like.
Click the Start button to record your game. You can record games or applications in the background without affecting other operations on the computer.
Part 4: How to Voice Record Yourself on a Mac

With HitPaw Edimakor, you can conveniently record sound with professional-grade quality. Here are the steps on how to capture audio on a Mac:
Step 1. Access the HitPaw Tool and Create a Video
Step 2. Start Your Audio Recording
Step 3. Stop and Edit Your Audio
Step 4. Fine-tune and Export Your Project
To start with the audio recording, launch the HitPaw Edimakor tool on your Mac and click on Create a video to proceed to the editing window.
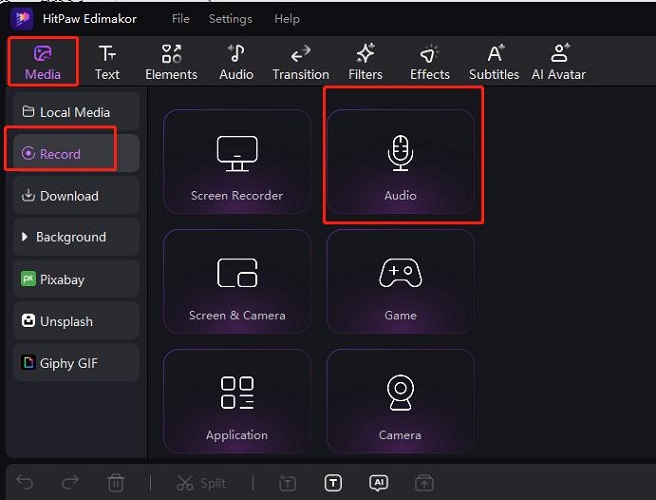
Head to the Record option available on the left panel below the Import section. Opt for Audio, which opens the Voice Recorder windows. Click on the Microphone to start the recording.
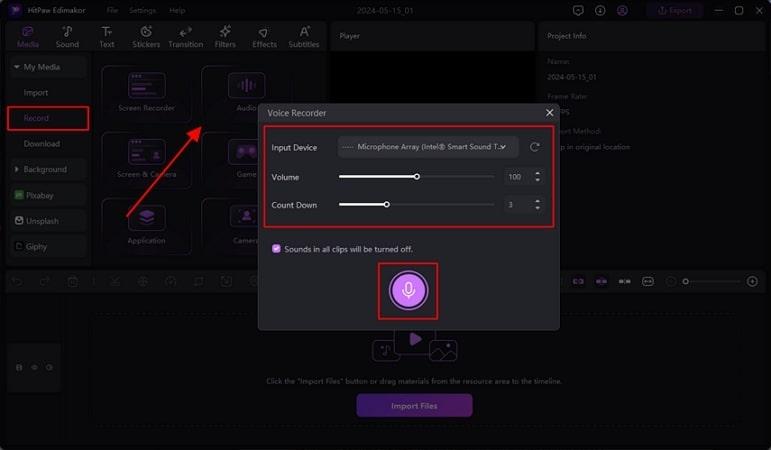
Once you have completed the recording, hit the Red button to stop. Now, your audio will be automatically imported into Edimakor's editing timeline. With the motive of enhancing the audio, if there is any noise in the background, toggle the Noise Reduction feature available from the Audio panel.
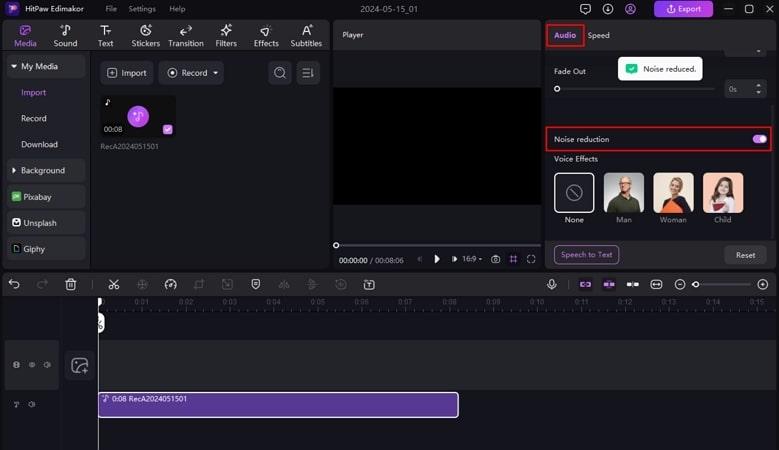
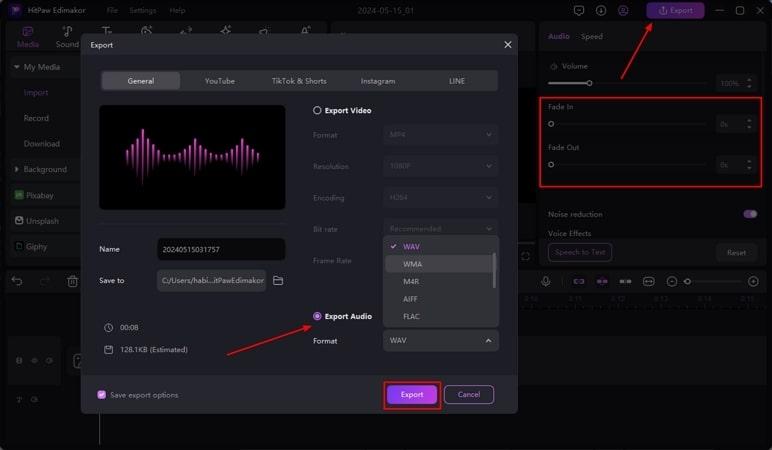
You can add transition effects like Fade In and Fade Out by dragging the sliders to further enhance the sound quality. Once all your editing is completed, press the Export button on the top right corner. Select the file format WAV from the drop-down list and add other configurations like file name and destination. Finally, lead into the Export button to save your audio file on your computer.
Final Words
Edimakor Video Editor and Edimakor Screen Recorder offers a simple and effective way on how to record yourself on a Mac. Once you download the Hitpaw you are ready to enjoy great features.
HitPaw Edimakor (Video Editor)
- Create effortlessly with our AI-powered video editing suite, no experience needed.
- Add auto subtitles and lifelike voiceovers to videos with our AI.
- Convert scripts to videos with our AI script generator.
- Explore a rich library of effects, stickers, videos, audios, music, images, and sounds.

Home > Video Recording Tips > How to Record Yourself on a Mac[Full Guide]
Leave a Comment
Create your review for HitPaw articles



Yuraq Wambli
Editor-in-Chief
Yuraq Wambli is the Editor-in-Chief of Edimakor, dedicated to the art and science of video editing. With a passion for visual storytelling, Yuraq oversees the creation of high-quality content that offers expert tips, in-depth tutorials, and the latest trends in video production.
(Click to rate this post)