Edimakor AI Avatar supports the Talking Photo feature to bring photos to life with seamless lip-syncing. This guide will go through how to create talking photos and lip-sync videos in detail.
Part 1. Start a New Project for Talking Photo
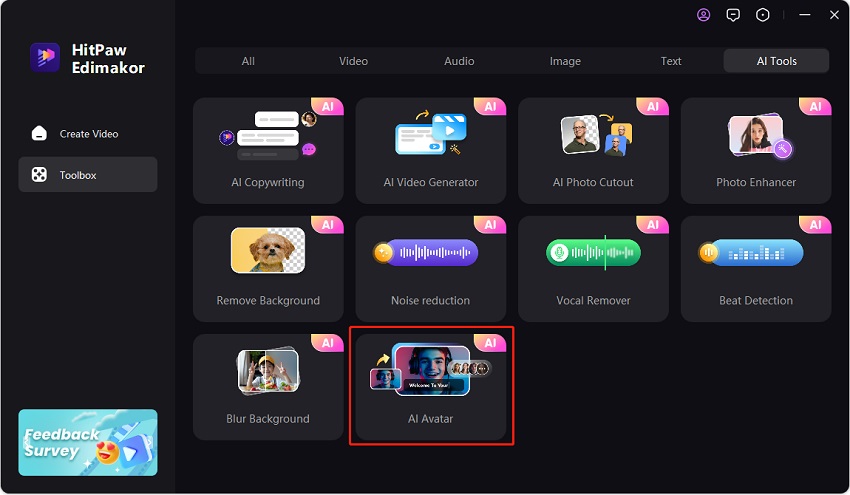
After install and run Edimakor on your computer, select AI Avatar on the main interface to start. On the video editing interface, click on the Talking Photo option.

Alternatively, access the AI Avatar feature through the Toolbox. Simply go to Toolbox > AI Tools > AI Avatar.
Part 2. Prepare Voice and Photo to Generate
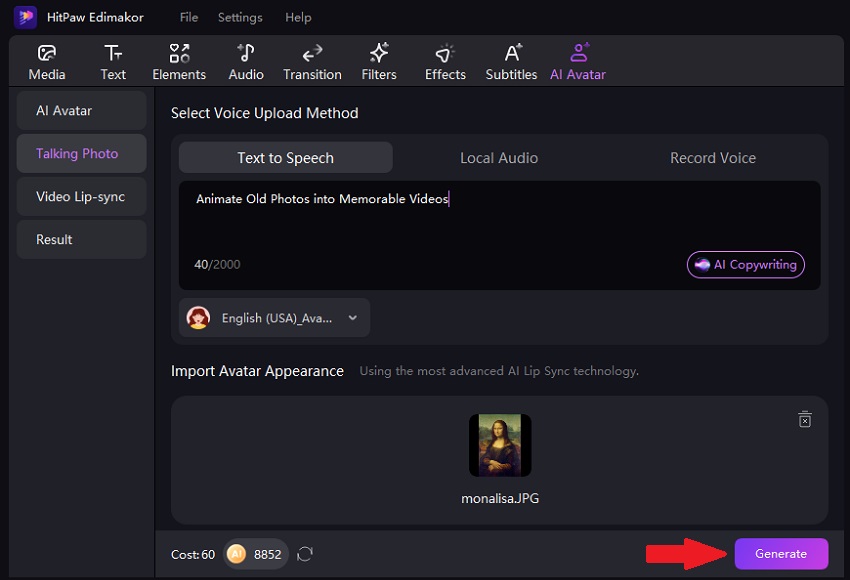
To bring your photo to life, prepare the voice that will sync with the photo and import the image itself. You have three methods to create or import the voice that will be used to animate the photo:
- Text to Speech: Enter the text you want the photo to speak. Select an AI voice in the Library that fits your preferences to read the text. You can also use the Clone Voice feature to replicate any voice you like. Learn more with Clone Voice guide.
- Local Audio: Import an audio file in MP3, WAV, and AAC format from your computer. The audio file should be less than 100 MB and does not exceed 5 minutes in length.
- Record Voice: Record your own voice directly within Edimakor. You can record up to 5 minutes of audio.
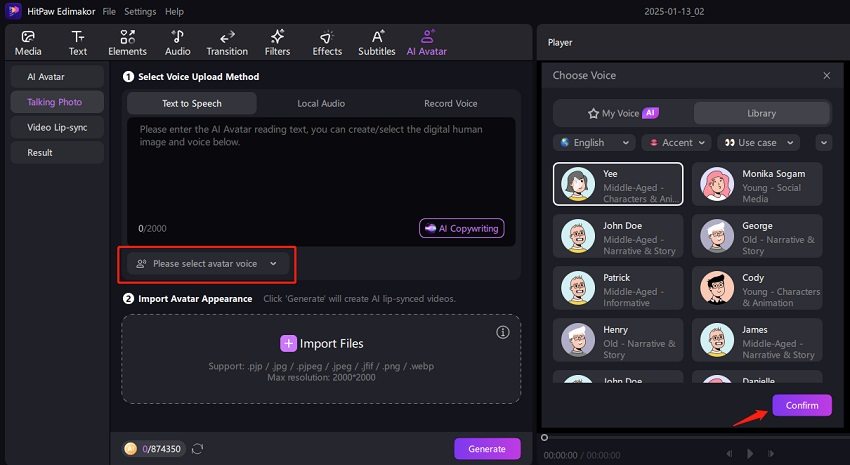
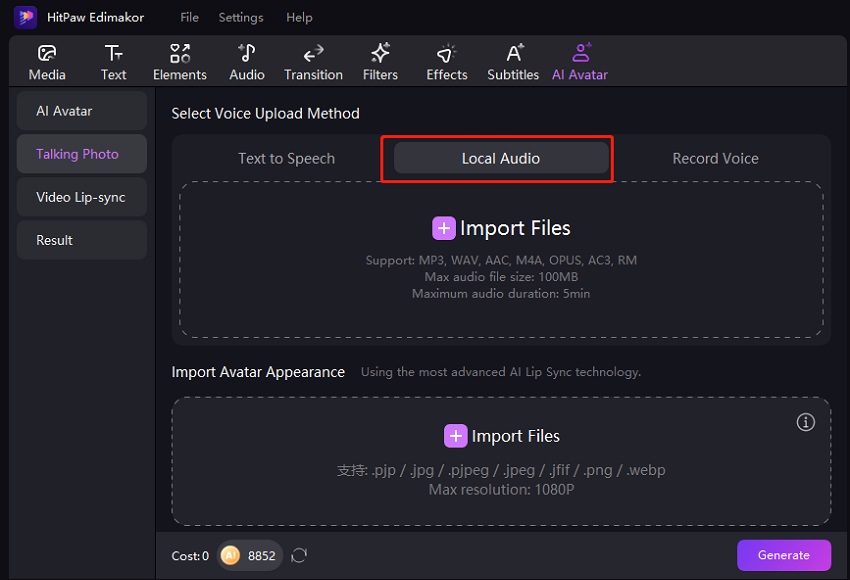
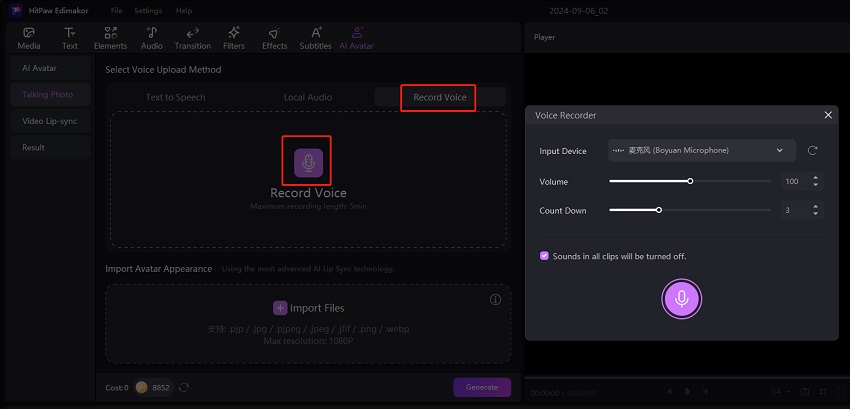
Now import the photo. Support multiple image formats, including pjp, jpg, pjpeg, jpeg, jfif, png, and webp. Click on the Generate button. Edimakor will start processing the image and syncing the voice.
Part 3. Check and Save Talking Photo with Lip-sync
Edimakor takes a few seconds to analyze the photo and sync it with the audio. After processing, the final result will appear in the Result section.
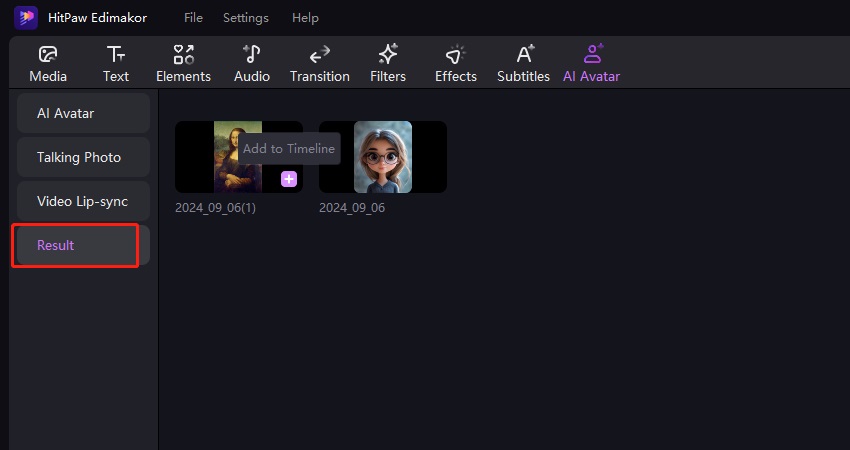
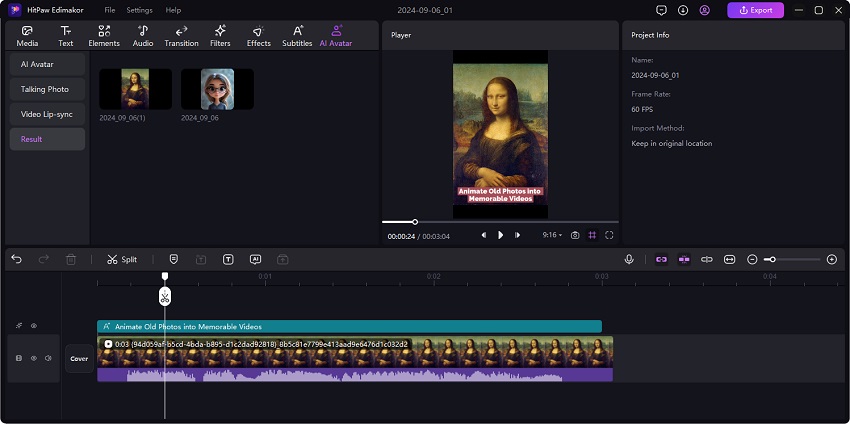
Click the + button to add the generated talking photo to the timeline. Preview the video to ensure the lip sync is accurate. You can also make additional edits to the talking photo such as subtitling, adjusting audio volume, adding stickers, etc.
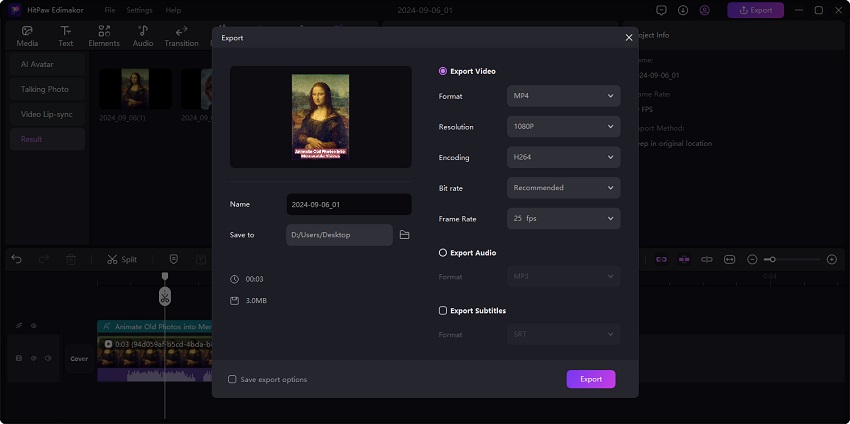
Finally, click the Export button located at the top menu bar. Choose your preferred export settings in the pop-up window. Click Export to save the video.
Part 4. How to Use Video Lip-sync Feature
In addition to creating talking photos, Edimakor also supports importing video files and making full lip-sync videos. And the process is the same. Navigate to the Video Lip-sync section. Prepare the voice using one of the three methods and import the video file. The supported formats include MP4, MOV, and AVI.
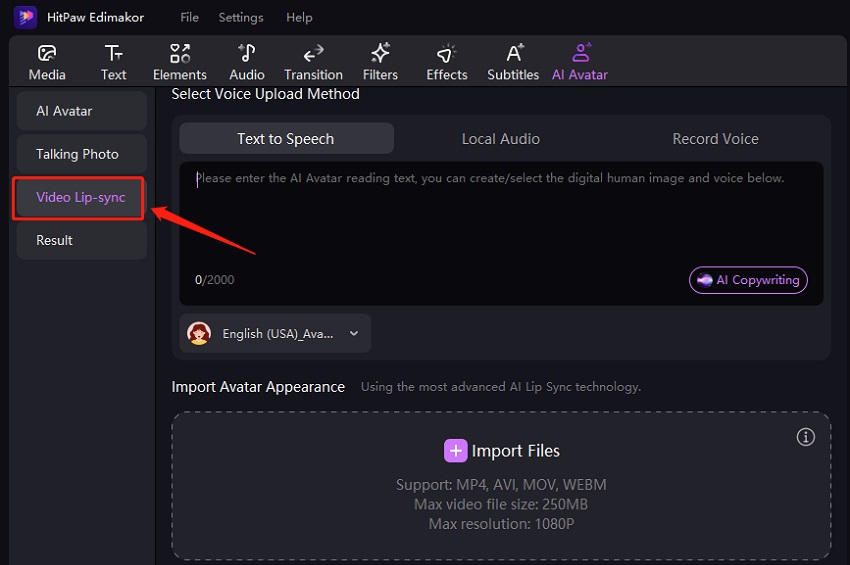
Click on the Generate button. Edimakor will analyze the video and synchronize the lip movements with the audio. The generated video is also saved in the Result section. Click on the + button to add it to the timeline. Preview the video and make any necessary adjustments.

Once satisfied with the video, click Export. Choose your preferred output settings, and save the video to your computer.
Video Tutorial on Edimakor AI Talking Photo
Watch the video below to learn how to make a Photo talking using Edimakor AI:
