Using the video stabilizer feature, video shakes and jitters can be reduced in a few simple steps.
Part 1. Add video and move it to the timeline
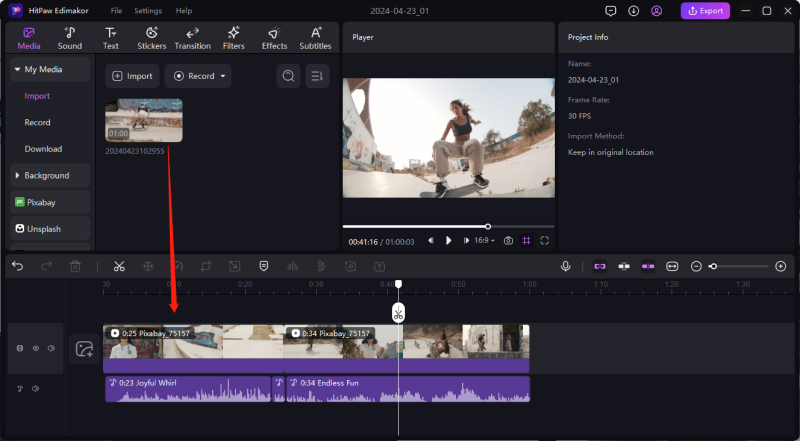
Click on the 'Import' button under the 'Media' tab to browse and add the desired video. Drag and move the video to the timeline at the bottom of the software interface.

Part 2. Turn on Video Stabilizer
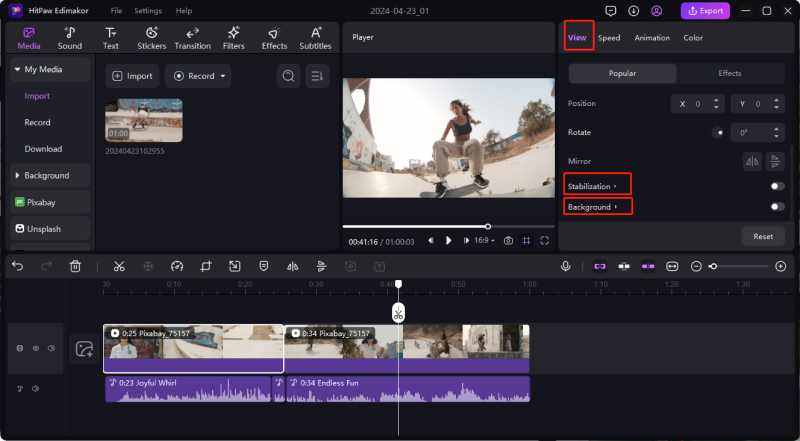
Select the target video at the Timeline, then click the 'View' tab on the right-hand-side panel. Scroll down and click on the 'Stabilization' button for the software to start stabilizing your video automatically.
Also, you can choose the 'Smooth level' by either dragging the slider or selecting the percentage from the drop-down menu.

Part 3. Export and save video
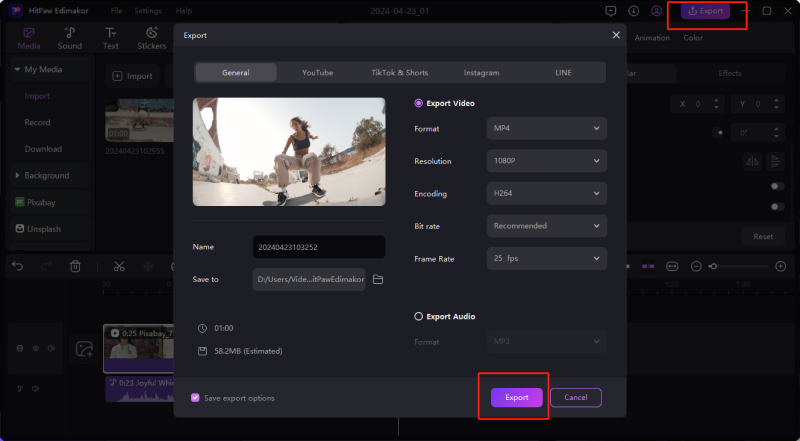
Once the process is complete, click on the 'Export' button at the top menu bar and a pop-up Export settings window will open. Here choose the desired video parameters like format, resolution, encoding, bitrate, frame rate, file name, and folder. Finally, click on the 'Export' button to save the video.

