Edimakor helps you create stunning and realistic videos from images with a variety of AI-powered effects such as kiss, hug, fight, and hand heart. Whether you want to bring still photos to life or craft engaging animations, Edimakor also provides customizable prompts to generate videos.
Tips:
To make trending videos like AI mermaid, AI kiss, or AI hug clips, please simply follow the AI Video Effects guide.
Part 1. Start Custom Image to Video in Edimakor
Activate Image to Video
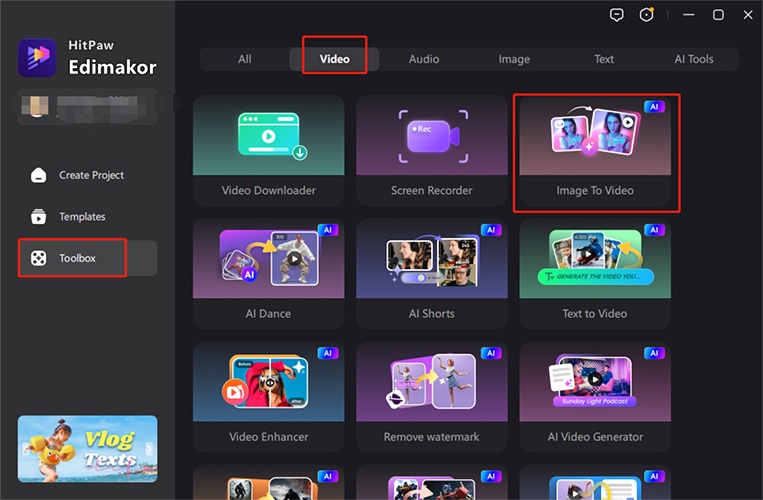
Before you begin, ensure you have the latest version of Edimakor installed and ready to use on your computer. Open Edimakor and click on Toolbox from the main interface. Find and click on Image to Video. You can also click on Create a Video and go to AI Media > AI Video > Image to Video under the Media section.
Choose an AI Video Mode
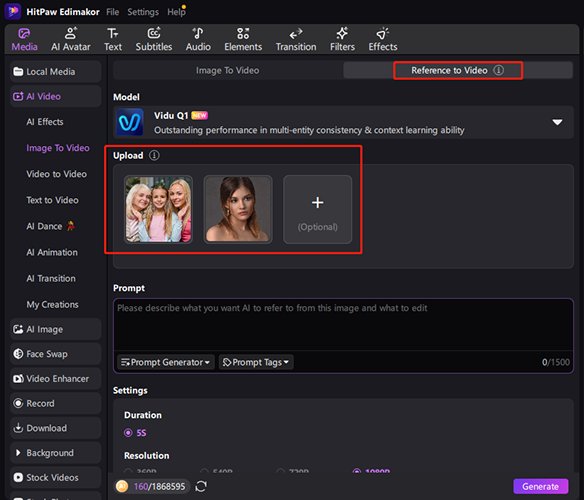
Edimakor provides two modes, Image to Video and Reference to Video. The key difference is that you can upload 1-7 pictures in Reference to Video for a specific result.
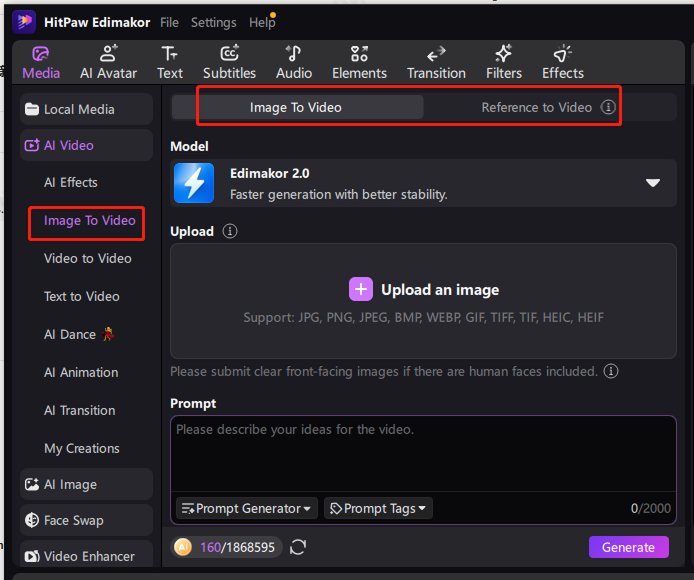
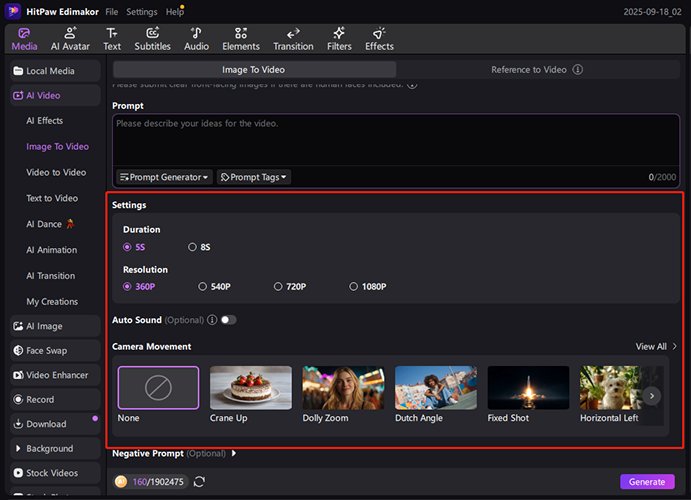
Image to Video
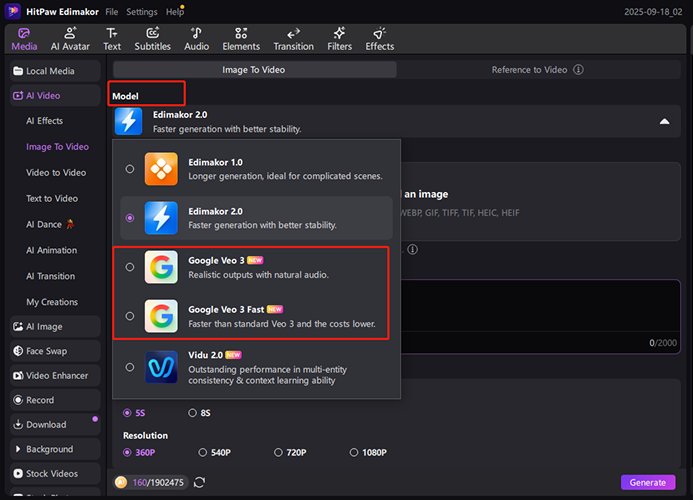
Get ready to choose your own video adventure! You can now pick between five fantastic models, and each one offers different editing magic. AI models: Edimakor 1.0, Edimakor 2.0, Google Veo 3, Google Veo 3 Fast, Vidu 1.5, Wan 2.2, and Minimax-Hailuo-02.
Then, import an image into the workplace.
Besides the basic settings, you can turn on the Auto Sound button for AI music or sound effects, even set a camera move.
Reference to Video
Reference to Video option has two AI models, including Edimakor 2.0 and Vidu 2.0. Here you can upload up to 7 images to create a video with some elements of each photo.
Part 2. Image to Video with Templates
Get ready for a super fun upgrade to your video effects with trending AI video templates! They come with cool sound effects now! You're in control! Whether you want to get creative and customize your own effects or just pick a fantastic ready-made template, the choice is yours.
We've got something for everyone! Dive into categories like Interactive (think hugs and high-fives!), AI Dance (get your "Subject 3" on!), Stylized (hello Ghibli vibes!), Appearance (instant muscle man, anyone?), Entertainment (explosions and costume changes!), Classic Transformations (become Iron Man!), plus adorable Pets and festive Holiday themes. It's time to play!
We're always keeping an eye on what's hot! Expect to see new video templates dropping soon that are right in line with the latest online trends. Stay tuned—you won't want to miss them!
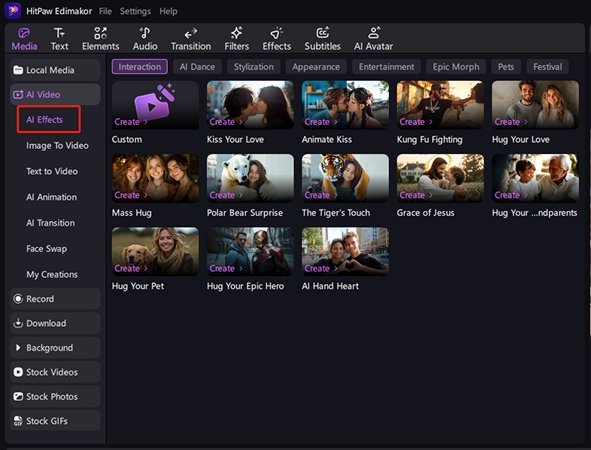
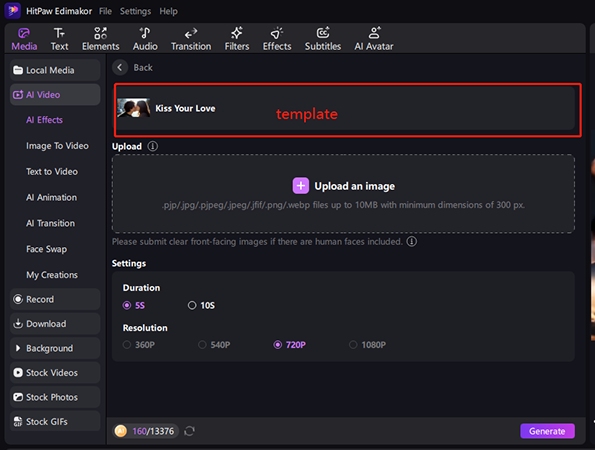
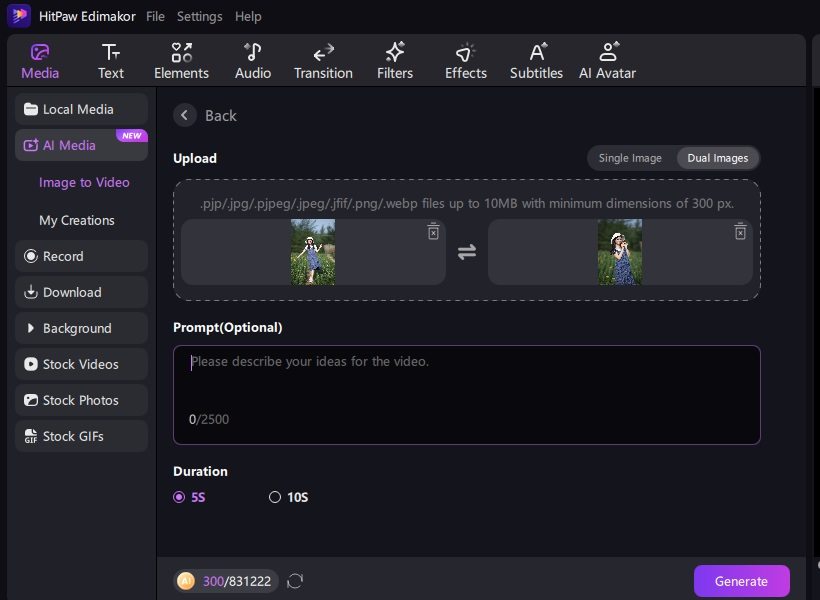
Then, click "Upload an Image" to import 1 or 2 photos for your creation.
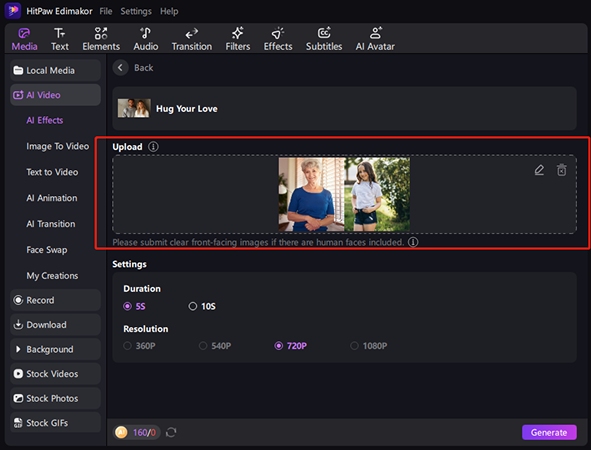
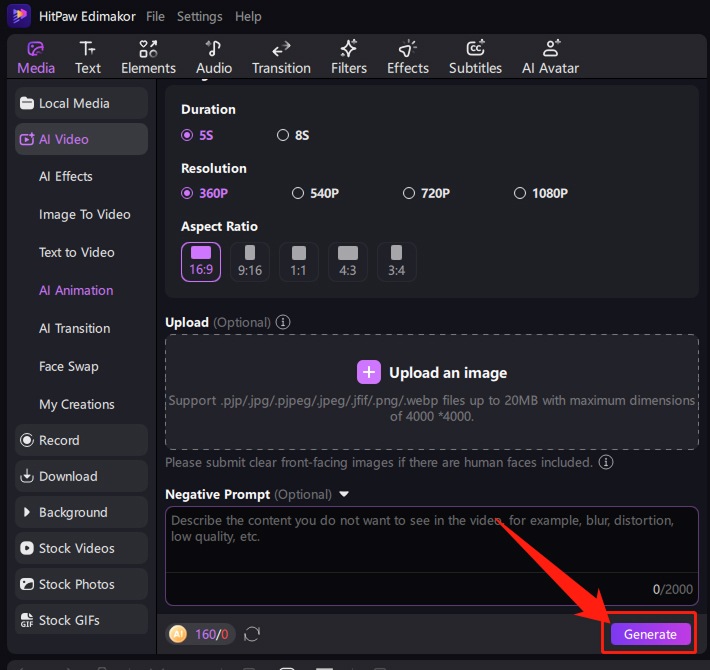
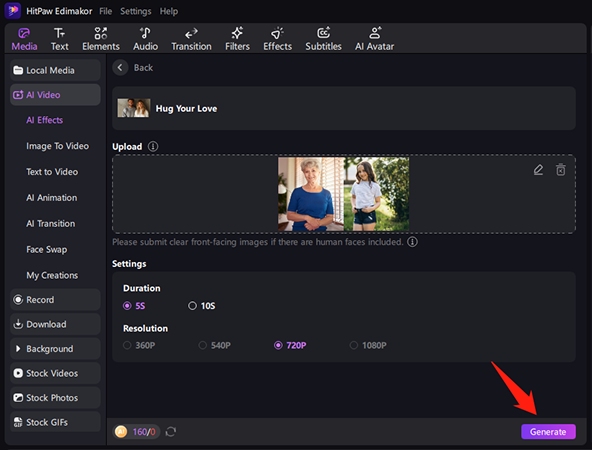
Once your image is ready, pick a duration and resolution and click "Generate".
The process may take a while, and the interface will automatically redirect to the My Creations section. Wait for the video to be generated, and once it's ready, you can preview the result.
Part 3. View the Result
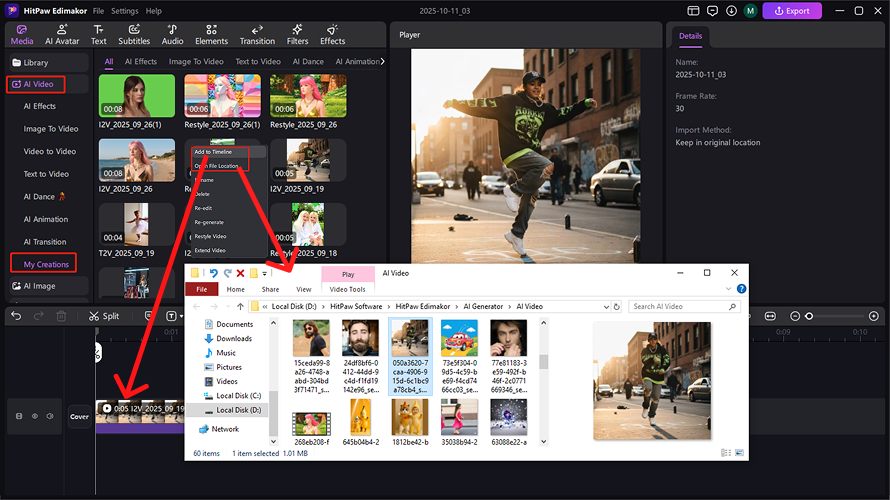
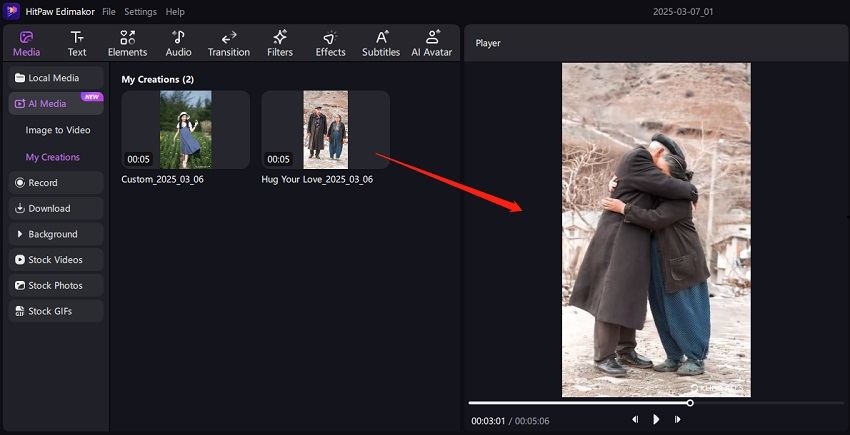
All your generated videos can be found in the My Creations section. Click on a video to preview it in the Player section.
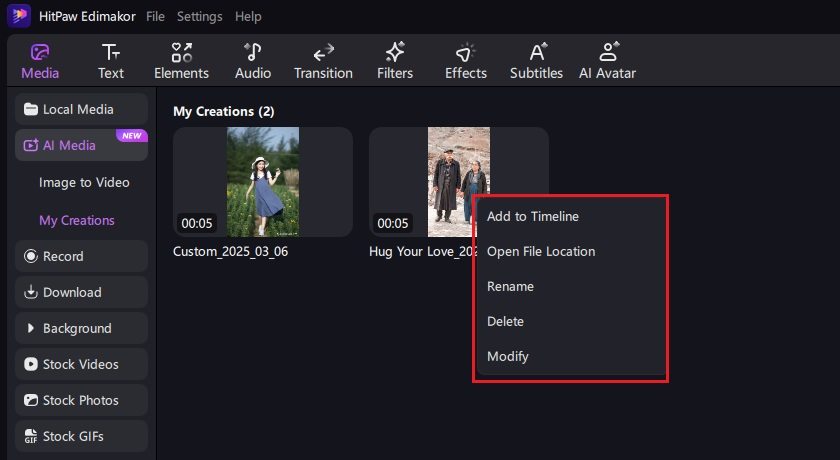
Right-click on a video to access additional options including:
- Add to Timeline: Add the video to the timeline for further editing and enhancement with Edimakor video editing tools.
- Open File Location: Locate where the generated video is saved on your computer.
- Rename: Change the default name to what you want.
- Delete: Delete the generated video.
- Re-generate: If you want to adjust the creation, you click this button and reopen the editing pane to modify it.
Part 4: Edit and Export
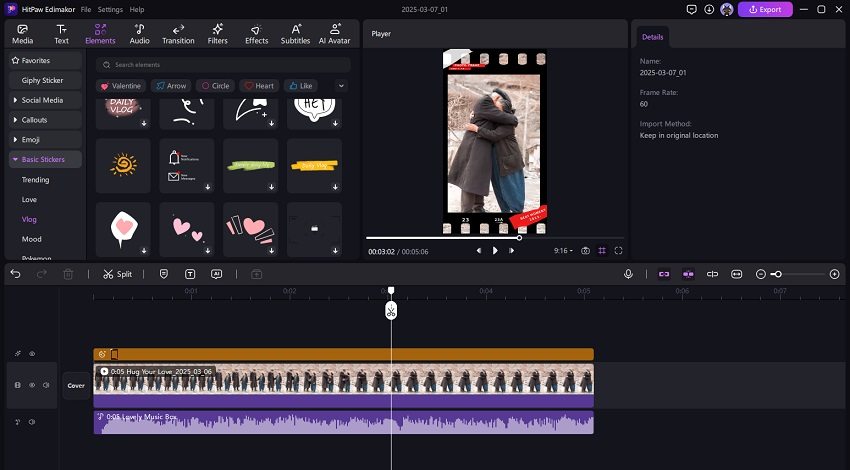
As mentioned earlier, you can further edit your generated video. Click the Add button to place the video onto the timeline. Enhance your video for example, by adding text, background music, changing the video background, or applying visual effects.
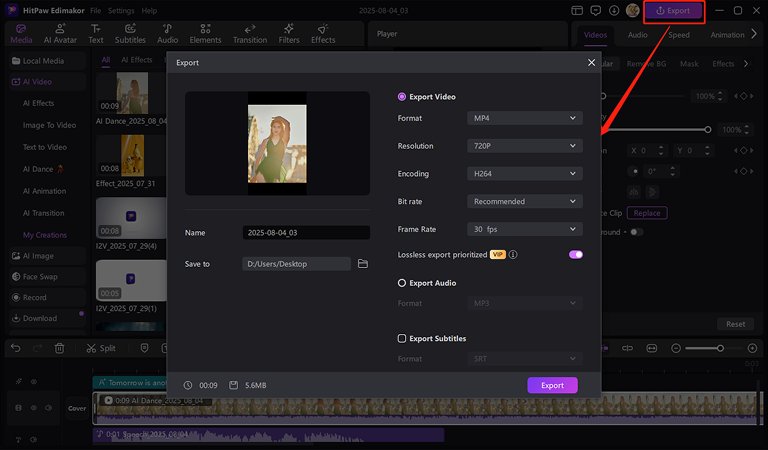
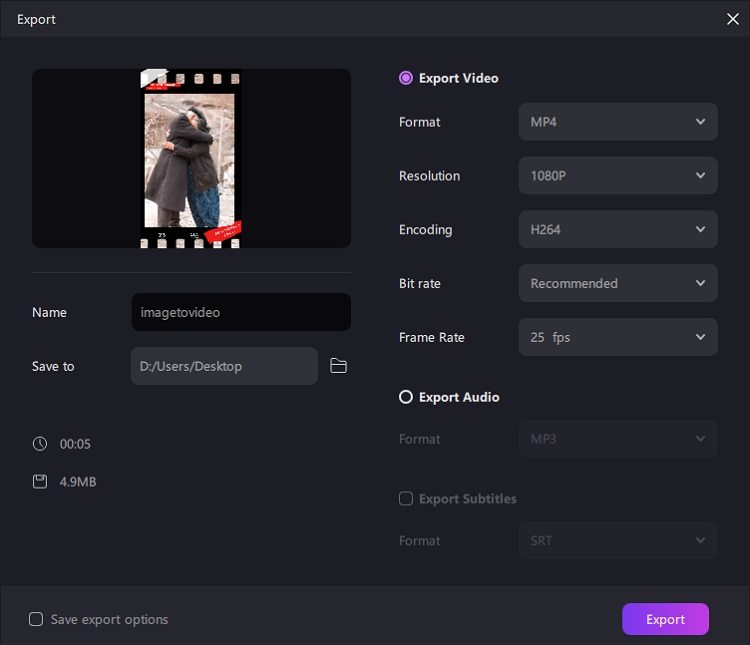
Once satisfied with the edits, click the Export option in the top-right corner. Configure the export settings and save the video to your computer. Now, your video is ready to be shared with family, friends, or on social media!
Part 5: Mastering AI Animation
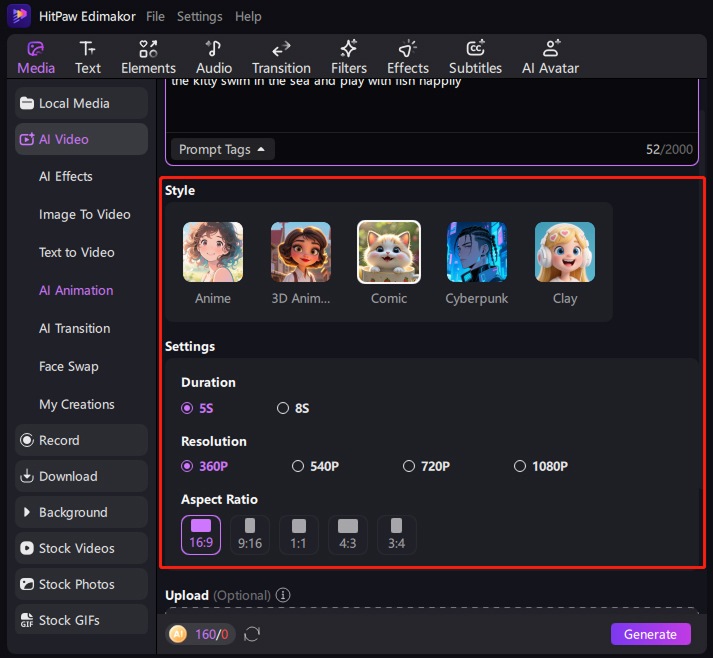
Effortlessly transform your ideas into stunning animated videos using Edimakor's powerful AI Animation Maker. Simply provide a text description or upload a reference image to kickstart the generation process. Choose from 5 compelling artistic styles: Anime, 3D Animation, Comic, Cyberpunk, and Claymation. Produce dynamic videos in either 5 or 8-second durations, with flexible resolution options reaching up to 1080P for high-quality output.
-
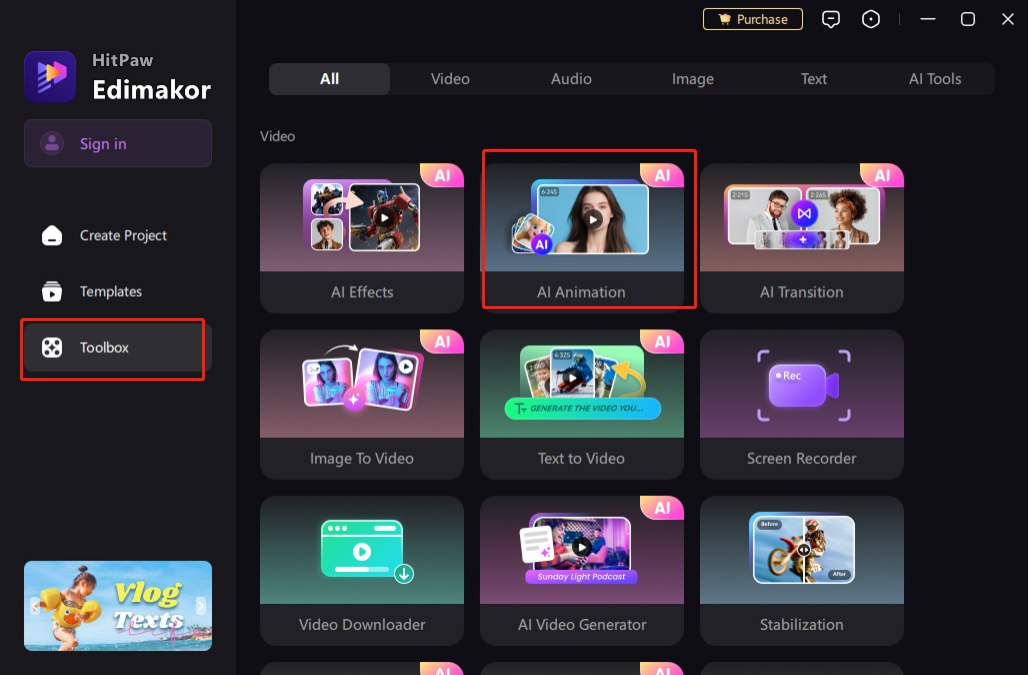
Activate "AI Animation": First, open Edimakor on your computer. Navigate to the "AI Tools" section in the main menu and select the "AI Animation" feature to initiate a new animation project.

-
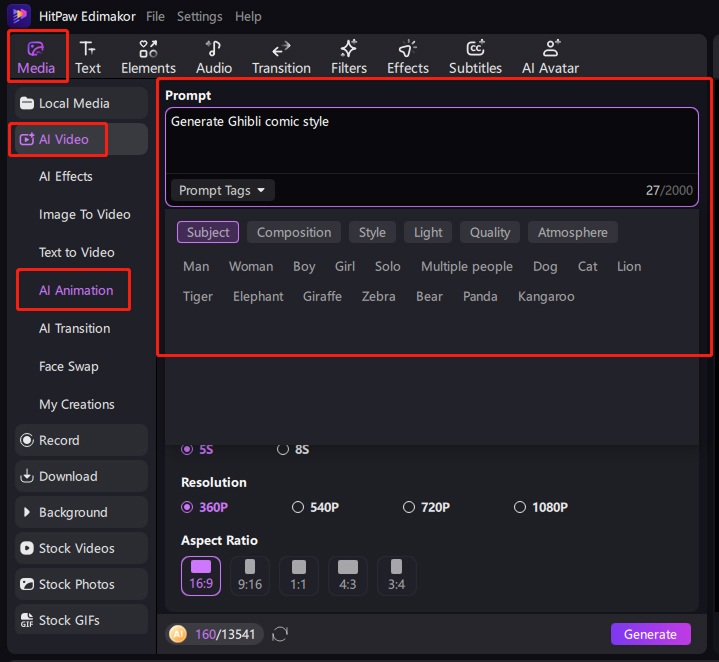
Enter Prompt for Your Animation: Clearly describe your animation idea using a detailed text prompt. Specify scenes, characters, actions, and any key visual elements you envision, to guide the AI's creation process. If you have no idea about it, you can pick some tags under the textbox.

-
Set Animation Style and Other Settings: Browse through Edimakor's extensive library of animation styles. Select the visual aesthetic that perfectly aligns with your project's mood and narrative, such as "Anime," "3D Animation," "Comic," "Cyberpunk," or "Claymation."

-
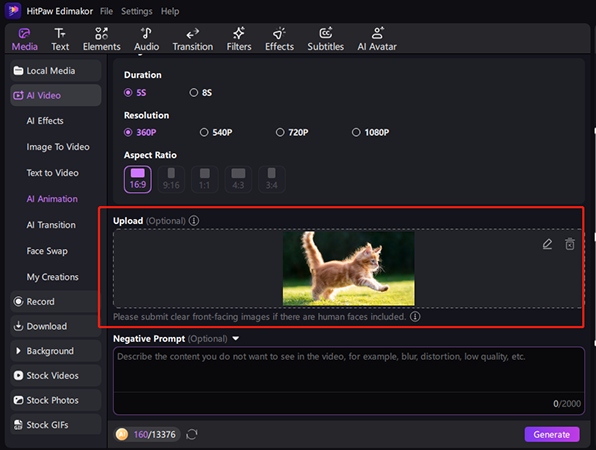
Import Your Image (Optional): For a more customized result, you can upload a reference image. The AI will draw inspiration from this image for visual elements, character design, or the overall aesthetic, further tailoring your animation's style or content.

-
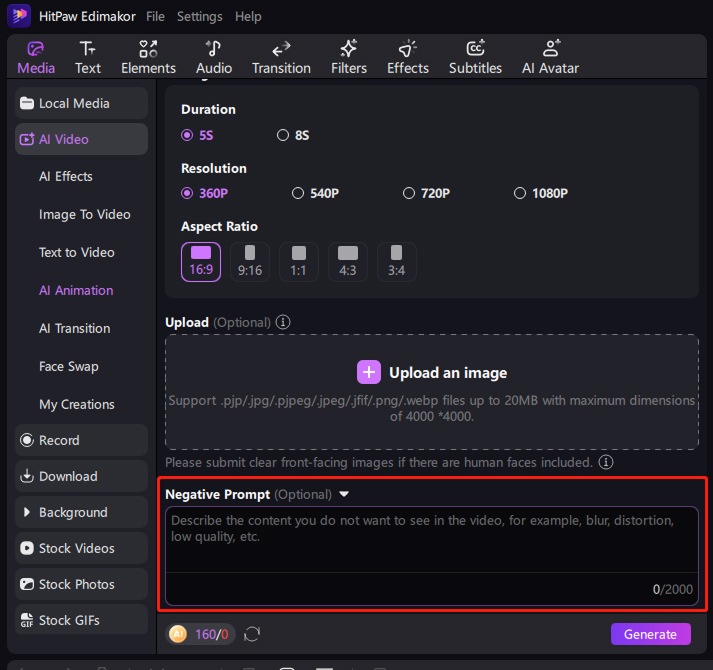
Negative Prompt for Better Result (Optional): To refine your animation, enter a negative prompt. This allows you to specify elements, colors, or styles that you wish to avoid, effectively guiding the AI away from undesirable features for a more precise outcome.

-
Generate AI Animation: Once your prompt, style, and settings are defined, click the "Generate" button. Edimakor's powerful system will process your inputs and create the animated video. Generation time may vary based on complexity and duration.

-
Preview Your Animation: After generation, preview your new animation within the software. You can make further edits, enhance with background music, or fine-tune details. Once completely satisfied, click "Export" to save your animated video to your device for sharing or further use.

The Result can also be further edited in Edimakor's timeline and exported as a video.

