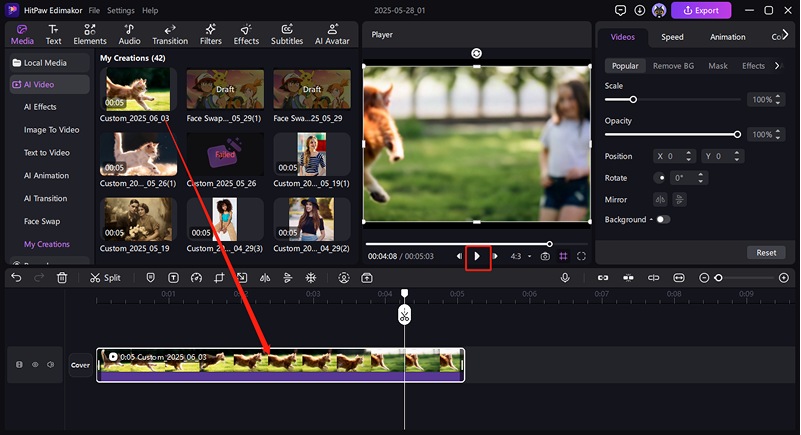
To make your videos truly shine, you can stick totraditional video transitions, or dive into the exciting world of AI transitions for truly special results. Edimakor's got a fantastic range, from its traditional video transitions to its innovative "AI Transitions," making your footage look polished and exciting.
Part 1: Traditional Way to Add Video Transitions
When it comes to traditional video transitions, it's all about picking a ready-made transition effect from your editing software's library and simply dragging it right between two video clips on your timeline. You'll usually choose from familiar options like smooth dissolves, dynamic wipes, or gentle fades, carefully placing them to guide your viewers seamlessly from one scene to the next.
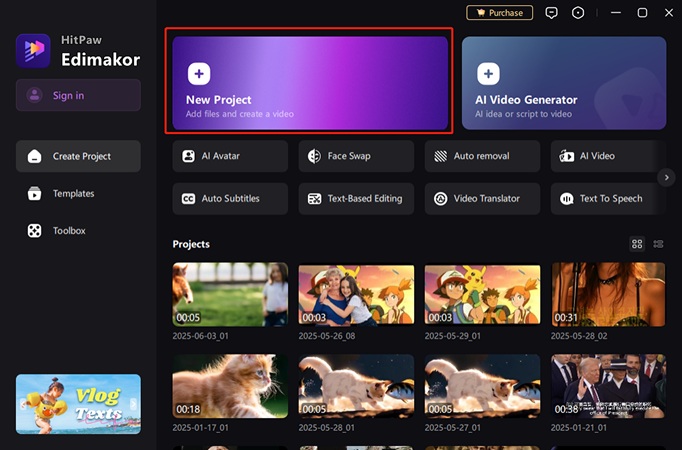
Step 1. New A Video Project
Get started by downloading and opening Edimakor on your computer. Once the application is running, start a new one or load your existing video project where you intend to connect different video segments.
Step 2: Import and Arrange Your Video Clips
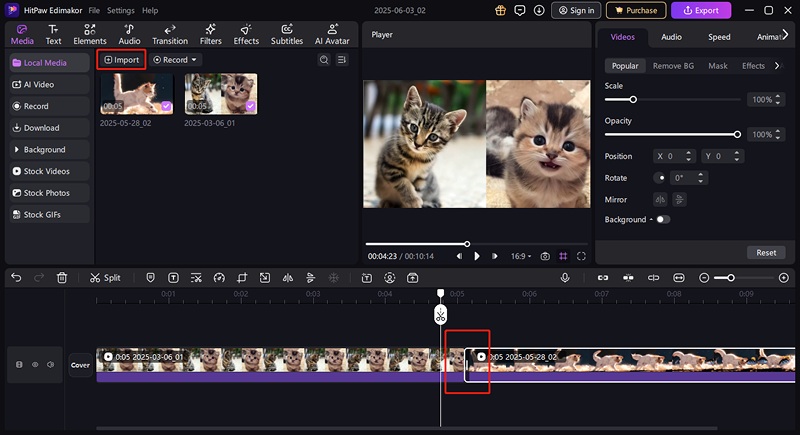
Import videos to Media. Next, drag and drop your individual video clips onto the timeline in the order you want them to appear. Transitions are applied between these clips to create a smooth flow from one scene to the next.
Step 3: Explore Edimakor's Transition Library
Navigate to the "Transitions" panel within Edimakor's interface. Here, you'll find a rich collection of transition effects, ranging from classic dissolves and fades to dynamic wipes and artistic blurs. Preview them to find the perfect fit for your video's mood.
Edimakor offers a wide variety of transitions to match any video style. Pick the transition that best tells your story. Check out "Trending & What's New" for popular options!
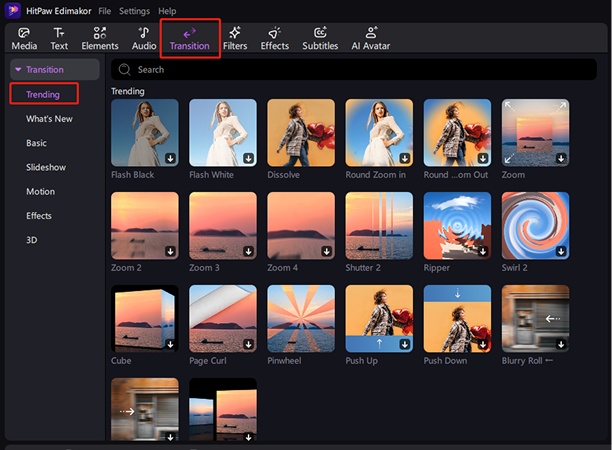
Explore trending video transitions in What's New:
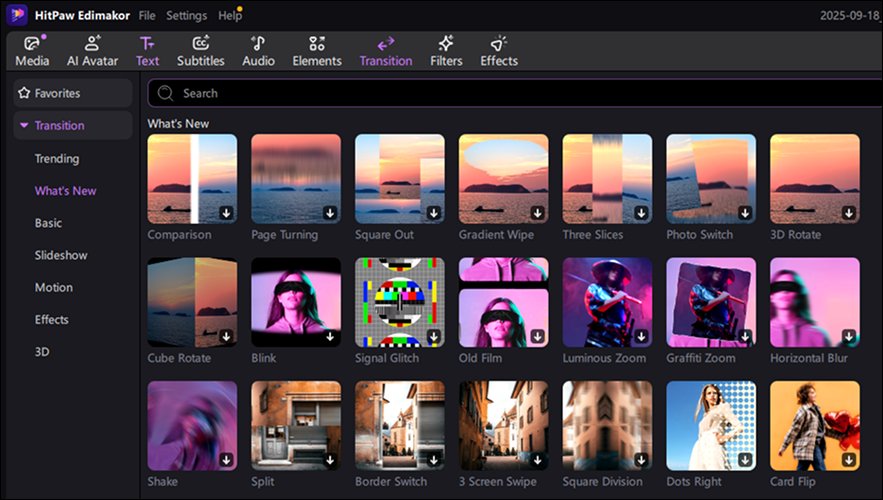
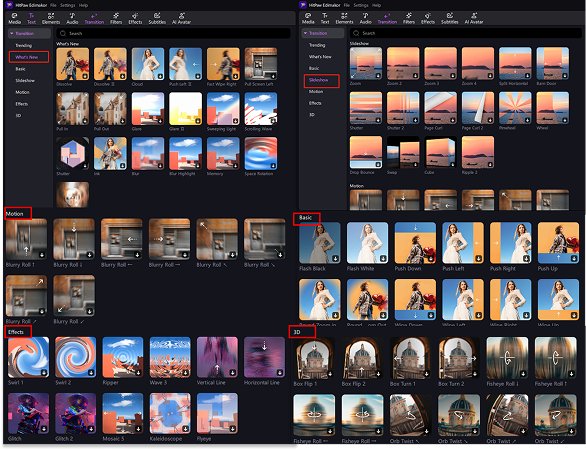
Beyond the transitions we've already covered, remember you also have these choices available:
Basic: Simple cuts or dissolves smoothly blend scenes; ideal for maintaining natural pacing.
Slideshow: Pushes, zooms, or slides images; great for dynamic presentations of still photos.
Motion: Simulates movement like spins or blurs; adds energy and excitement to sequences.
Effects: Stylistic changes like glitches or color shifts; creates unique, artistic, or dramatic impacts.
3D: Adds depth, making scenes appear to move in 3D space.
Step 4: Filter and Search for Specific Transitions
If you have a specific transition in mind, use the search bar or filter options to quickly locate it within the library.

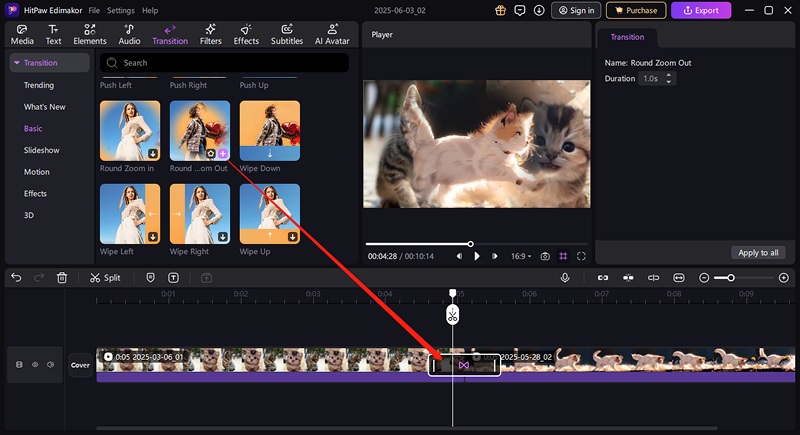
Step 5: Apply Transitions Between Clips
Once you've chosen a transition, simply drag it from the library and drop it onto the timeline, precisely at the point where two video clips meet. Edimakor will automatically place the transition to smooth the shift between scenes. To remove a transition, simply click on it in the video and hit the delete key on keyboard.
Step 6: Play Back and Review Transitions
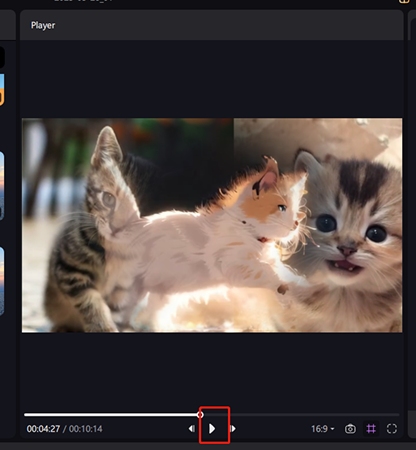
Play back your video in the preview window to see how your chosen transitions look and feel. This crucial step allows you to ensure a seamless and engaging viewing experience.
Part 2: Elevate Your Video Edits with AI Transitions
Edimakor AI Transition is a powerful, intuitive tool specifically designed to create intelligent video transitions between any two distinct images you upload. It transforms static image pairs into a dynamic visual flow, intelligently bridging the gap with sophisticated AI transition effects.
Step 1. Luanch AI Transition
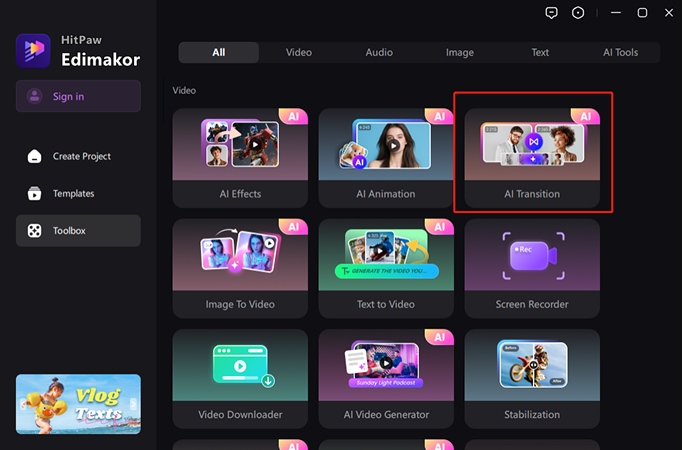
Begin by navigating to the Edimakor "Toolbox" pane and find "AI Transition" feature.
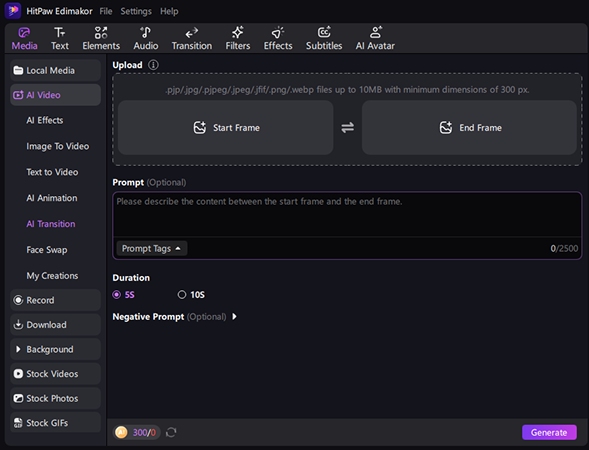
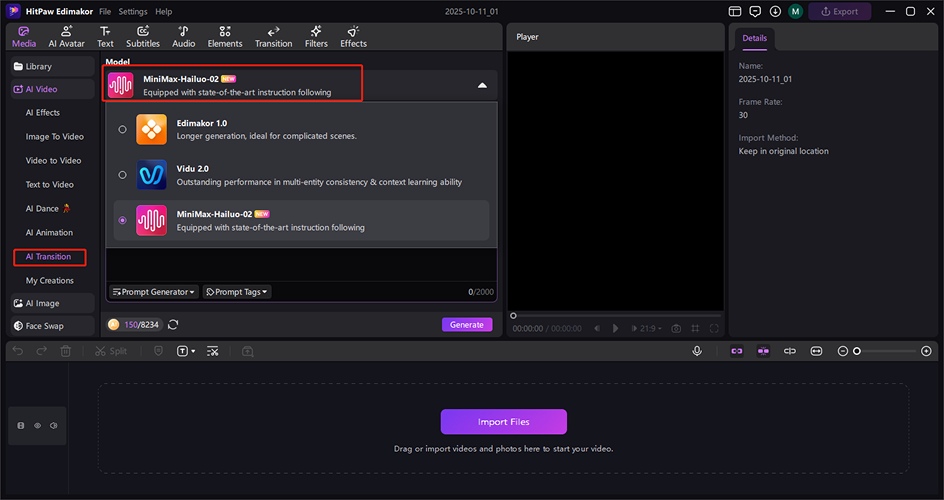
Edimakor integrates many AI video transition models for a better result. You can find trending AI models like Vidu and Minimax-Hailuo here.
Step 2. Upload Images & Enter Prompt
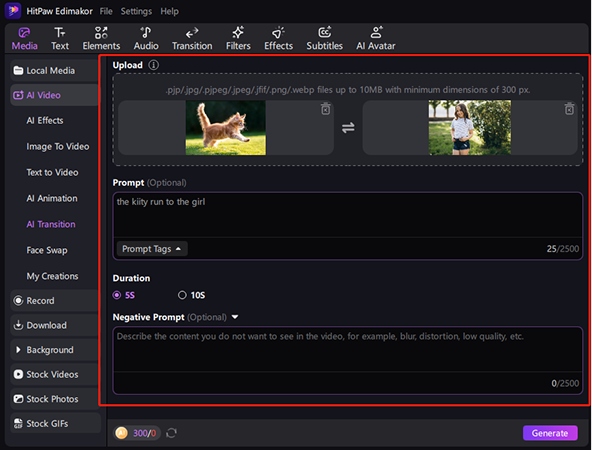
Upload your first image to the designated starting slot, and then your second image to serve as the transition's endpoint. Remember, providing a detailed prompt is crucial for achieving the most perfect transition possible. Then set a duration as 5s or 10s, and add a negative prompt as optional. When all is done, just it "the Generate" button to get your AI creation.
Step 3. Review Your AI Transitions and Flow
Hold a minute to wait for the generation in "My Creation" and preview it when it is done. If you are satisfied with the clips, just right-click them and select Open File Location to find them immediately. There, you can also add them to the timeline and edit them as normal video footage and export it by clicking the "Export" button on the top right corner.
