New in HitPaw Edimakor, the AI Photo Cutout tool allows you to isolate the subject in an image and add custom backgrounds, effects, and filters to it. This is similar to what iOS has, where you can long-tap the main object in a picture on your iPhone and share the isolated element as a sticker or attachment. The feature may come in handy when you wish to remove an unwanted background or entity and add a custom one to make the photo look more vibrant and appealing.The following steps explain how to use the AI Photo Cutout tool in HitPaw Edimakor:
Part 1. Remove the Image Background with AI Photo Cutout
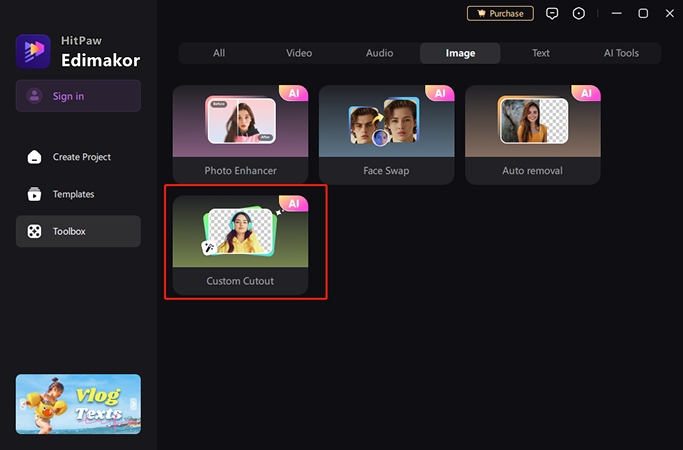
Launch HitPaw Edimakor and click the 'Custom Cutout' button located in the 'Toolbox'. Then, browse and import your source photo.

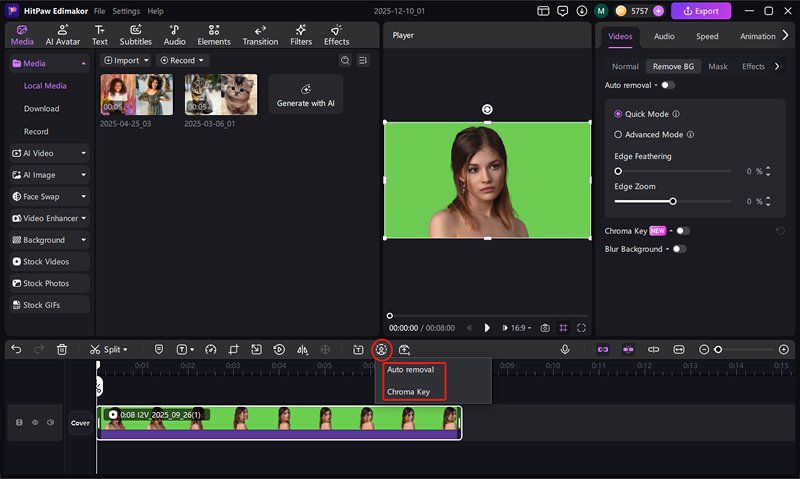
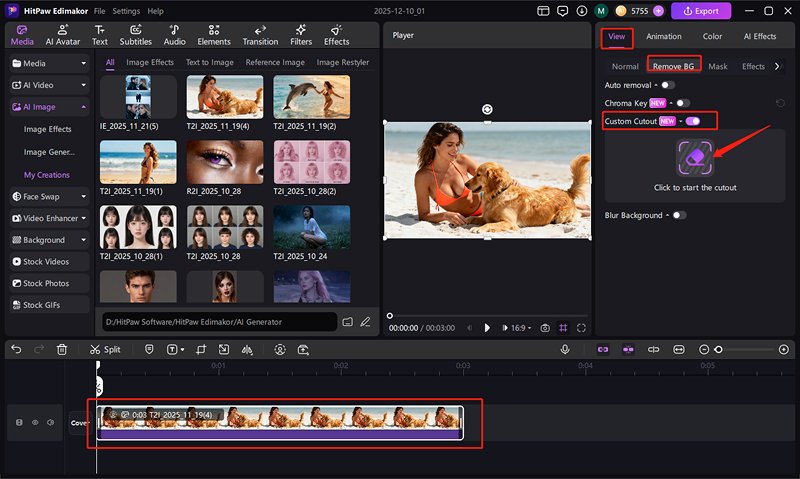
Alternatively, select the clip on the timeline, and enable the cutout feature by using either the cutout icon above the timeline or the switch found in the right properties panel.


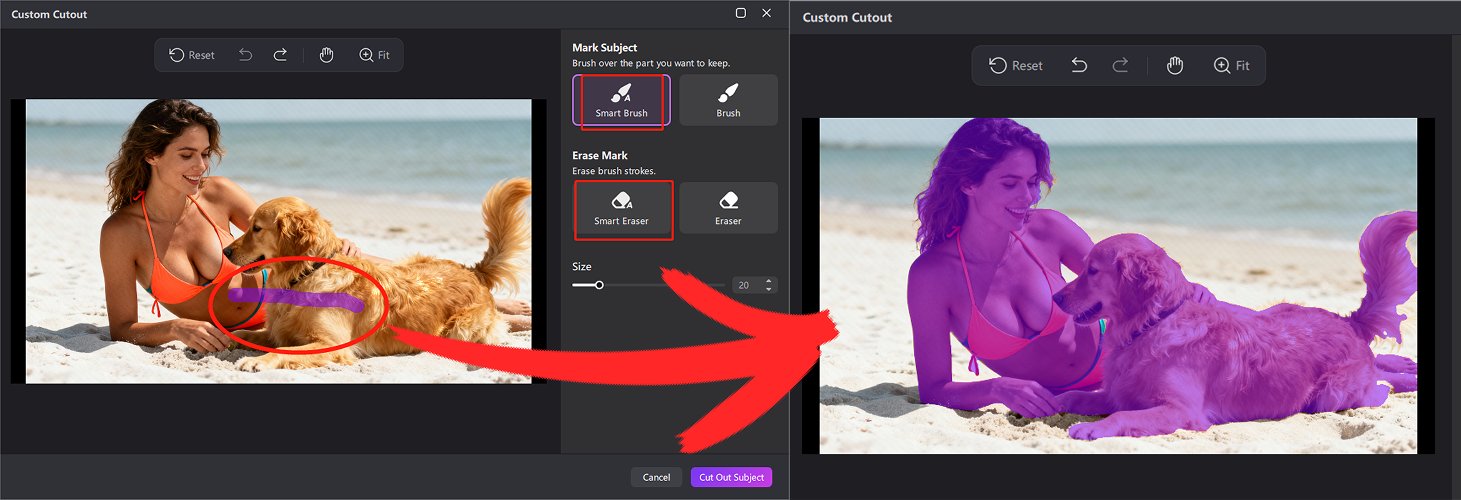
Next, use the brush and eraser to draw the object by yourself in the pop-out window.
If you don't want to waste time, you can use the "Smart Brush" or "Smart Eraser" to cover the object in seconds.

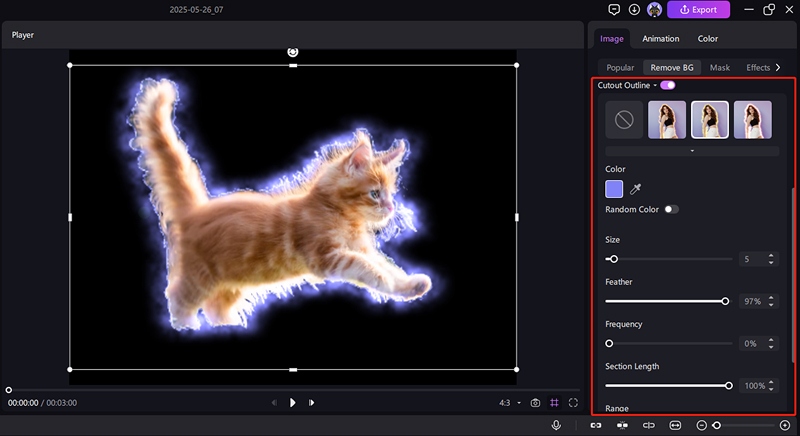
Then, it is super easy to add stunning outline effects for the object. 1) Select an effect you like. 2) Pick a nice color. 3) Adjust other arttributes of the outlines.

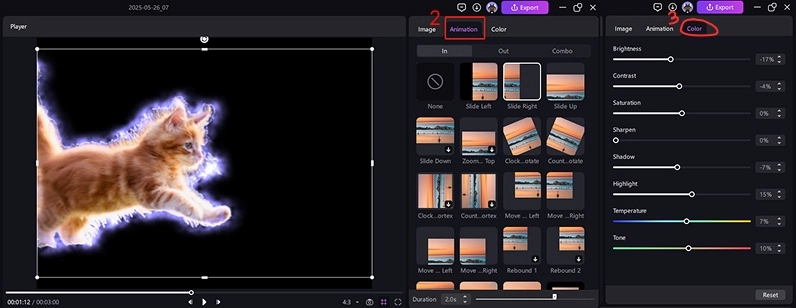
To truly enhance your video's visual impact, head to the "Animation" and "Color" panels. Here, you can apply dynamic movements or smooth transitions to bring elements to life. Meanwhile, the "Color" panel lets you precisely adjust hues, vibrancy, and tone, ensuring a polished, professional aesthetic that makes your content look its absolute best.

Part 2. How to Use Chroma Key
This guide will demystify chroma key, the powerful technique behind "green screen" effects. Learn how to effortlessly replace backgrounds, transport subjects to any location, and create stunning visual content. Elevate your images with professional-looking effects, making the impossible, possible.
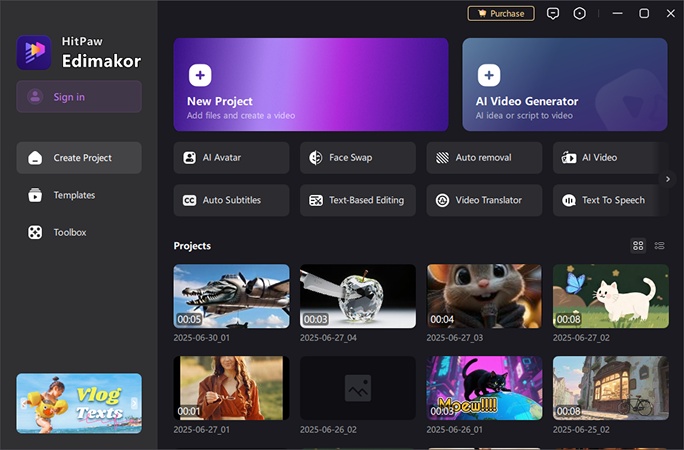
First of all, click "New Project" in the main panel of Edimakor.
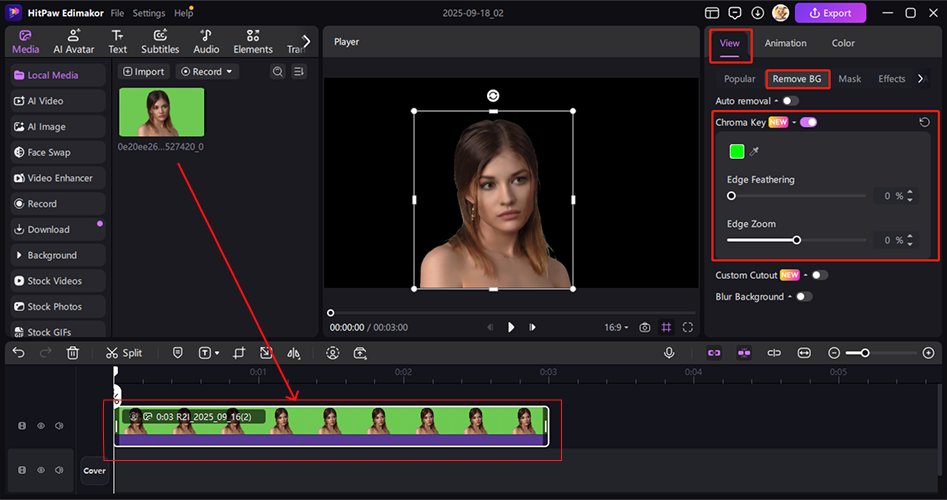
Upload your images to the the work place. Drag and drop them to the timeline. Select the ones you want to apply the chroma key effect. Then, go to the top-right panel "View>Remove BG>Chroma Key" and turn it on.
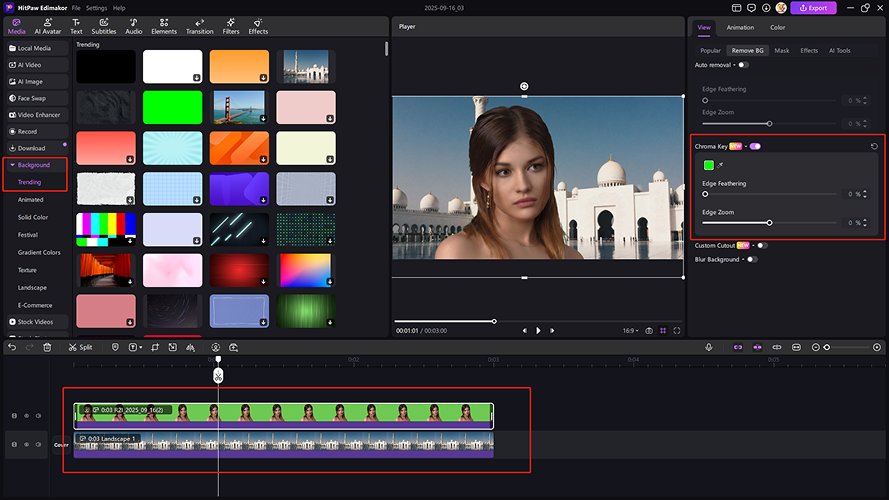
Back to the left panel and find a background or drag one to the timeline from yoe local file for a perfect result.
Part 3. Add Custom Background
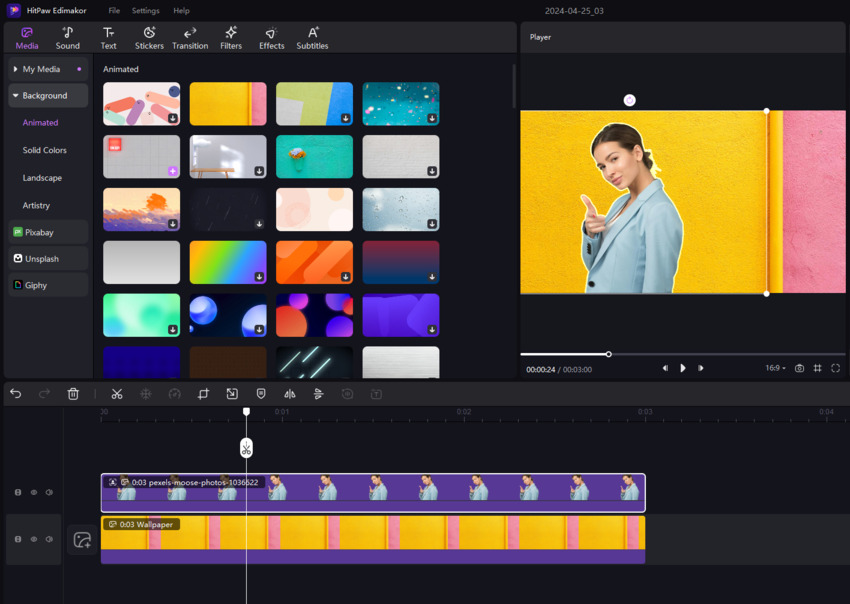
Go to the Background option in the left pane of the Media window, drag your preferred background effect from the Content Box, and place it below the photo’s track in the Timeline.
Part 4.Adjust Image Appearance
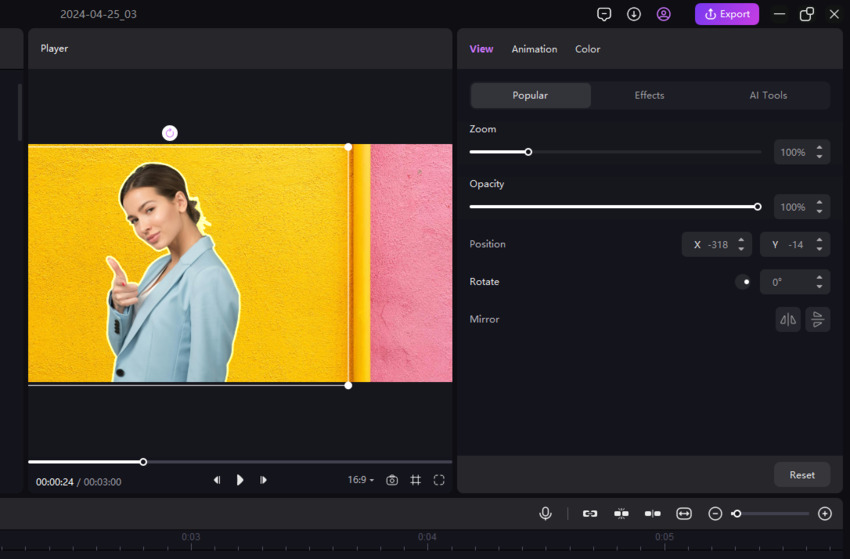
Go to the Popular tab from the top of the right pane. Use the Zoom, Opacity, Position, Rotate, Mirror, and Background options to adjust the appearance of the subject according to the target platform, portal, or document you wish to use it in.
Part 5. Add Effects and Filters.
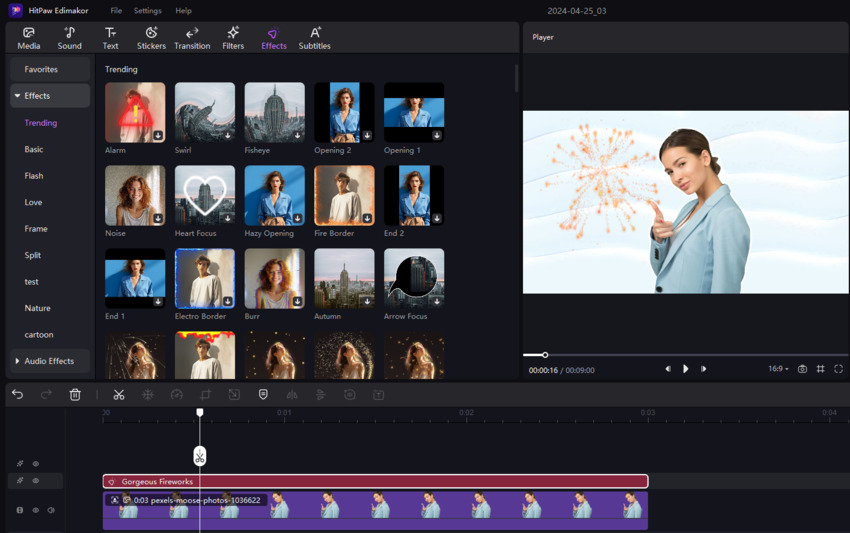
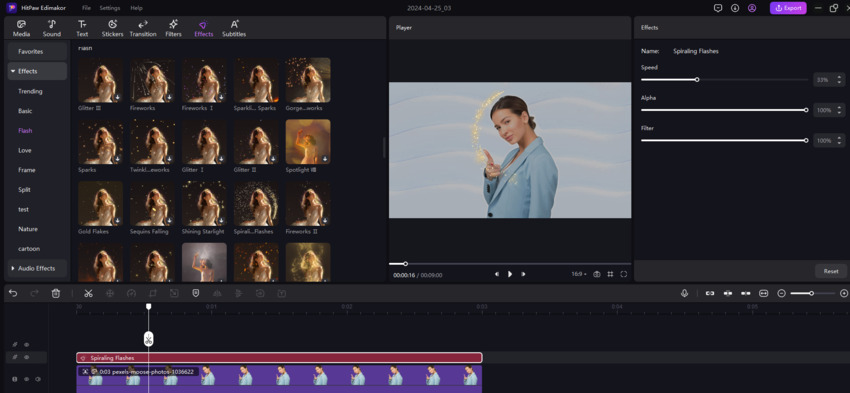
Click the Effects button from the standard toolbar at the top-left of the interface, choose your preferred effect, and drag and drop it on the photo track in the Timeline. Use the options under the Effects tab on the right to adjust parameters. Optionally, do the same for the filters.
Part 6. Export the Photo Video.
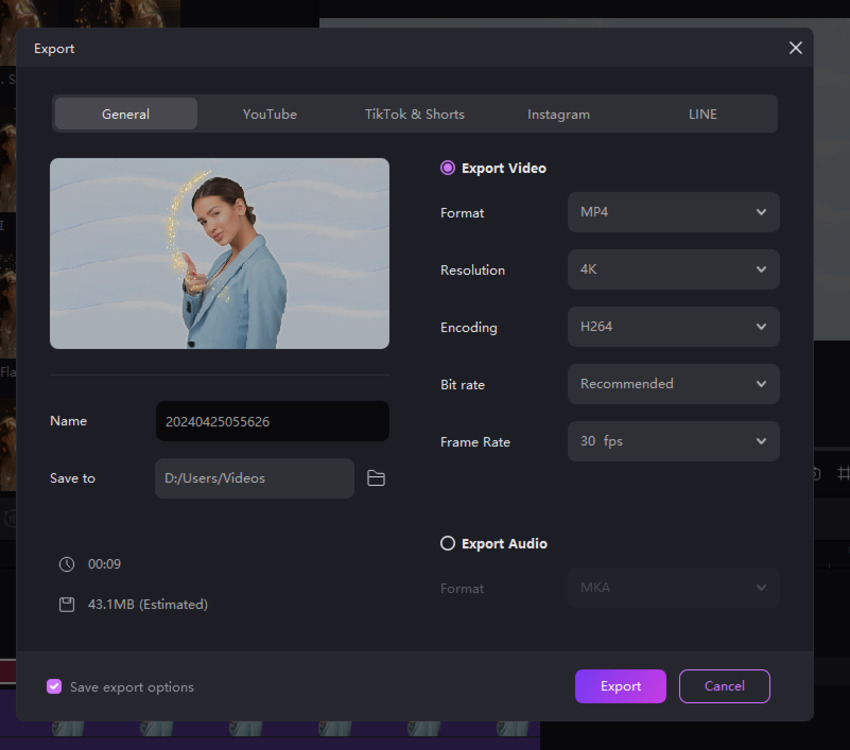
Click Export from the top-right. Use the tabs and options in the Export box to define output preferences. Click Export from the lower-right area to export the AI Cutout modified image video from HitPaw to your PC.
Video Tutorial on AI Cutout
Watch this video tutorial on how to remove the image background with Edimakor AI Photo Cutout.
