Need funny face-swapped videos and photos? Edimakor is your go-to. We'll walk you through the entire process using our easy-to-use video editor. Simply follow along, and you'll be able to easily create stunning deepfake face-swapped videos powered by AI technology. If you're ready to create amazing and fun videos, follow along!
Declaimer:
This guide is meant to provide general information only and does not offer legal advice. Before using the relevant features, please ensure the following:
- Consider consulting a qualified legal professional in your jurisdiction to understand any legal risks that may apply;
- Carefully read and fully understand the Edimakor Terms of Service and Edimakor Privacy Policy;
- Ensure that any content you generate follows applicable local, state, and federal laws, with special attention to rules governing synthetic media and deepfake technologies.
Step 1: Explore the Face Swap Tool
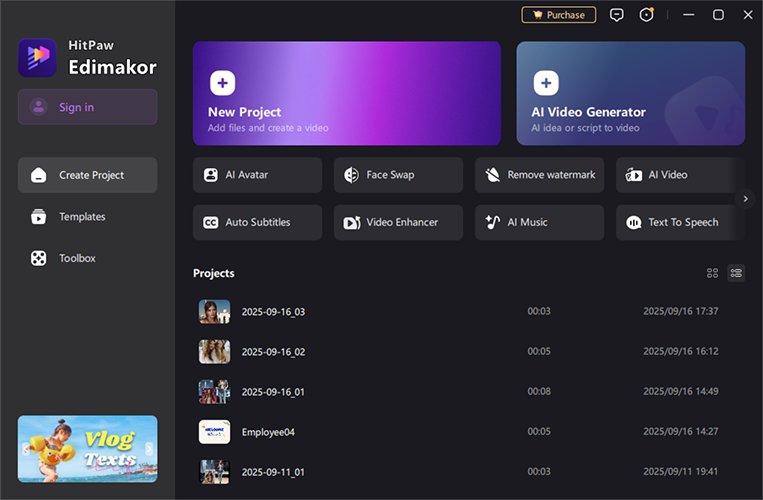
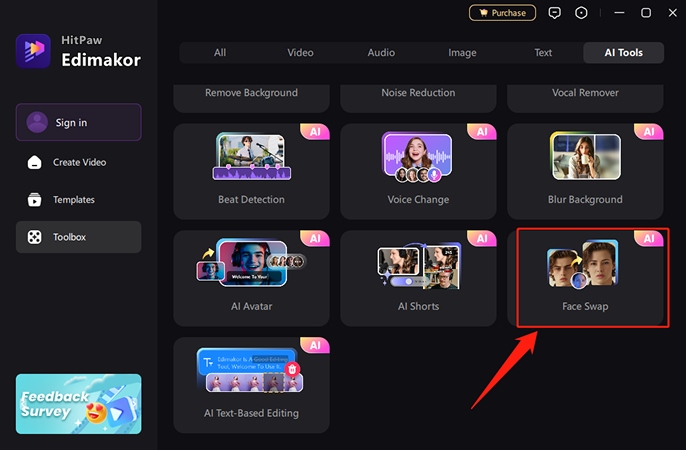
To start swapping faces with someone else's, click the "Face Swap" button to use the online face swap editor.
Step 2: Start to Swap Face
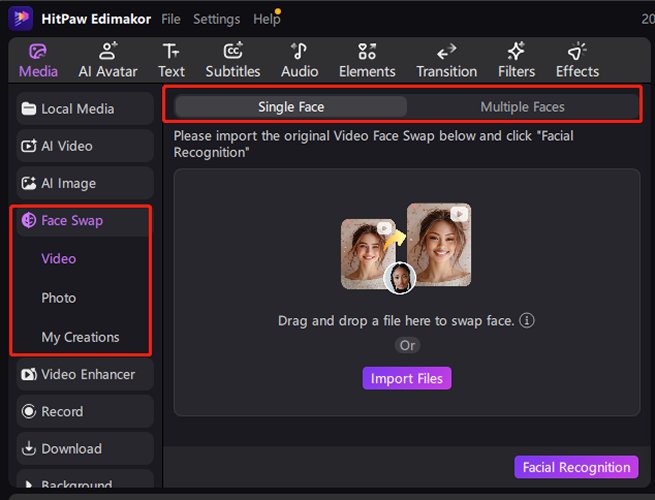
In the "Face Swap" menu, select either "Video" or "Photo," then select Single Face or Multi-Face mode from the top-center tab to configure the workflow.
Step 3: Import a Video
Click 'Import File' to select and upload the video file you want to work with from your device.
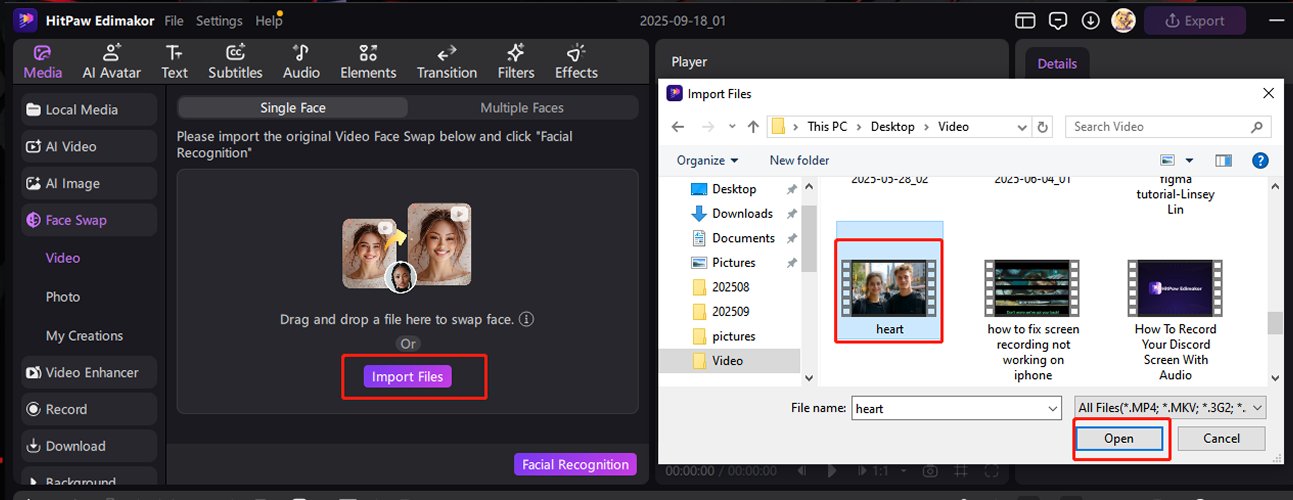
Select the “Single Face" or "Multiple Faces" mode here to set the workflow. Once the video file upload is complete, follow the face swap process from the next step.
If you want to edit only a specific part of a long video, click the "Edit" tool in the upper right corner to split the video into smaller sections.
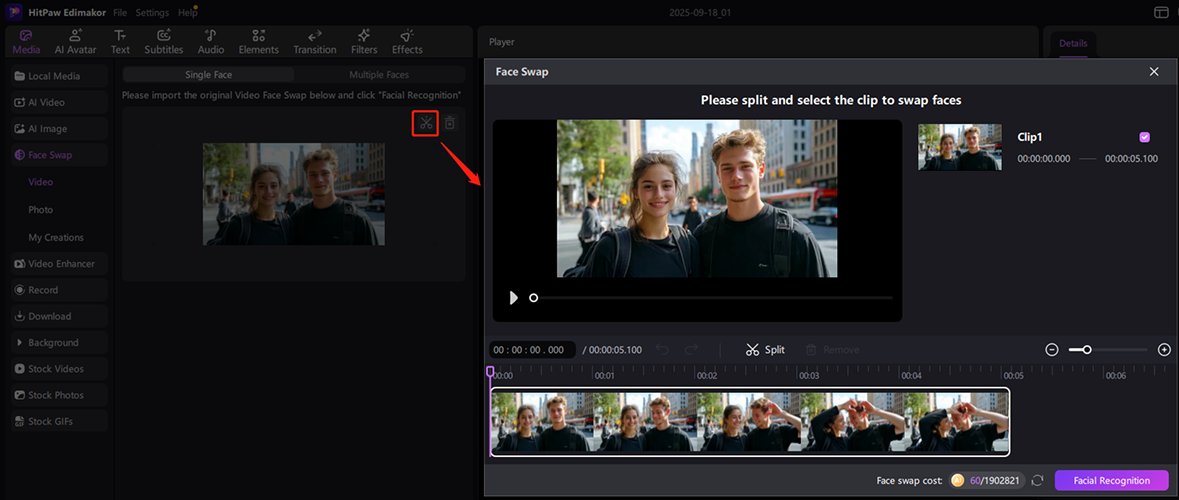
Drag the timeline to select the point you want to split, then click the "Split" button. If you want to separate more, repeat this process as many times as needed.
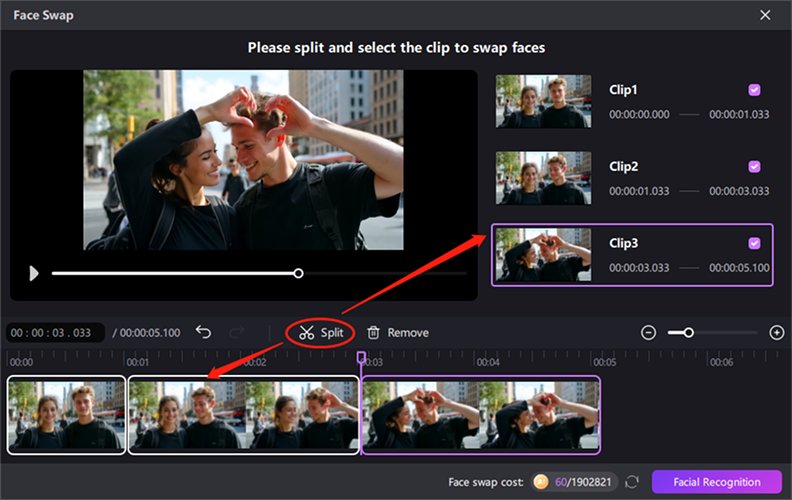
Select the desired segment and click the 'Recognize Faces' button in the bottom right corner to have Edimakor AI detect the corresponding face. It automatically scans people in the clip, and in later steps, you can check the detected faces and map the faces to be replaced.
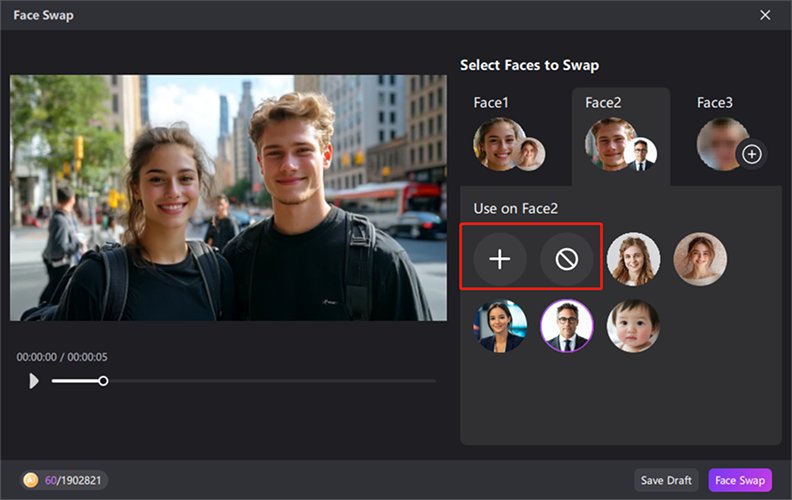
Step 4: Choose the Face You Want to Replace
First, click on the face you want to replace in the video. Then, you can freely replace the face by selecting the desired person's face, mosaic, or sticker.
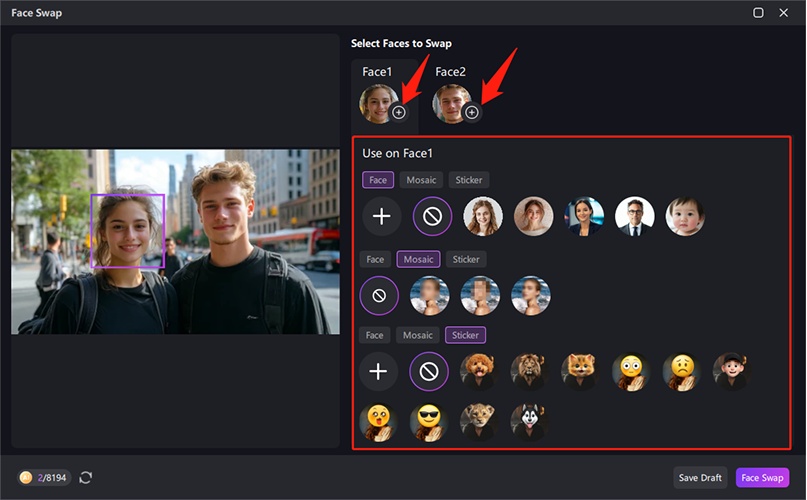
Next, select the face you want to add to the video. The selected face will appear in the bottom right corner of the screen, along with the face to swap with.
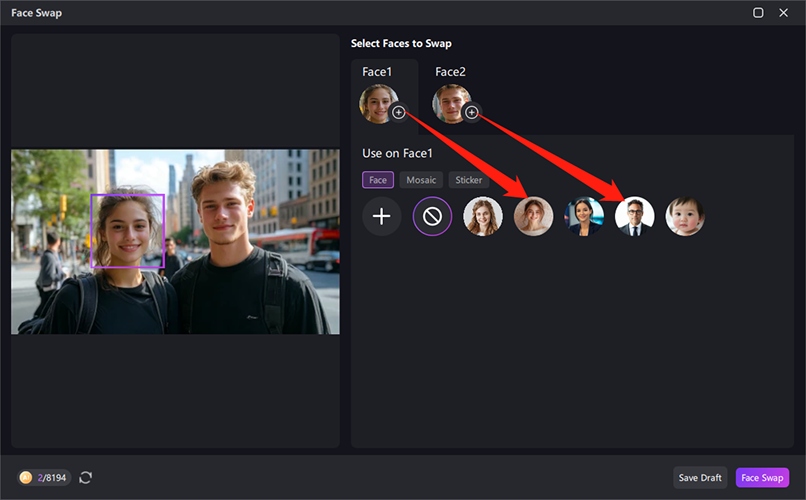
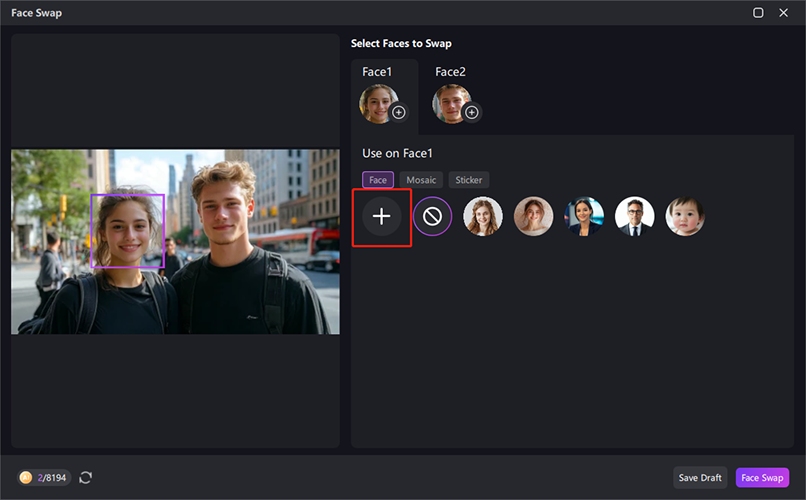
If you want to add your own face or another face to the video, press the '+' button to add a new face and swap as many faces as you want using the same method as described above. Once you've found the combination you like, save it as a draft or start compositing right away.
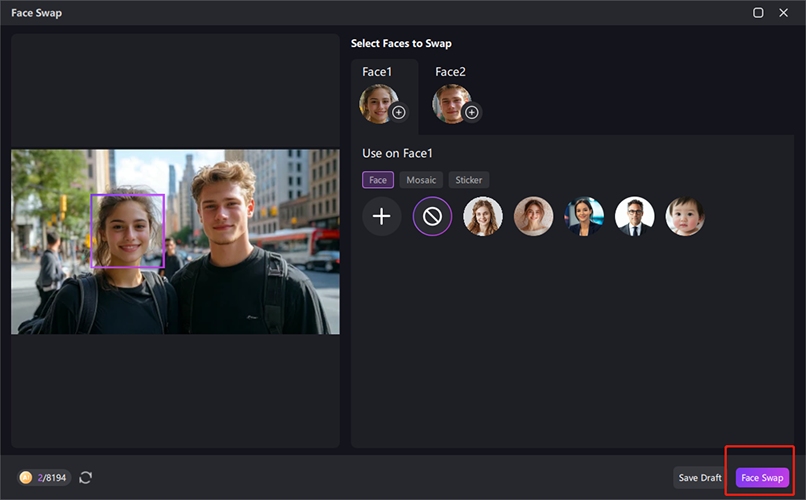
Step 5: Swap Faces
After selecting the face to be changed, click the "Face Swap" button. Click to start compositing.
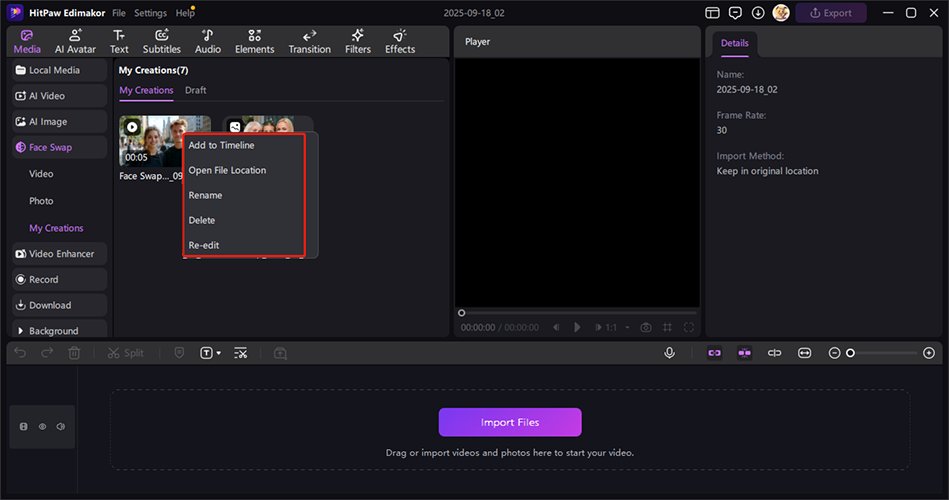
All your own creations and drafts are stored in 'My You can check it at any time in the 'Creations' folder.
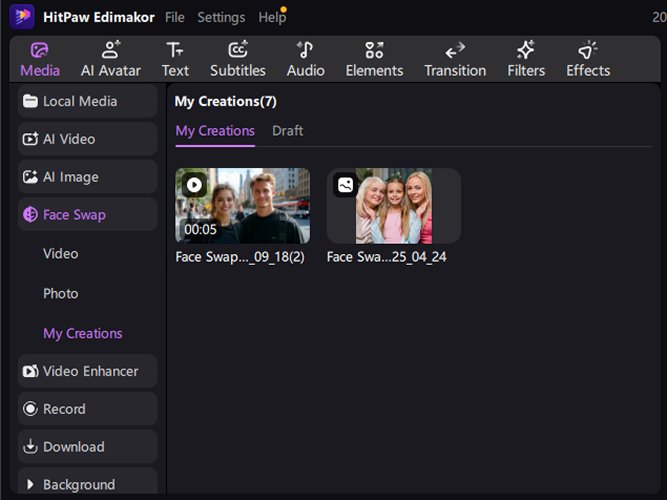
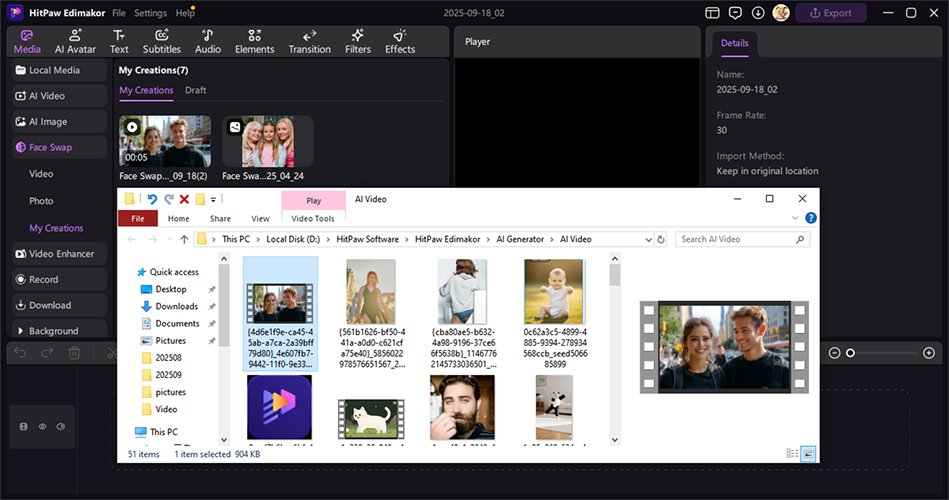
If you want to find a video file created by Edimakor, click the results. You can find the generated file by clicking the "Open Folder" button that appears when you hover over the thumbnail.
Step 6: Check the Final Results
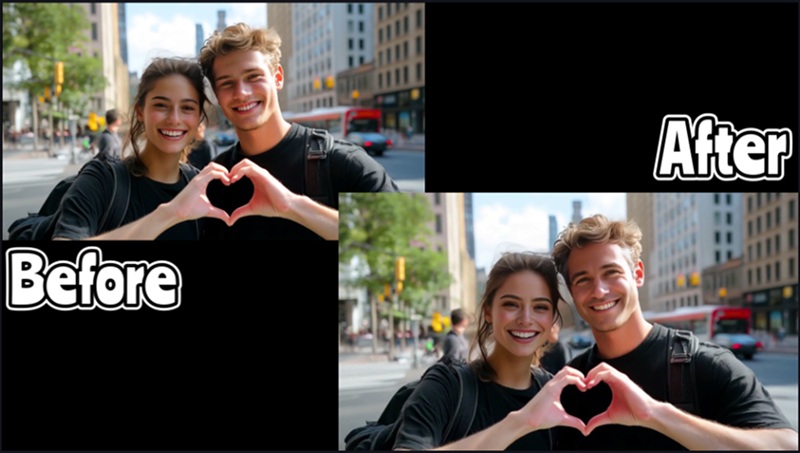
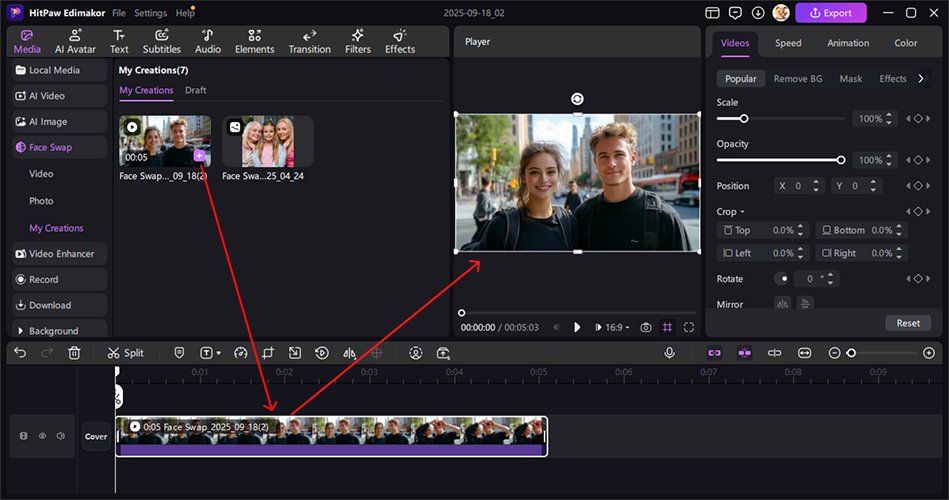
If you're happy with the final video, drag it to the timeline. Edimakor offers a variety of editing features, so you can further customize it to your liking.
Step 7: Export the Finished Video
If you're satisfied with everything, click the "Export" button. Choose your desired video format (e.g., MP4) and resolution, then download the face-swap video.
Create and share your own unique face swap video now!
