To use HitPaw Edimakor (Video Editor), you need to know how to download and install it, how to register for the full version and how to edit video in detail, following the full guide to start your video. HitPaw Edimakor (Video Editor) is available on both Windows and Mac. You can enjoy the features of HitPaw Edimakor (Video Editor) without worrying about the system issue.
Part 1. Download & Installation
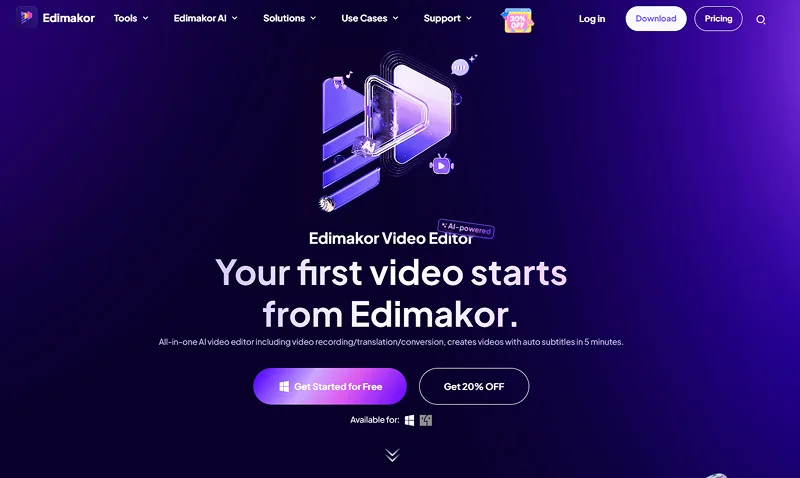
Visit the official website of HitPaw Edimakor (Video Editor) and click on the download button "Try It Free" for a Windows version. You can also choose a Mac version.

-
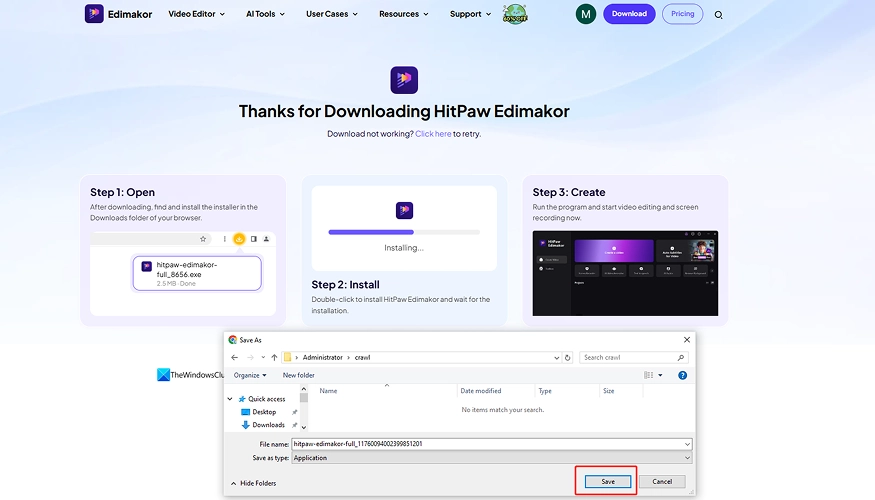
For the latest version of Chrome (Chrome 115), a tip for downloading will be shown at the top right corner and a webpage of "Thanks for Downloading" will pop up. Next, save the fille to install Edimakor.

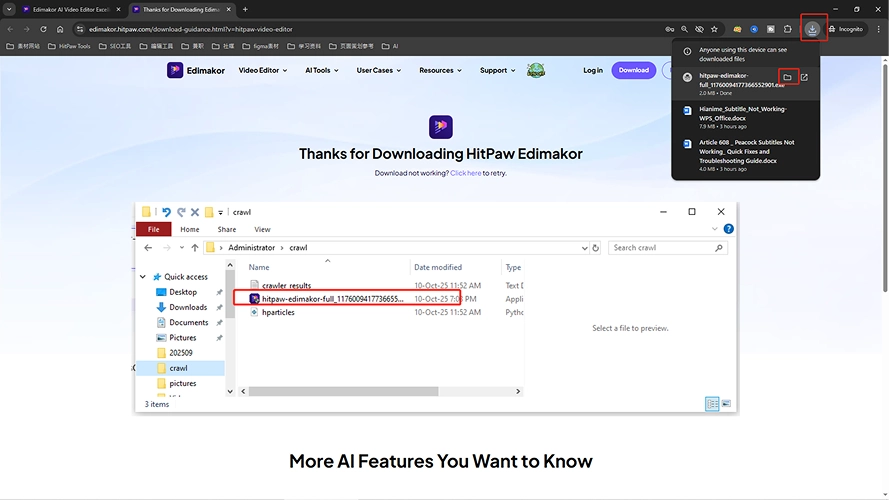
The file can also be found in the top-right corner of the browser.

-
After downloading, click on the file and start installing HitPaw Edimakor (Video Editor).
-
Click on “Install Setting” if you want to change the software language and the path to save the installation files. Once all settings are OK, click on the “Install” button to start the installation process.
-
When the installation process is over, a webpage of "Successful Installation" will appear. Click on the “Start” button and the home interface of HitPaw Edimakor (Video Editor) will show up.
-
After installation, you can start your video-editing journey. The software version you downloaded from the website is a free trial one. It will attach watermarks to your exported videos. Therefore, it is suggested that you should buy the software license to activate your account. After activation, you are sure to find a brand new world of video editing with HitPaw Edimakor (Video Editor)!
Part 2. Activate and Register
-
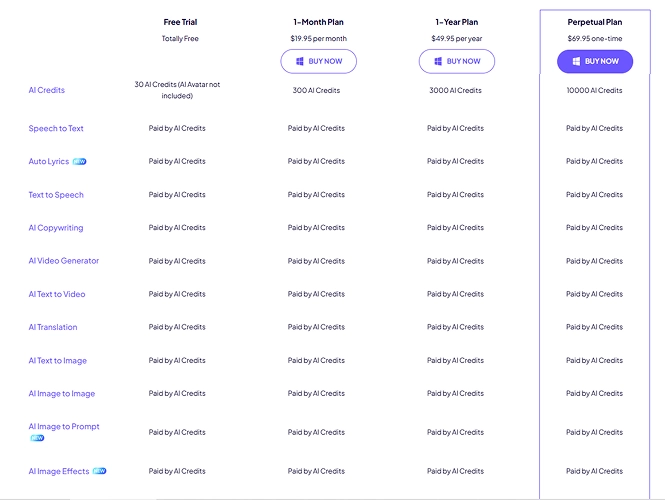
Visit the official website of HitPaw Edimakor (Video Editor) and click on the "Buy Now" button. Then you can choose to buy 1-month, 1-year or perpetual plan of using HitPaw Edimakor (Windows or Mac).
-
After purchase, a license email will be sent to you.

Notes:
Edimakor 3.1 introduces AI credits, a versatile credit management tool. You will receive 30 credits when you first log in to Edimakor 3.1 or a later version. Credit usage varies based on the complexity of the AI task. You can check the credit balance and history via the Edimakor Account.

-
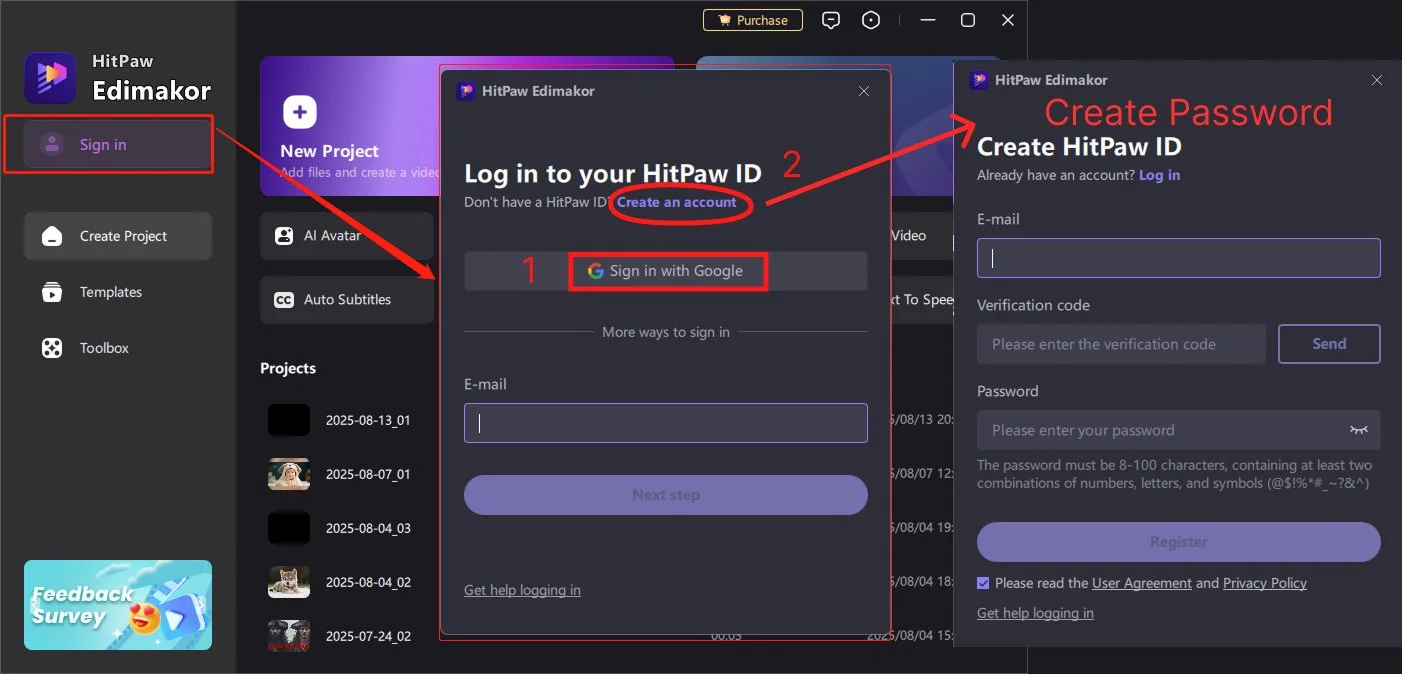
To activate your license, simply open the software and click "Sign in". You can register your account in two ways.
Part 3. Update
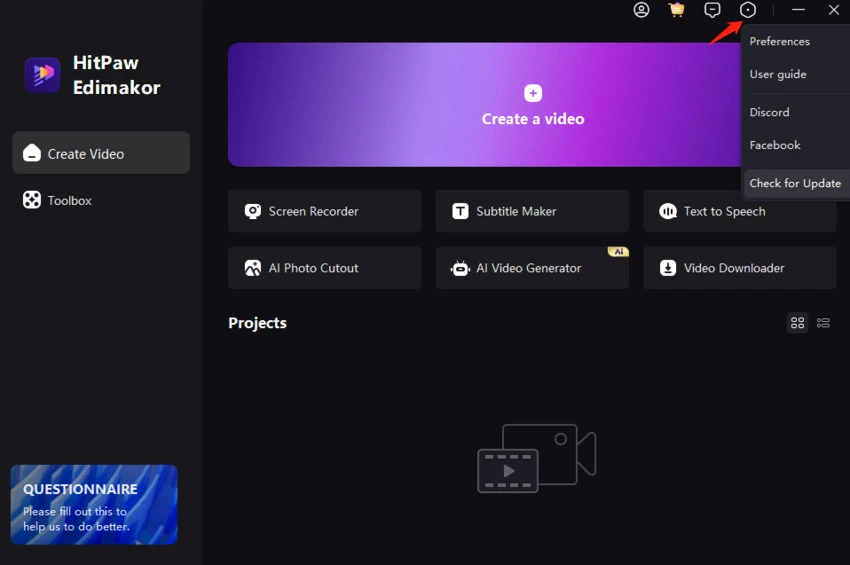
You can click on the settings icon and choose "Check for Update" to see whether there is a new version released by HitPaw software team. Any latest version will be notified to you in time!
Part 4. Uninstall
- Click "Start", and then select "Settings"> "Applications"> "Applications and Features".
- Select the software and then choose "Uninstall".
- Or you can just find out the software file and delete it directly. (If you encounter any difficulty in using HitPaw Edimakor (Video Editor), please feel free to contact us. We are always here to help you!)
Part 5. Interface Overview
There are 6 parts in this video editor's interface.
Menu:
All general settings are here.
Settings:
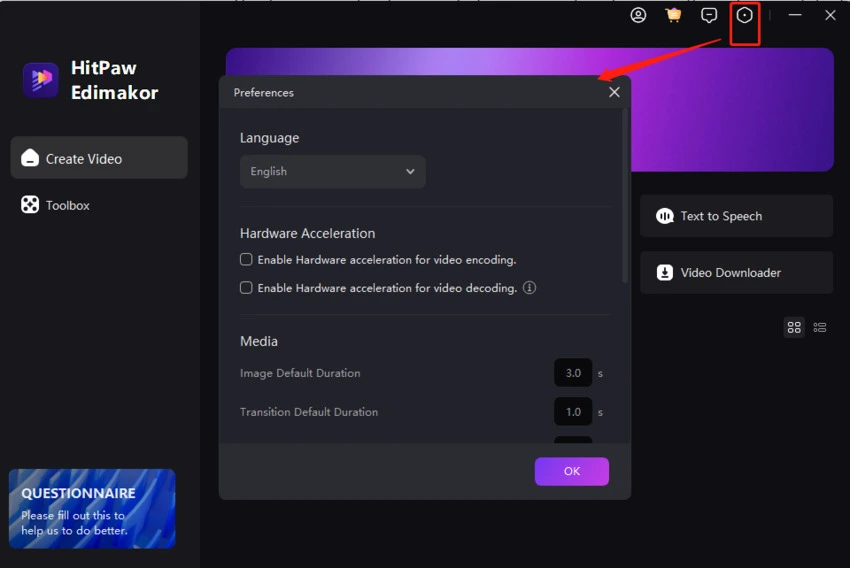
In settings, you can choose the preferences of this video editor.
Language:
Change the video editor to your language. It supports 16 languages: English, Français, Italiano, Indonesia, 日本語, Español, 한국어, Português, भारत, Türkçe, Nederlands, Deutsch, العربية, 中文简体, 中文繁體, Pусский.
Enable/Disable Hardware Acceleration:
Hardware acceleration can help you export and preview the video much faster. You can enable it or disable it whenever you want.
Media Default Settings:
Set the default duration of image, text, and transition. Project: Set default aspect ratio and frame rate of the project.
Shortcut:
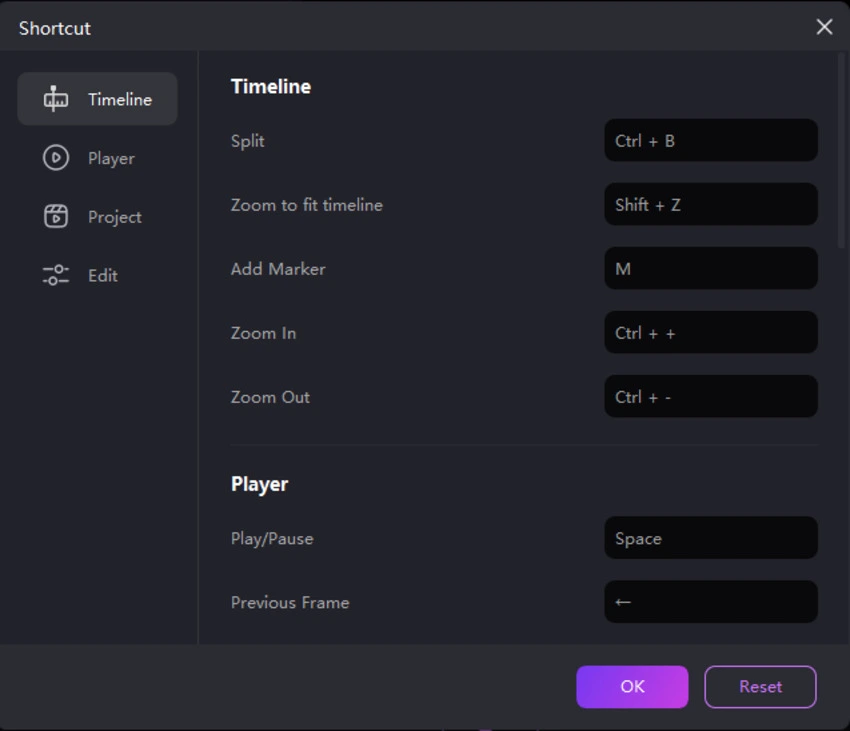
Here, you will find all default shortcuts. Also, HitPaw Edimakor (Video Editor) allows you to set the hotkeys to the ones you want. You only need to click the box after the feature and type on the keyboard to set shortcuts, then, click on the “OK” to save. If you do not want these changes, you can “Reset” to the default ones.
Help:
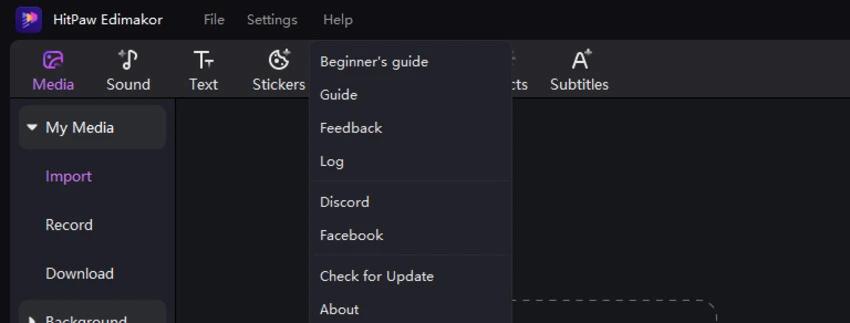
Get help from HitPaw Support Team whenever you meet any problems and check the details about HitPaw Edimakor (Video Editor).
Guide:
This will lead you to the guide of HitPaw Edimakor (Video Editor).
Feedback:
Contact the support team to report your issues or give your suggestions.
Log:
Click to find the log files of your video editor, then, upload them to the support team if you have any problems when using this software.
Check for Update:
Check whether there is a new version for HitPaw Edimakor (Video Editor).
About:
The information about HitPaw Edimakor (Video Editor) including the version you are using, HitPaw’s official website, copyright details.
Register:
If you already purchased one license. You can activate it here and enjoy the full version.
Media Library:
You can upload all your media files such as audio, video clips, images, and GIF here. Also, HitPaw provides different audio, text, stickers, transitions, and filters to you for free use.

Preview Window:
In the middle of this video editor, you can preview the video, image, or GIF you are editing or have added. Click on the “Play”, “Backward”, or “Forward” to watch. It also allows you to preview with different aspect ratios: 16:9, 9:16, 4:3, 1:1, 21:9. Click on the full screen icon, you can preview the video with the entire screen.
Properties Window:
When you play the media file, you can check its properties. And if you are editing these media files in the timeline, you can adjust some properties here.
Quick Toolbar:
Quick editing tools are here.
- Undo: Cancel the last edit for your media in the timeline.
- Redo: Restore the last edit for your media in the timeline.
- Delete: Delete the selected elements in the timeline.
- Split: Split the selected video or audio into two parts.
- Change speed: Slow down or speed up the video, audio, gif speed.
- Crop: Crop the unwanted part of the video, image, and gif.
- Connect: Enable or disable the automatic connection between the main video with other media.
- Preview line: Preview the video you are creating on the timeline with it. You can disable or enable it based on your needs.
- Zoom in: Zoom in to check each frame in detail.
- Zoom out: Zoom out to decrease the display length of all media in the timeline.
The usable editing toolbars will be different when you are editing different media files.
Timeline:
The timeline allows you to edit your media files.
Main video track: The track with the gray color is the main video track. You can put your main video here. Please note there is only one main video track in this video editor.
Unlimited video tracks: You can add unlimited video tracks below or above the main track and add video, audio, pictures, GIF, effects, transitions, etc here.
Eye icon: This is for showing or hiding the corresponding track. Click to switch the status.
Audio icon: You can show or hide the audio via this function.

Part 6. Keystrokes
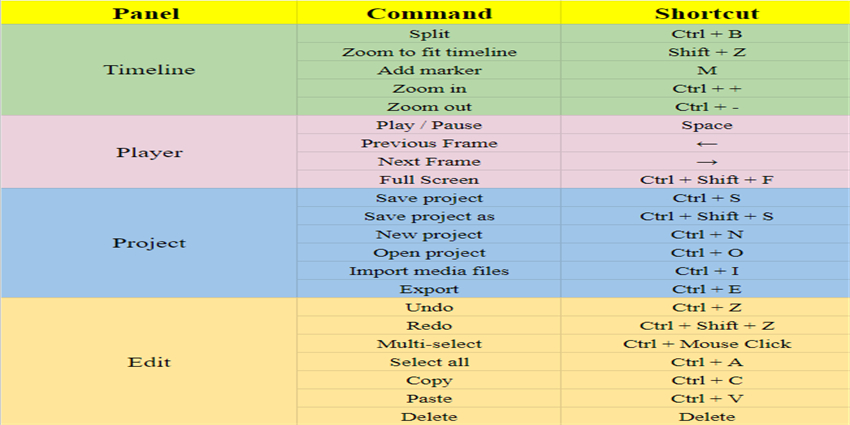
HitPaw Edimakor (Video Editor) provides default keystrokes, here is the list.
Part 7. Open/Create A Project
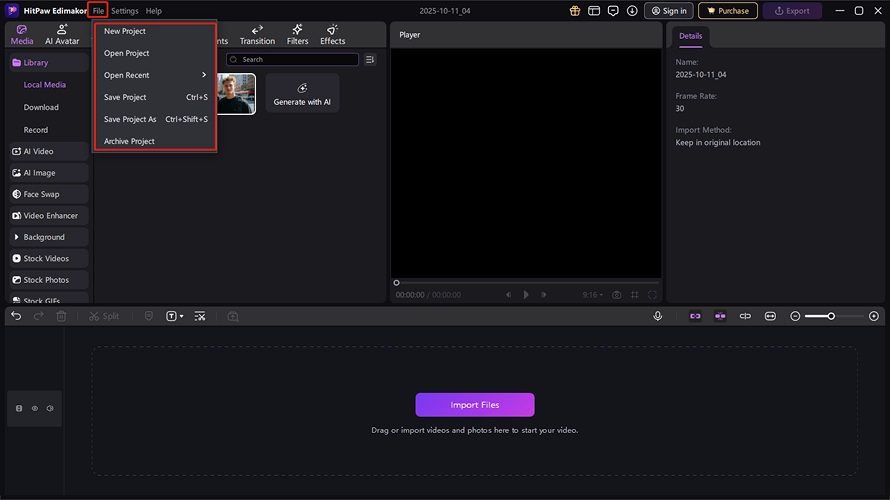
Open the software and click on "Start a new project" to start editing videos. If you use HitPaw Edimakor (Video Editor) for the first time, several guidance tips will automatically show up to help you. On the main interface, click on "Drag & Drop files" to import your video, audio and photo materials.
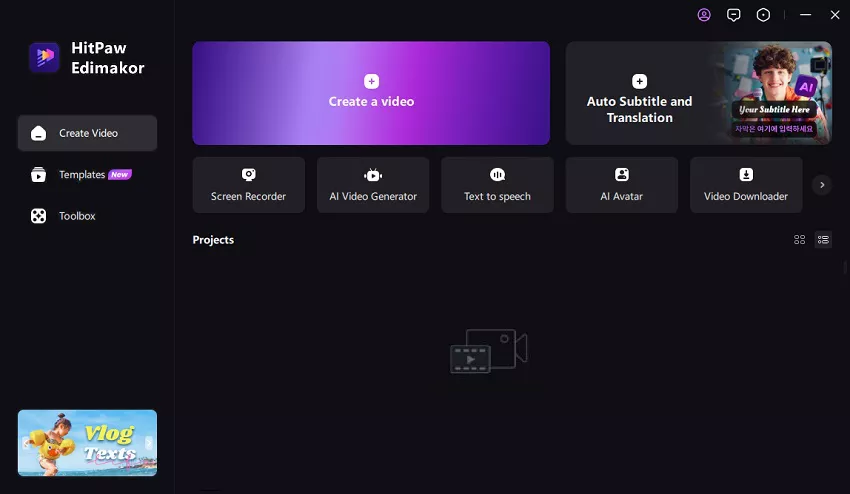
If you have already edited any video with HitPaw Edimakor (Video Editor), you can click on open project to choose your edited file or just simply select the edited video from the recently opened list below.
Part 8. Import Media Files
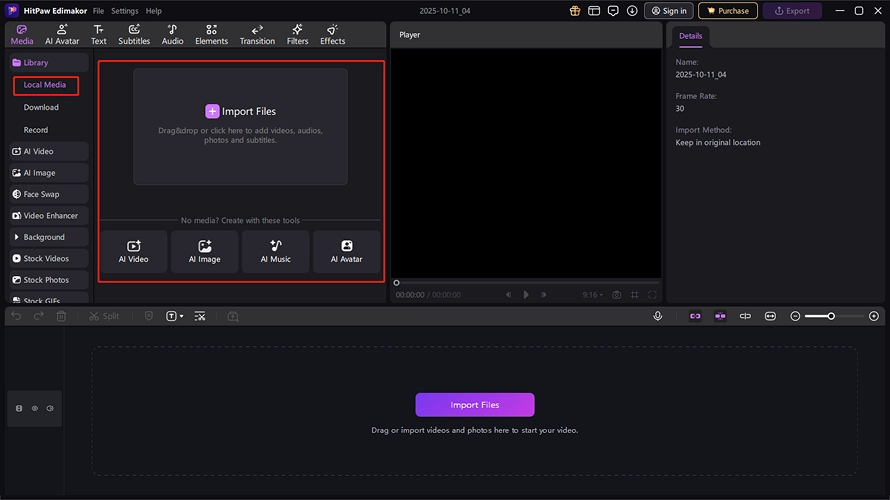
HitPaw Edimakor (Video Editor) supports importing videos, audio, photos and GIFs.
1. Upload Media Files
Click the “+” button to select media files to import, or drag and drop files to upload. Then, all videos, audio, photos and GIFs will be shown in "My Media" column.
2. Add More Media Files
If you want to add more media files after importing one, you can drag files directly or click “+” to import them.
3. Categorize Media Files
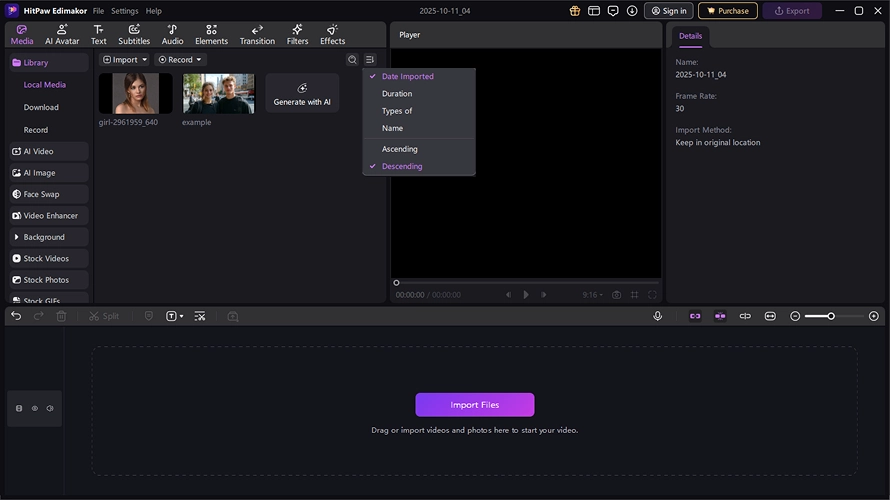
You can categorize the media files in terms of date imported, duration, and types. And then you can list them via ascending or descending.
4. Delete Media Files
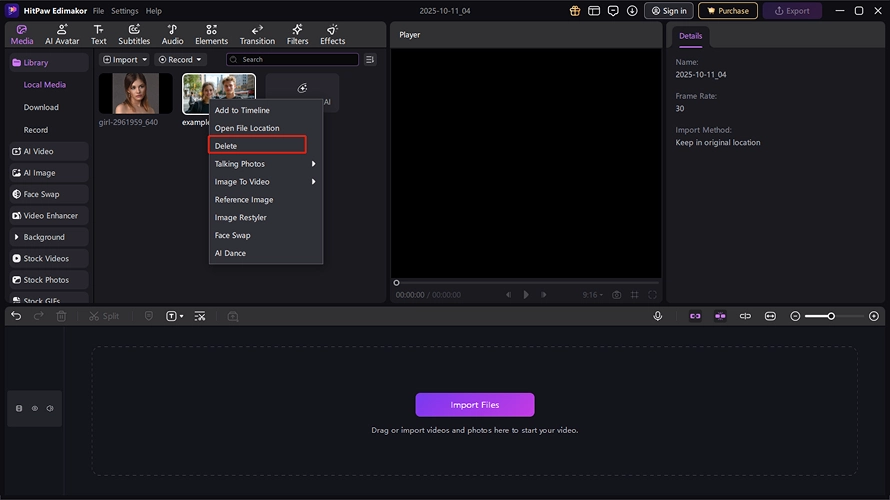
If you upload the wrong file, you can right click and delete it.
