Get ready to have some fun with Edimakor AI Image Generator! This tutorial will guide you through using its three core features: Text to Image, AI Reference Image, and Image Restyler, helping you easily create stunning visuals.
Part 1: Launching Edimakor AI Image Generator
Launch Edimakor and navigate to the major panel offering the AI Image Generator.
Step 1. Start a New Project or Open an Existing One
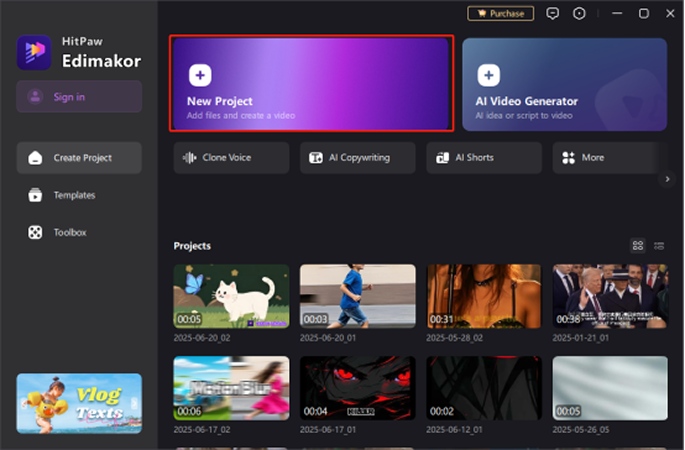
Launch HitPaw Edimakor. On the main screen, you can either click "New Project" to start a fresh video project or select an existing one from the "Projects" list below.
Step 2. Access the AI Image Generation Feature
Once you're in the editing interface, find and click "AI Image" on the left sidebar menu. Then, click it to access the AI Image Generation functions.
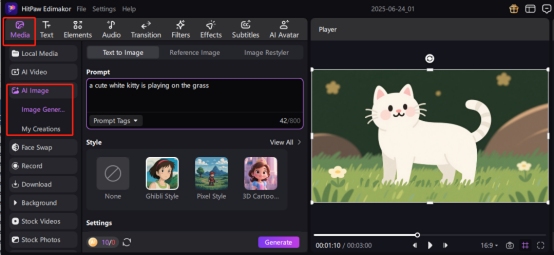
Or, you can find "Text to Image", "Reference Image", or "Image Restyler" directly in the "Toolbox" at the left menu on the main screen.
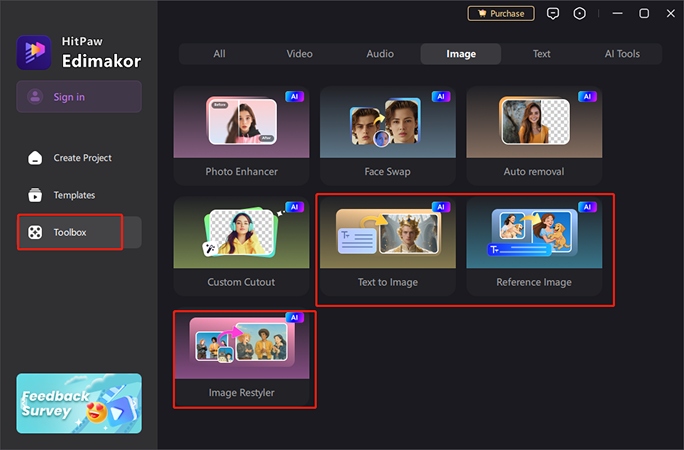
Step 3. Choose Your Generation Mode
No matter how you enter the AI Image Generator, you can switch the modes there anytime.
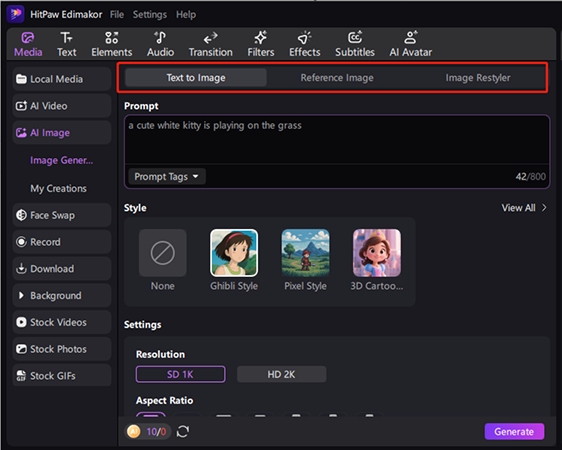
Part 2. How to Use Edimakor AI Text to Image
Edimakor AI Text to Image feature allows you to create entirely new images by simply typing in a text description.
Step 1. Pick an AI model and Enter Your Prompt
Under the "Text to Image" tab, you'll find a box. Click it and select an AI model as you need. Here are some choices: Google Nano Banana, Nano Banana Pro, Seedream 3.0 and Seedream 4.0. Then, type your description or create one with the AI prompt generator in the textbox of what you want the AI to generate. The more specific your description, the better the results will be.
If you pick the Google Nano Banan Pro AI model:
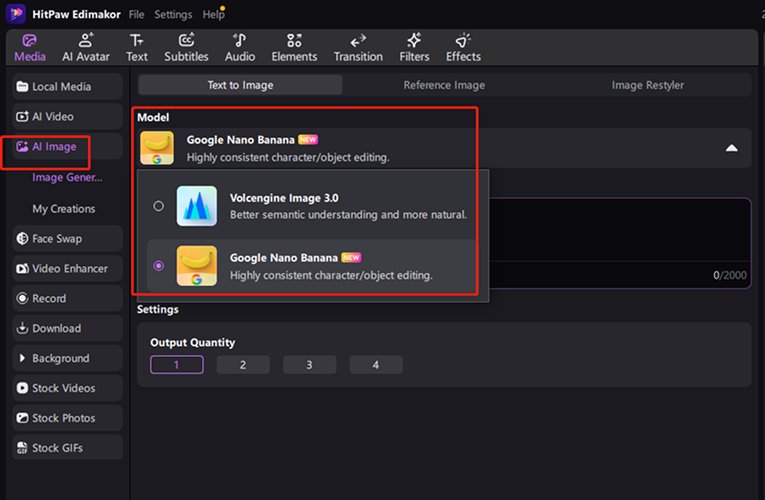
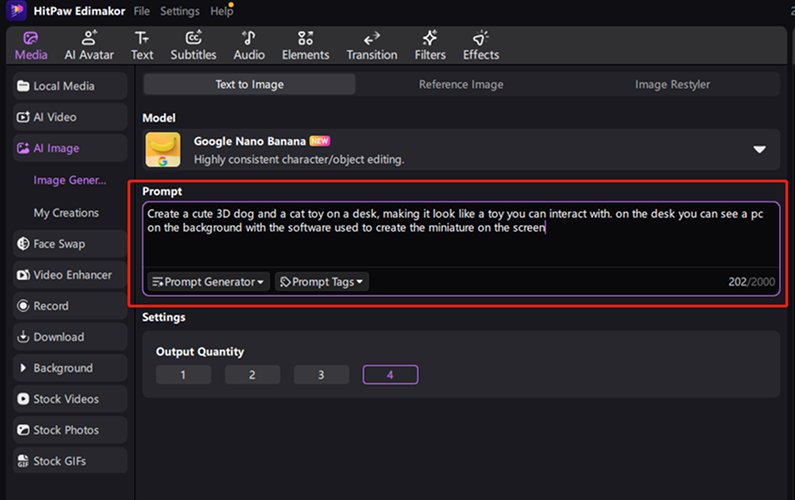
Step 2. Select an Image Style for Volcengine image 3.0
For Volcengine image 3.0, you can choose different "Style" options to influence the artistic look of your generated image below the Prompt. Pick one from the various style thumbnails (like "None," "Ghibli Style," "Pixel Style," "3D Cartoon," etc.) to apply preset aesthetics.
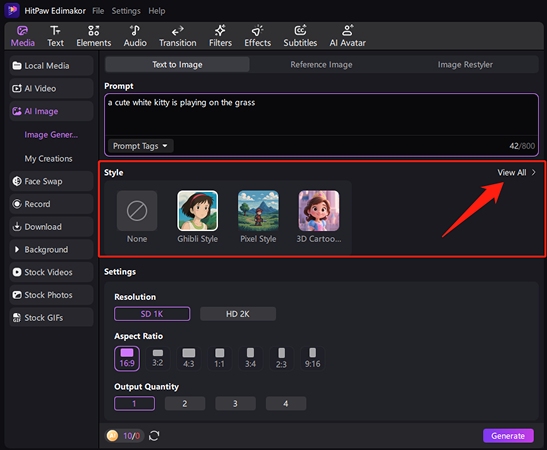
If you want more styles, just click "View All" to explore a broader style library.

Step 3. Adjust Image Settings
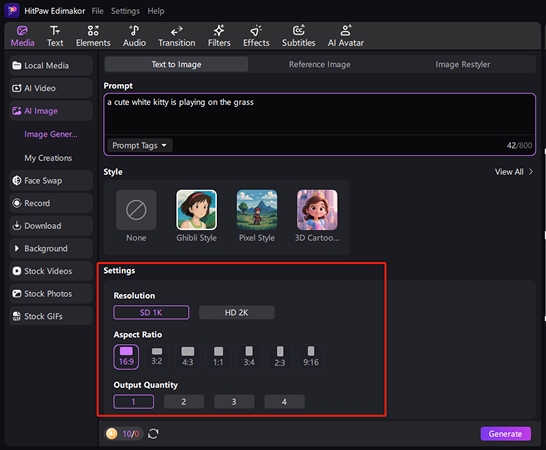
In the "Settings" area, you can customize the following parameters:
Aspect Ratio: Choose the dimensions of your image, such as 16:9, 3:2, 4:3, 1:1, etc. Output Quantity: Select how many images you want to generate at once (e.g., 1, 2, 3, or 4).
Step 4. Generate Your Image
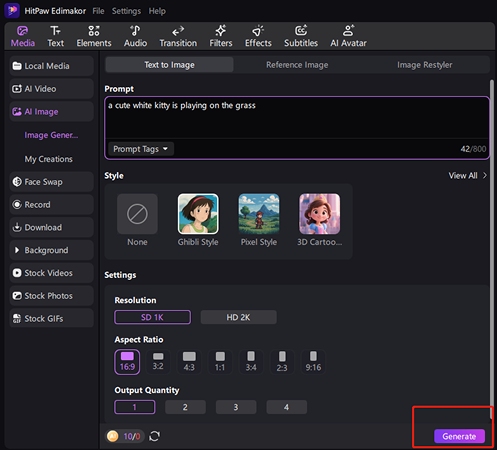
Once your settings are configured, click the "Generate" button in the bottom right corner. The AI will then start generating images based on your prompt and settings.
Part 3: How to Use Edimakor AI Reference Image
This feature is a text to image generator based on image. It lets you upload a reference image and combine it with a text description to generate new images. The AI will consider the composition or elements of your original reference.
Step 1. Smart Reference Image Generator
Within the "Reference Image" feature, you'll see some AI models like Google Nano Banana, Nano Banana Pro, and Seedream.

Step 2. Upload Your Reference Image
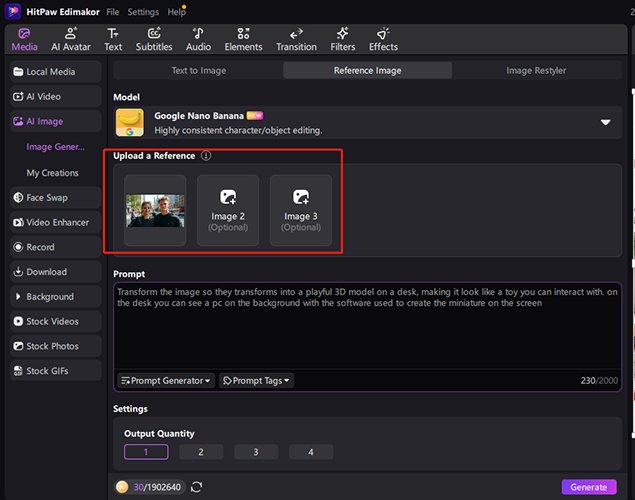
Here, you can upload up to 10 images for better result.
Step 3. Enter Your Prompt
Once uploaded, put your detialed description to the tool.
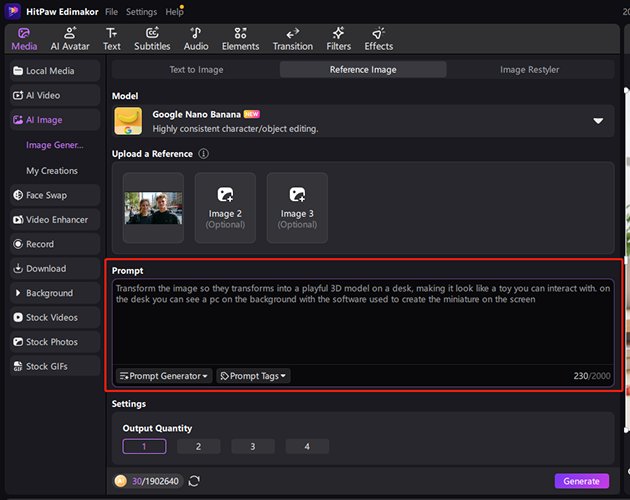
Step 4. Hit "Generate" to Recreate the Image
With your settings ready, click the "Generate" button in the bottom right.
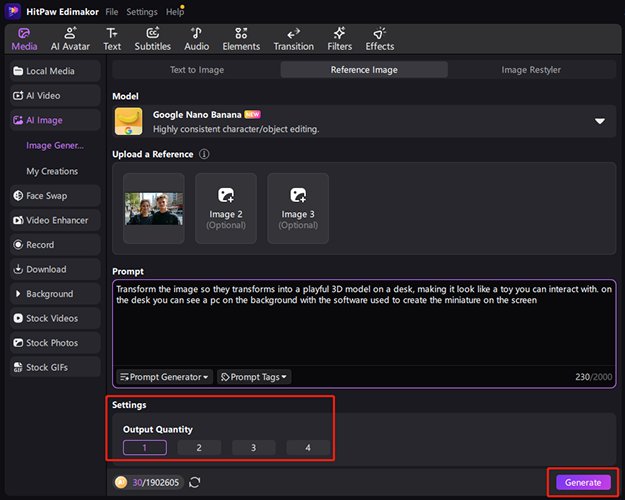
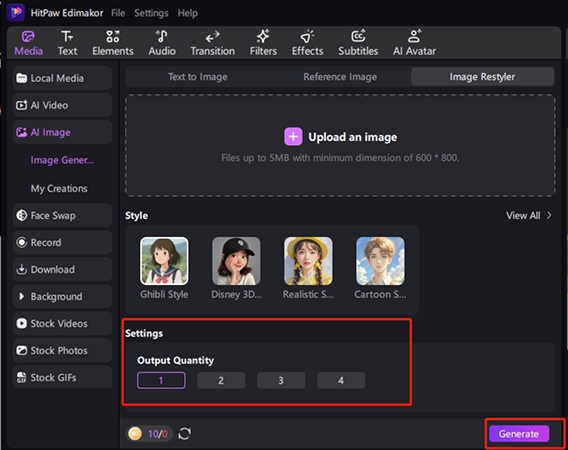
Part 4: How to Use Edimakor AI Image Restyler
This feature transforms your uploaded image into various artistic styles.
Step 1. Select the "Image Restyler" Tab
From the main AI Image Generator interface, navigate to the top row of tabs and click on "Image Restyler."
Within the "Image Restyler" panel, you'll find an intuitive area designed for uploading your source image. You can usually drag and drop your desired picture directly into this area, or click a prominent "Upload Image" or similar button to browse your computer's files.
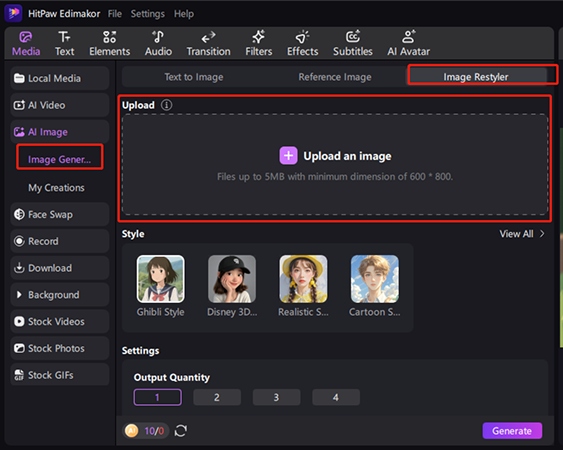
Step 2. Choose a Style from the Preset Library
Once your image is uploaded, the real fun begins! Below the uploaded image preview, you'll see a diverse "Style Library" (or similar section) filled with various artistic presets. These presets can range widely, mimicking styles such as: Ghibli Sytle, 3D, Realistic, Cartoon, Cyberpunk, Mokoto Boy, Clay, and Chinese Ink Style, etc.
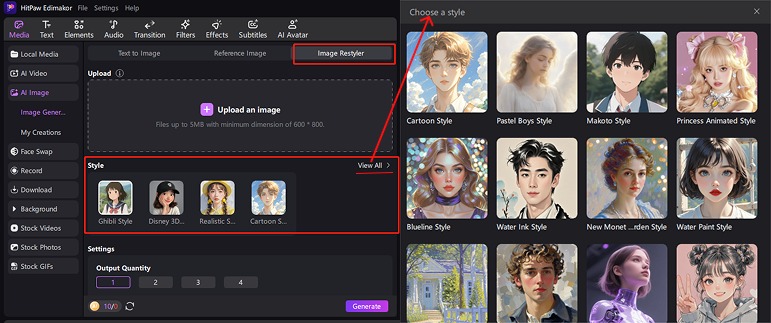
Step 3. Generate Your Styled Image
After selecting your preferred style, locate the "Generate" button, typically found in the bottom right corner of the interface.
Part 5: Advanced Editing Your Generated Images
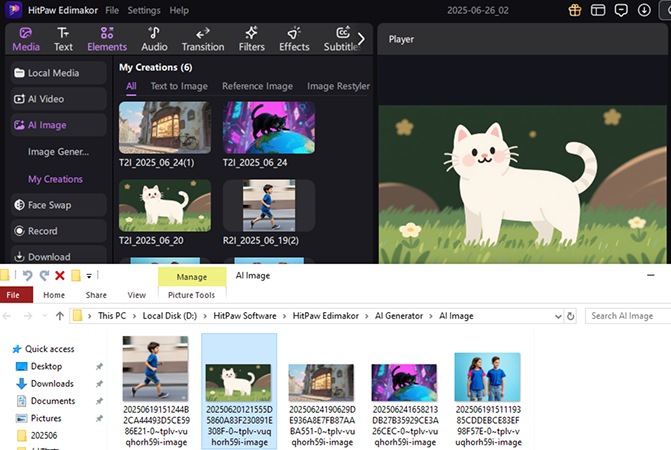
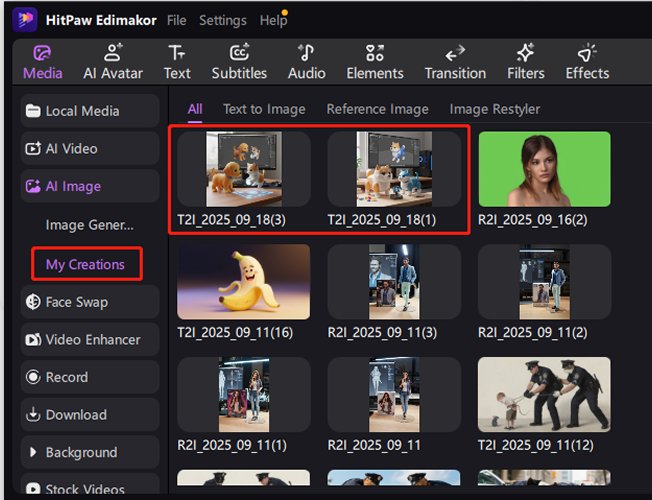
All images created with the AI Image Generator are saved in the "My Creations" area. You can edit it by add it to the timeline in Edimakor video editor with ease. Here are the detailed steps:
Step 1. View Your Creations
Click "My Creations" on the left sidebar to see all the images you've generated.
Step 2. Image Management and Editing
In "My Creations," right-click on a generated image to open an options menu, where you can edit the image in the following ways.
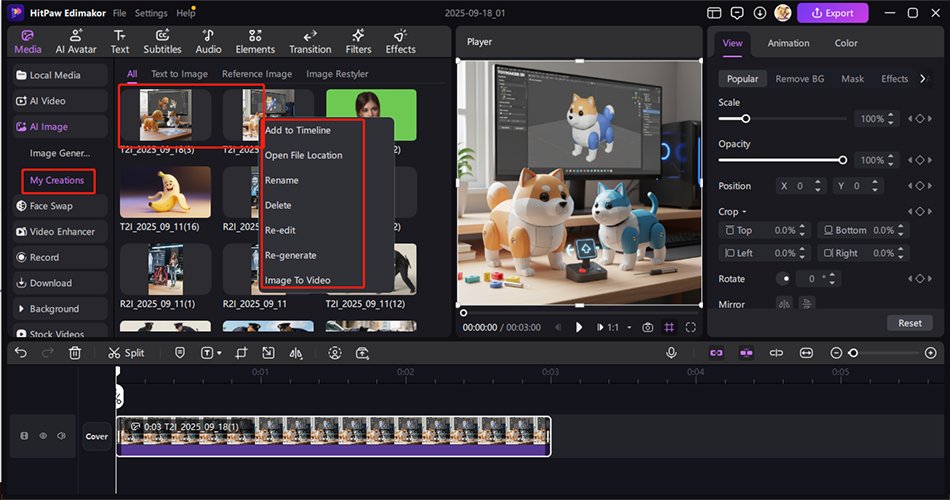
- Add to Timeline: Incorporate the image into your video editing timeline as part of your video.
- Open File Location: All images is saved on your computer when it is generated.

- Rename: Change the image's file name.
- Delete: Remove the image from the list.
- Modify: Reopen the generation interface to edit or adjust the image again.
- Re-generate: Create a new version of the image using the same settings.
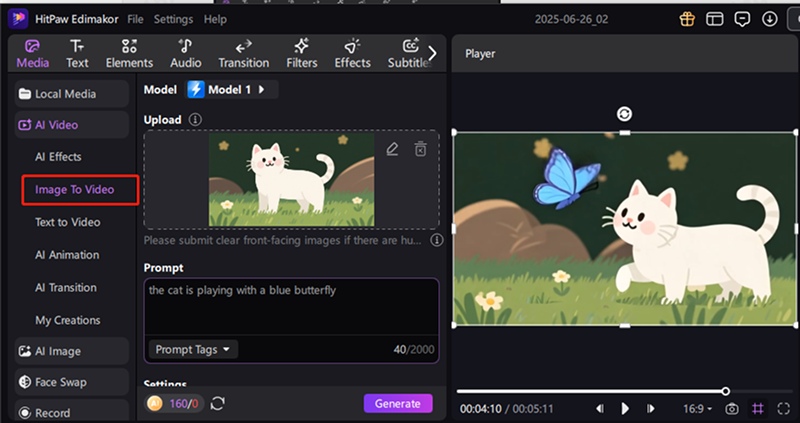
- Image To Video: Convert your static image into a simple video clip.

Step 3. Advanced Video Editing
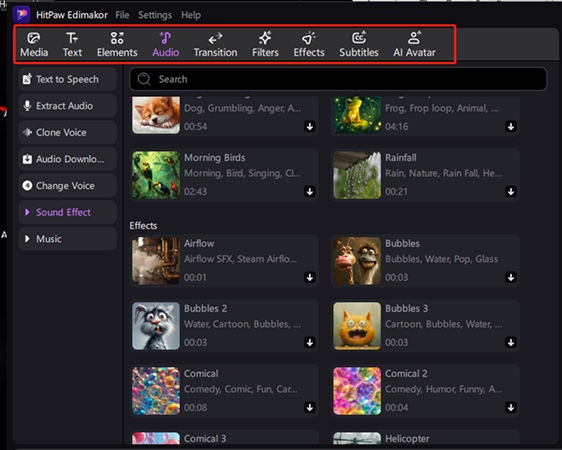
After adding an image to your timeline or turn image to video, you can use HitPaw Edimakor's powerful video editing features for further refinement. The top menu bar offers a rich set of tools like "Media," "Text," "Elements," "Audio," "Transition," "Filters," "Effects," "Subtitles," and "AI Avatar" to help you integrate your images into videos and create even more compelling content.
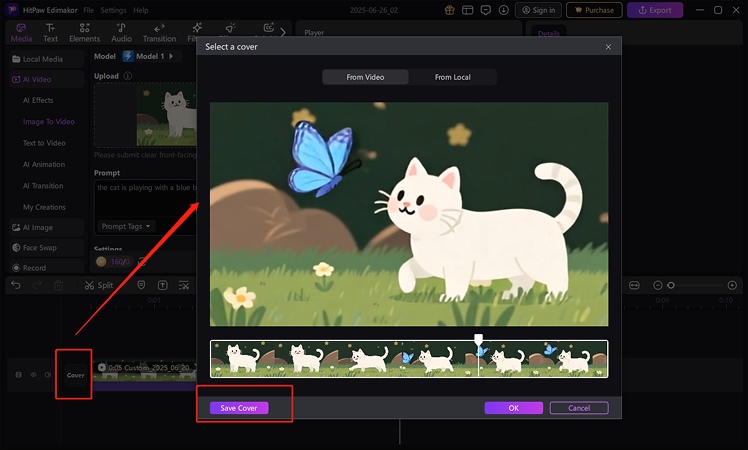
You can also save an image from the video by making a cover on the timeline.
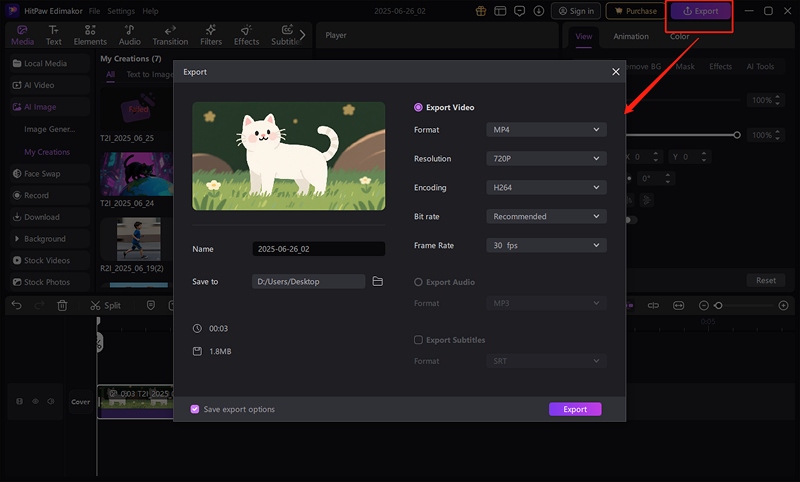
Step 4. Export the Video
Finally, export what you create with this amazing AI image and video generator to share and win applause!
With these steps, you've mastered the basics of the HitPaw Edimakor AI Image Generator. Now, go forth and unleash your creativity, transforming words and images into endless possibilities!
