Subtitles are a medium that bridges the gap between multiple languages. Burned-in subtitles, also known as hard-coded subtitles, are permanent subtitles that cannot be turned off by the user. The usefulness of hard-coded subtitles comes into play when some players or websites cannot automatically recognize and display subtitles (i.e. soft subtitles).
Many creators create subtitles and embed them into videos using unique and attractive styles and fonts. In this article, we will discuss burning subtitles and explain how to burn subtitles into videos using different tools.
Part 1: What are Burnt-in Subtitles
Burnt-in subtitles are not separate subtitle files, but are part of the video and cannot be turned off. This ensures that all viewers can see the subtitles, no matter what device or platform they are using. Such subtitles are guaranteed to be in sync with the video and error-free because they are embedded by the creator themselves.
Part 2: How to Burn Subtitles into Videos
We’ll now talk about how to burn in subtitles to videos. There are many ways to accomplish this task, however, we’ll mainly talk about two most successful methods. One is by using HitPaw Edimakor, while the other is the VLC media player.
1. Burn Subtitles into Videos with Edimakor
HitPaw Edimakor is an amazing video editing platform that has the ability to add subtitles to your videos. While video editing is its main strength, we can’t ignore that it also has AI capabilities for subtitles. Anyway, why choose Edimakor for burnt-in subtitles? There are several compelling reasons:
Highlights
- No need for manually adding and hardcoding subtitles. Edimakor automatically recognizes the audio in your video and generates subtitles. Manual edits are also supported.
- Customize subtitles to your preference by choosing the style, font, size, color, and more.
- Generated subtitles are automatically embedded in your video upon export. No need other steps.
- You also have the option to export the subtitles as a separate file.
- While Edimakor can automatically add subtitles, you can also import subtitles from a local SRT file and add them to your videos.
- With Edimakor, you can even automatically translate subtitles to other languages and show bilingual subtitles on your videos.
Here's how you can burn in subtitles to your videos using Edimakor Auto Subtitles feature:
-
Step 1: Install Edimakor and once the programs runs on your computer, click on the Auto Subtitles for Videos option.

-
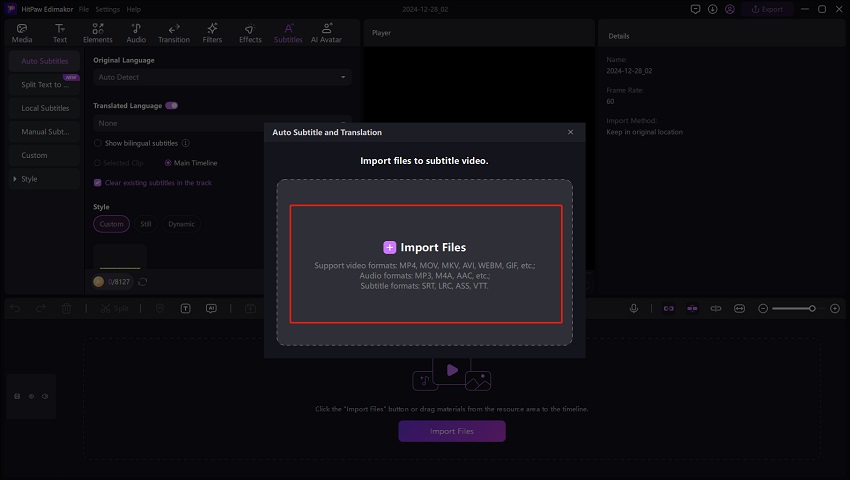
Step 2: Now import the video to which you want to burn captions to.

-
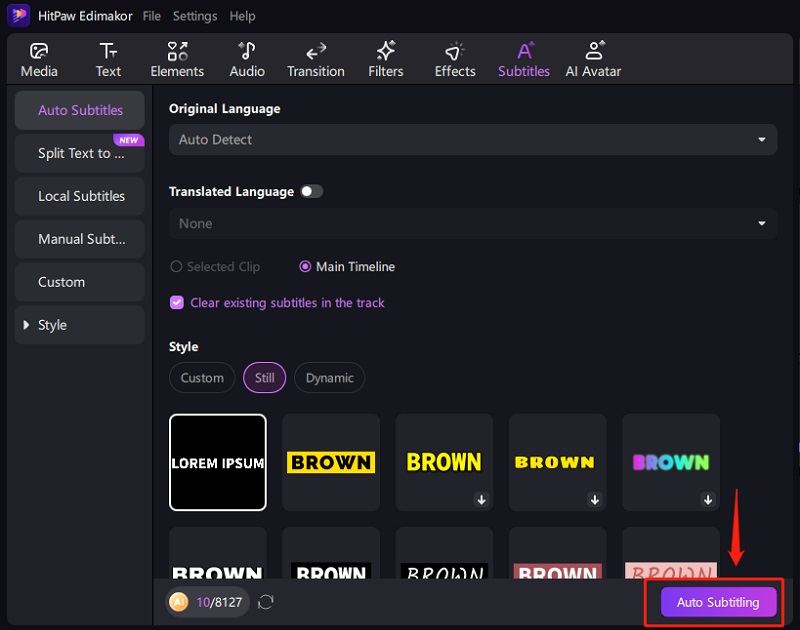
Step 3: Click on the Subtitles button from the top horizontal tab and click on Auto Subtitling button.

-
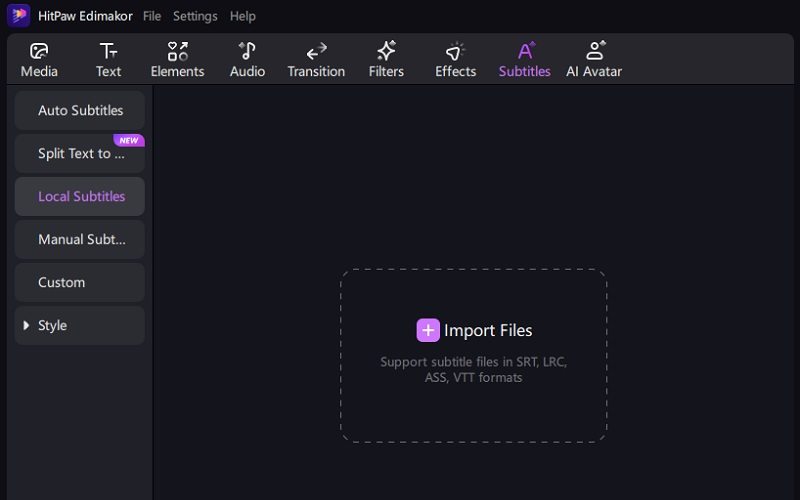
Step 4: If you already have the subtitles created in a separate SRT file, you can also upload them from the Local Subtitles sections.

-
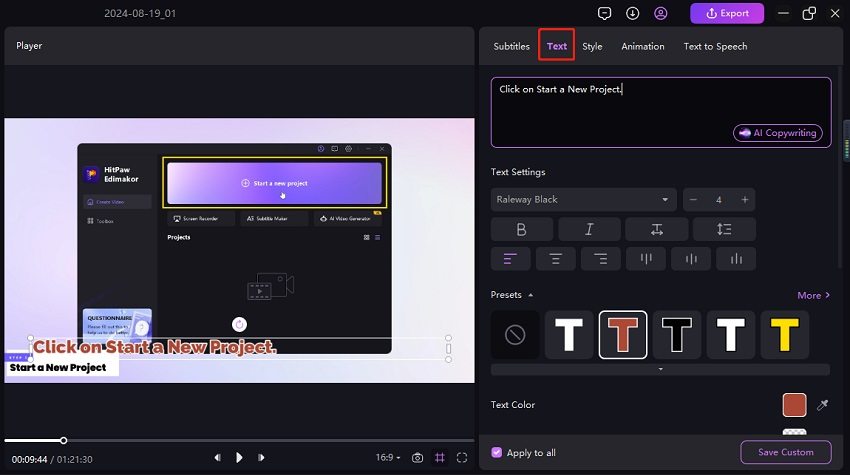
Step 5: Next, ensure that your subtitles look exactly like you want them to. You can edit various components.

-
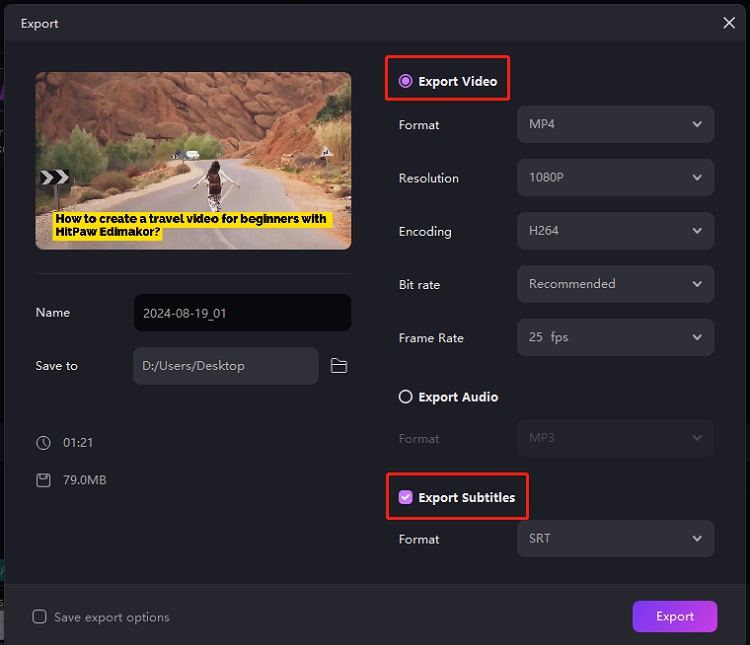
Step 6: Once the subtitles are finalized, click on the Export button in the top right corner and the video is now exported with the subtitles hard coded into it.

2. Burn Subtitles into Videos with VLC
VLC media player is one of the most common free media players. Besides being able to play any kind of video file, it’s also capable of harcoding subtitles to your videos. Since the burning in process is not automatic and requires more steps, follow these steps below:
-
Open VLC media player on your computer and press Ctrl + S to open the stream dialogue.
-
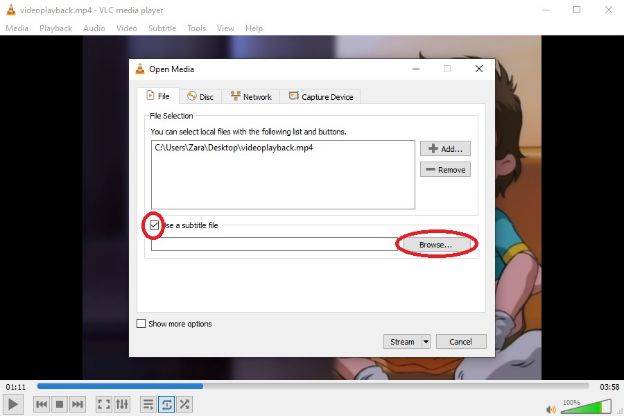
Now, add the video and the subtitle file. Click on the Use a subtitle file box to add the subtitle file. Then, click on Stream and then hit Next on the next screen.

-
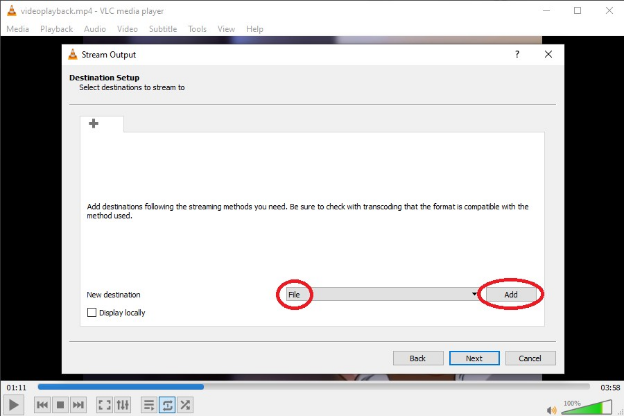
This will take you to the following screen. Here select the output destination and your file name. Change the option to File and click on Add. Make sure to add the desired file format at the end of the name like “samplevideo.mp4”.

-
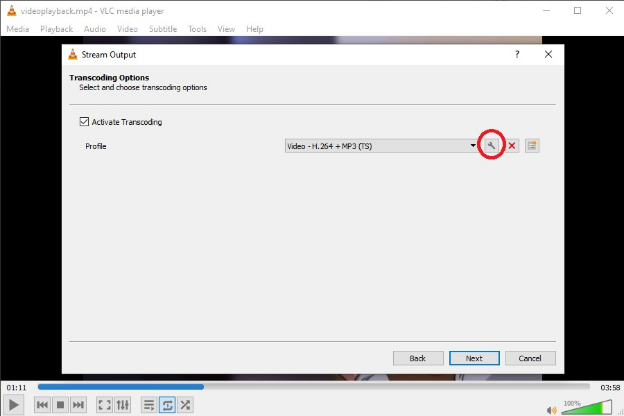
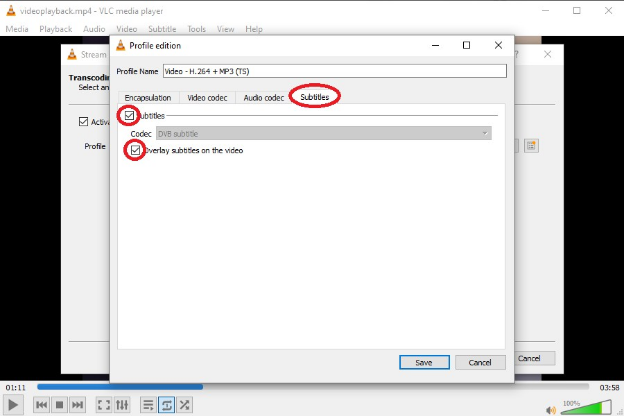
Tick the box to activate transcoding. Next, choose the profile and then click on the wrench icon.

-
Go to Subtitles and make sure that the subtitles box and overlay subtitles box are ticked.

-
Click on Save, hit next and wait until the procedure completes. This is how you burn subtitles into video VLC.
Part 3: FAQs on Burnt-in Subtitles
-
Q1. What are the Benefits of Burnt-in Subtitles?
A1: The main benefit of hard-coded subtitles is that it is always visible. No matter what device or media player the video is played on, these subtitles will not disappear.
-
Q2. What is the difference between burnt-in subtitles and SRT files?
A2: First, SRT files are external files containing text and timestamps, while burnt-in subtitles are encoded within the video itself. Second, SRT files can be turned off or on in a media player. This is not the case with burnt-in subtitles. Third, SRT files rely on external support from the media player, while burnt-in subtitles will always work as long as the video is playing.
And when embedding subtitles, fonts, colors, designs and even transitions can be customized, and the need for media player compatibility is eliminated.
Conclusion
Burnt-in subtitles are a reliable way to ensure that subtitles on your videos are never turned off and that everyone who ever watches your video can enjoy the benefits of subtitles on your video. While some people say that they like to be in control and be able to turn subtitles off at any time, if you still want to hardcode and burn in subtitles into video, use HitPaw Edimakor to do this job automatically.
Home > Subtitle Tips > What is Burnt-in Subtitles and How to Burn Subtitles into Videos
Leave a Comment
Create your review for HitPaw articles





Yuraq Wambli
Editor-in-Chief
Yuraq Wambli is the Editor-in-Chief of Edimakor, dedicated to the art and science of video editing. With a passion for visual storytelling, Yuraq oversees the creation of high-quality content that offers expert tips, in-depth tutorials, and the latest trends in video production.
(Click to rate this post)