With Handbrake’s intuitive interface, adding subtitles to videos in MP4 and MKV format is simple and efficient. Follow along to learn how to add subtitles with Handbrake and explore alternative tools for automatic subtitling.
Part 1: What Is Handbrake?
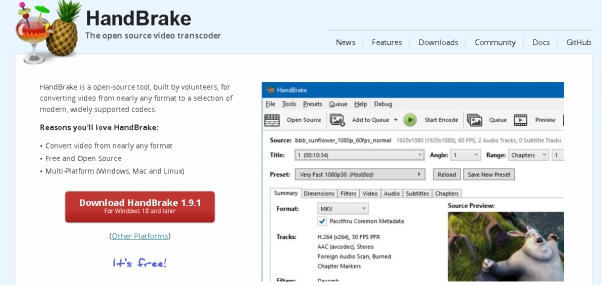
Handbrake is an open-source, free video transcoder that lets users add features like subtitles, optimize video quality, and convert videos to various formats. It provides adjustable subtitle choices for better video playback, can open a very wide range of video formats, like MP4, MOV, AVI, and MK, and export them in MP4 (.m4v), MKV, WebM formats.
Part 2: How to Add Subtitles to Videos with Handbrake
Adding subtitles to videos with Handbrake is straightforward. You can manually add external subtitle files or enable closed captions. Here’s how to add subtitles to both MP4 and MKV files.
-
How to Add Subtitles to MP4 Files Using Handbrake
To add subtitles to mp4 handbrake, you can follow these steps:
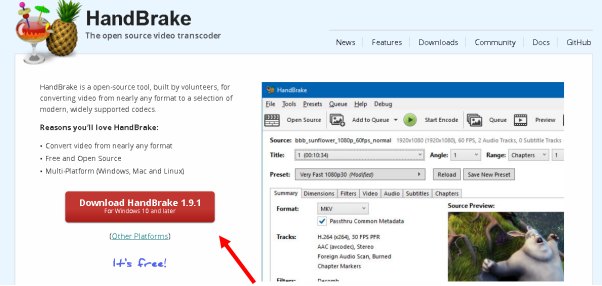
Step 1: Download and Install Handbrake
Visit the official Handbrake website and download the software compatible with your operating system. Install the program following the on-screen instructions.

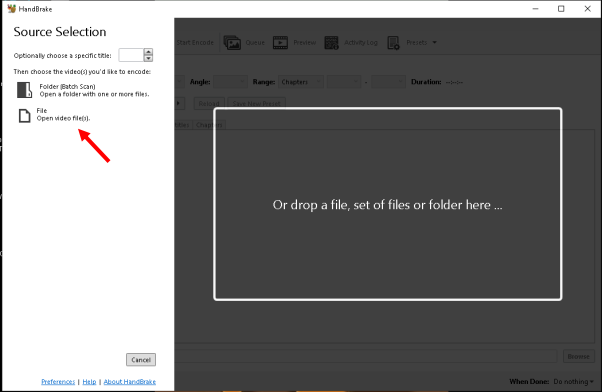
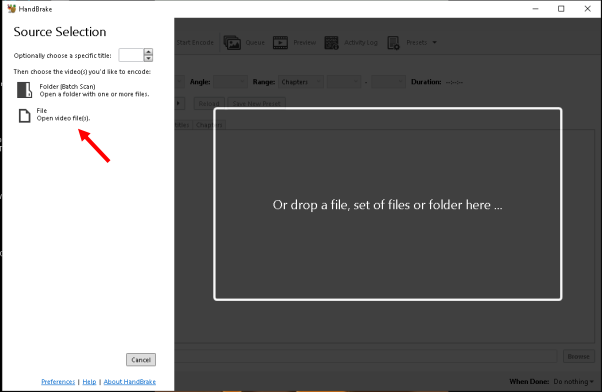
Step 2: Open the MP4 Video in Handbrake
Launch Handbrake and load your MP4 file by clicking Open Source and selecting the video from your computer.

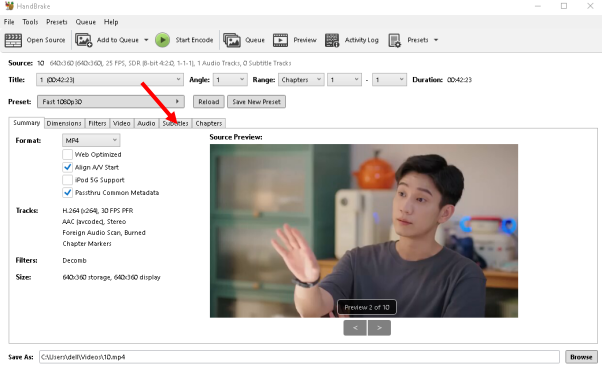
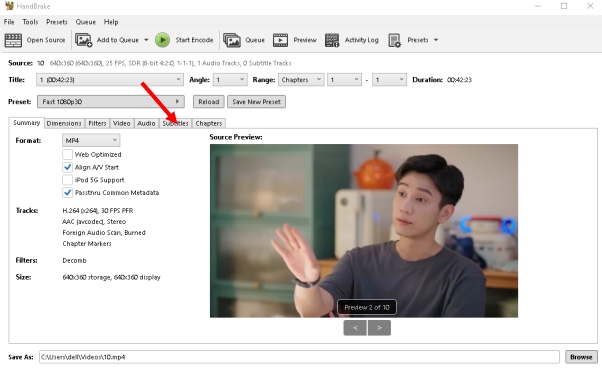
Step 3: Click on the Subtitles Tab
After opening your video file in Handbrake, navigate to the Subtitles tab located at the top of the interface. This section allows you to manage all subtitle options for your video. Here, you can add external subtitle files, select pre-existing subtitle tracks, or configure advanced settings.

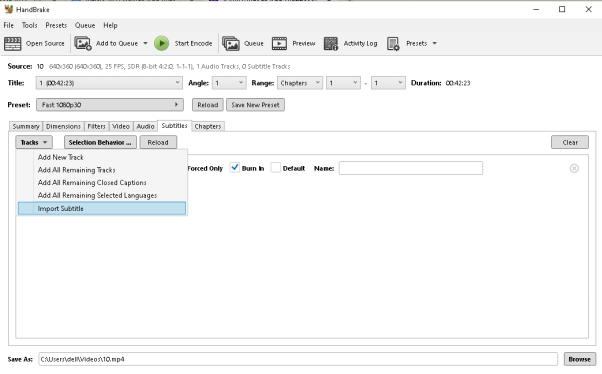
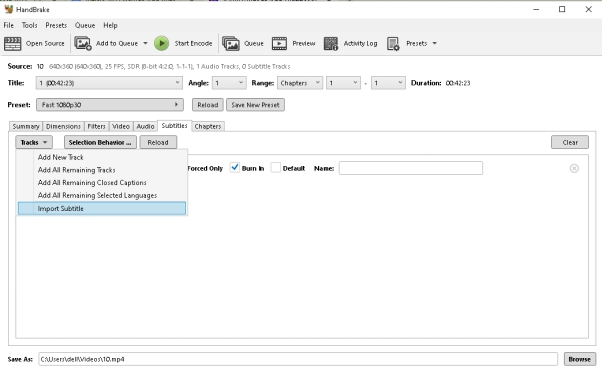
Step 4: Add the Subtitle File
Once you're in the Subtitles tab, click the Import Subtitle option to upload your subtitle file. SRT is the most common format, but Handbrake also supports other handbrake subtitle options like VobSub and SSA.

Step 5: Adjust Subtitle Settings
Within the Subtitles tab, you’ll see options for handbrake subtitle settings. You can select the appropriate language track, specify the font size, and adjust the default position of the subtitles. If your video has multiple subtitle files, Handbrake allows you to prioritize which one is displayed.
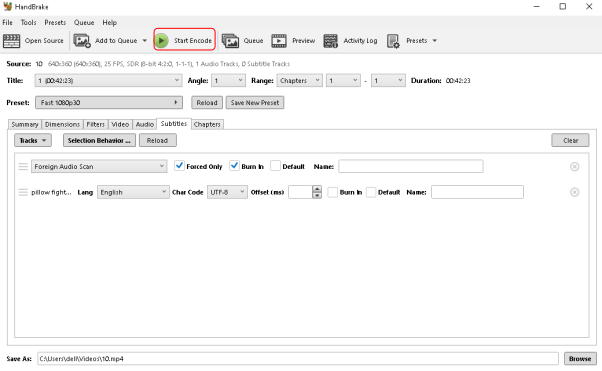
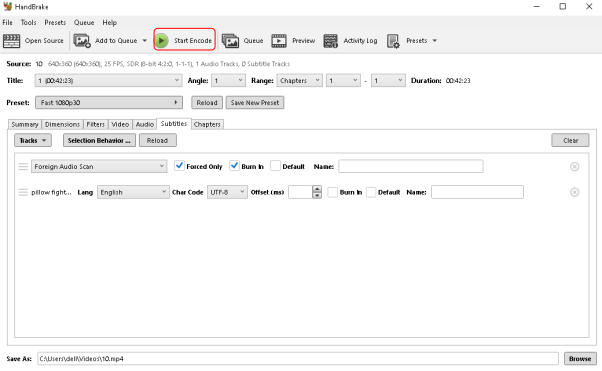
Step 6: Encode the Video with Subtitles
Once all settings are configured, click the Start Encode button to embed the subtitles into your MP4 file. Handbrake will begin processing the video and save it to your designated output folder.

-
How to Add Subtitles to MKV Files Using Handbrake
To add subtitles to MKV videos in Handbrake, you can follow these steps:
Step 1: Open the MKV Video in Handbrake
Launch Handbrake and select your MKV file by clicking the Open Source button. You can drag and drop the file into the interface or browse through your folders.

Step 2: Click on the Subtitles Tab
After loading your MKV file, switch to the Subtitles tab in Handbrake. These handbrake subtitle options offer all the subtitle customization options for your MKV video. Whether you're embedding existing subtitles or adding new ones, this tab serves as your control centre for managing all text overlays.

Step 3: Add the Subtitle File
Click the Import Subtitle button to upload the subtitle file of your choice. Make sure the file matches the video's language, context, and scene transitions to avoid synchronization issues.

Step 4: Adjust Subtitle Settings
Now, it's time for handbrake subtitle settings. In the Subtitles tab, choose the language for your subtitles and adjust the display options. You may need to tweak the font size, position, or style for readability. If your MKV file already has internal subtitles, you can choose to override or merge them with the newly added track.
Step 5: Encode the Video with Subtitles
Once the subtitles are added and settings are fine-tuned, click the Start Encode button. Handbrake will process the MKV file and embed the subtitles into the video. The encoding process time depends on the length and resolution of the video.

Part 3: How to Sync Subtitles in Handbrake
Subtitles may sometimes appear out of sync. Use these steps to learn how to sync subtitles in handbrake:
Step 1: Identify the Subtitle Delay
Play the video with the added subtitles and observe any delays or mismatches in timing. Take note of how far the subtitles are behind or ahead of the audio to determine the exact correction needed. This step is crucial for ensuring a smooth viewing experience.
Step 2: Adjust the Subtitle Delay
Navigate to the Subtitles tab in Handbrake. Use the Offset option to manually adjust the subtitle timing. Enter a positive or negative value to either delay or advance the subtitles as needed. Carefully test the adjustments by playing short sections of the video to ensure the text appears at the correct time.
Step 3: Fine-tune the Subtitle Alignment
Once you've adjusted the delay, preview the entire video to verify the synchronization. Watch key scenes with rapid dialogue or action to confirm that the subtitles match seamlessly with the audio and visual elements.
Part 4: How to Add AI Auto Subtitle with Handbrake Alternative
-
What Is Edimakor ?
The process of developing and embedding subtitles is made easier using Edimakor. This cutting-edge tool ensures great accuracy and quick results by automatically transcribing speech to text. Edimakor is made to accommodate both novices and experts searching for effective subtitle solutions with its user-friendly UI and robust capabilities.
-
How Does Edimakor Benefit Users
- Automatically transcribing audio to text eliminates the need for manual transcription.
- AI-powered transcription is often more accurate than manual transcription.
- Easily create subtitles for accessibility and wider audience reach.
-
How to Add AI Auto Subtitle Using Edimakor
-
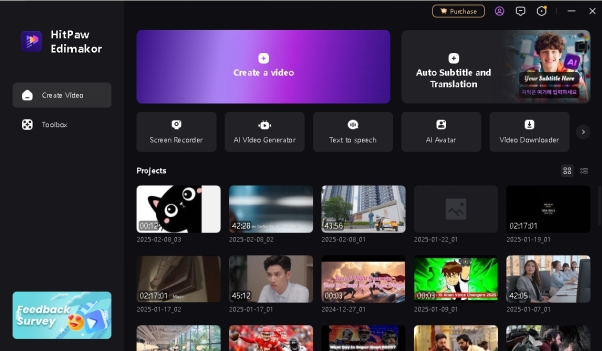
Step 1: Open HitPaw Edimakor (Speech to Text)
The first step is to launch HitPaw Edimakor. On the main interface, you will see Create a Video optiom, select it. Now go to Media section of Edimakor and upload the video file you want.

-
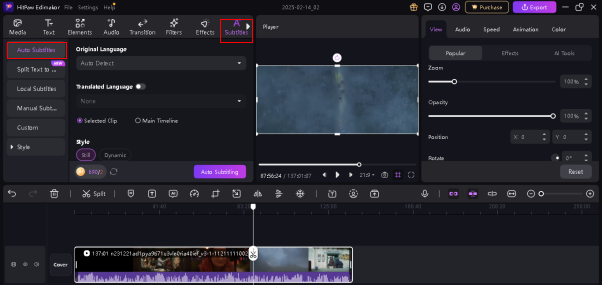
Step 2: Select Auto Subtitle
Now, you have to open the Subtitle tab that has multiple subtitle options. You have to select the first one which says Auto subtitle. This feature is based on AI and automatically add subtitles into the video. To increase accuracy, go over and make changes to the automatically generated subtitles.

-
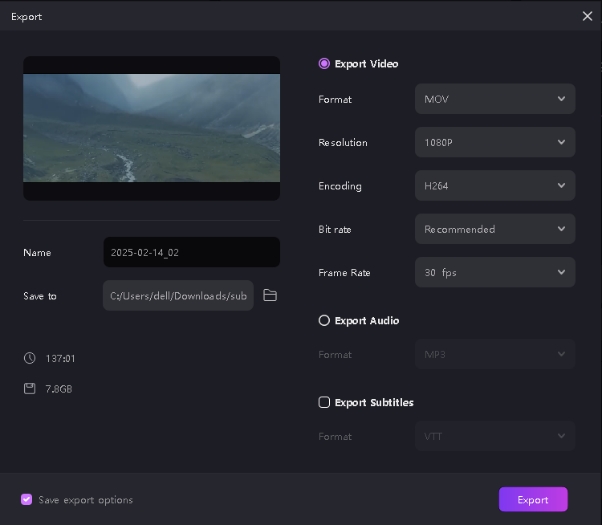
Step 3: Export the Video
Export the video with the subtitles embedded if you are happy with them. To meet your preferences, you can select from a variety of formats, such as MP4 or MKV. The finished video will be saved by Edimakor to the output place you have designated, ready for watching or sharing.

-
Final Words
The process to add subtitles with handbrake to MP4 and MKV files has never been simpler. You may easily customize subtitles by following the instructions in this guide. It is suggested to explore the various subtitle settings to fine-tune your viewing experience. Moreover, you can also try HitPaw Edimakor (Video Editor) for AI-based automation to further expedite the procedure.
Home > Subtitle Tips > How to Add Auto Subtitles with Handbrake | MKV & MP4
Leave a Comment
Create your review for HitPaw articles


Yuraq Wambli
Editor-in-Chief
Yuraq Wambli is the Editor-in-Chief of Edimakor, dedicated to the art and science of video editing. With a passion for visual storytelling, Yuraq oversees the creation of high-quality content that offers expert tips, in-depth tutorials, and the latest trends in video production.
(Click to rate this post)