Even if you lack access to a real filming location, you can still enhance your YouTube videos by adding a polished studio backdrop. This tutorial will show you how to use easily accessible tools and resources to make a convincing fake YouTube studio background.
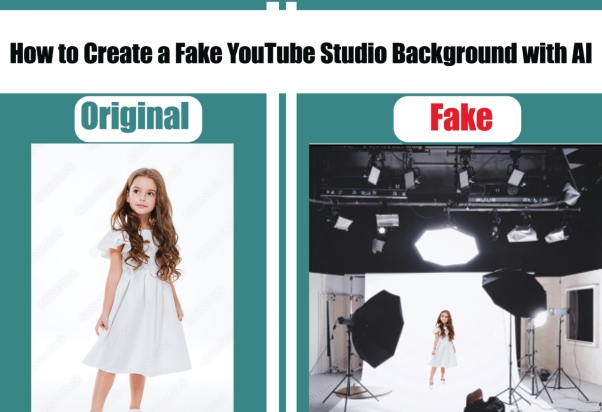
Part 1: How to Create a Fake YouTube Studio Background with AI
Here, we are going to discuss the entire process of getting a fake YouTube studio background photoshop with the help of HitPaw Edimakor, a perfect video editing tool. With its user-friendly features, you can replace or customize your background without the need for complex editing skills.
-
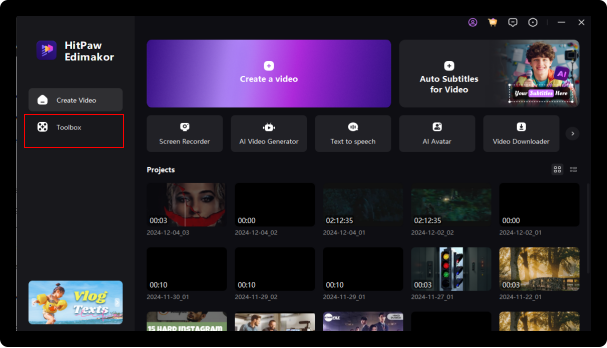
Step 1. Open HitPaw Edimakor (AI Video Background Remover) and Go to the Tool Box
Launch the HitPaw Edimakor program first. Open the interface and go to the Tool Box area. The necessary tools for modifying and improving your movie background are located here.

-
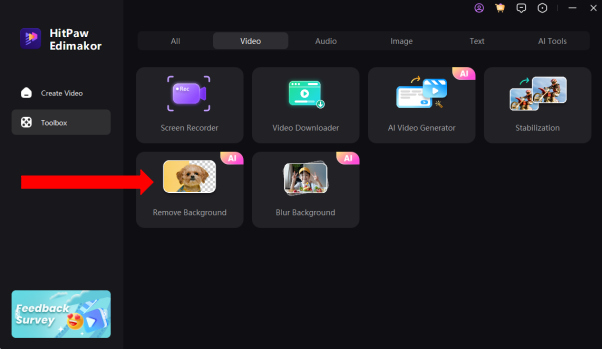
Step 2. Choose the Remove Background Feature
In the toolbox, move to the Video section and select the Remove Background option. Then, add the picture which background you want to remove. Your current background will be automatically detected and eliminated by this AI-powered feature. Compared to manual editing, it saves time and work by guaranteeing an accurate and clean cutoff of your subject.

-
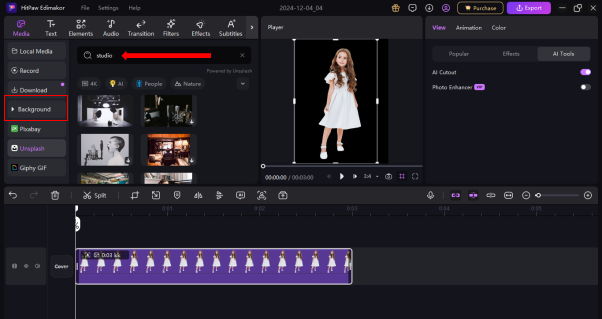
Step 3. Include the Background You Want
You can use the new YouTube studio background template psd or design by importing it. Select a polished studio backdrop that complements your business. To make your videos stand out, you may either make your own design or search for pre-made options from the side menu.

-
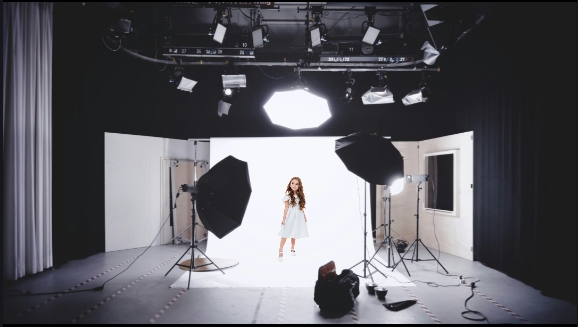
Step 4. Adjust the Picture for a Seamless Fit
Resize the background to fit the frame of your video and adjust the picture for a seamless fit. Make sure the background mixes in organically with your video by adjusting its alignment, brightness, and contrast. To prevent an unnatural appearance, this step is essential.

-
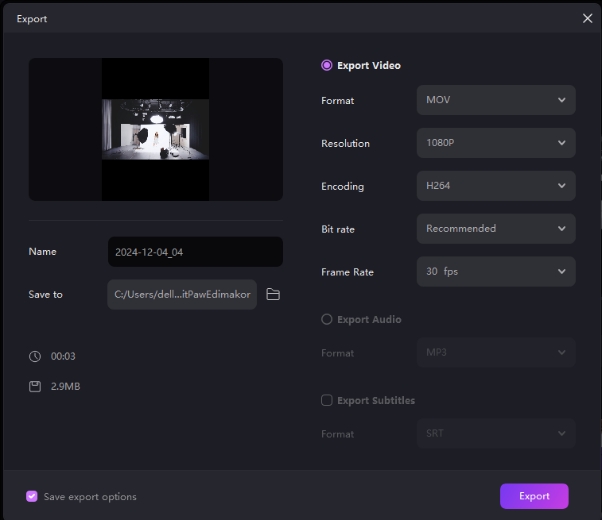
Step 5. Export the Content After Editing
Save the video you have edited with the updated backdrop. After you are happy with the changes, export the high-resolution video. This guarantees a completed product that is polished and prepared for uploading to your YouTube channel.

Part 2: How to Create a Fake YouTube Studio Background with Printed Pictures
Creating a professional-looking YouTube studio background image doesn’t require expensive equipment or tools. By using printed pictures creatively, you can set up an attractive background that fits your style and budget. Follow these simple steps to create a stunning fake studio setup for your YouTube channel.
-
Step 1. Select Your Background's Theme
Choose your background's theme or feeling before printing any photos. A unified theme enhances the visual attractiveness of your movies and aids in preserving your business identity. You can choose a bright pattern that fits your content niche, a minimalist style, or even a comfortable home setup.

-
Step 2. Pick and Save High-Quality Pictures
Look for high-quality pictures that complement the subject you have selected. Both free and paid picture selections are available on websites such as Unsplash, Pexels, or Shutterstock. Clear visuals are essential for a professional appearance, therefore make sure the YouTube studio background png is of good quality to prevent pixelation when printed.
-
Step 3. Print the Pictures in the Size You Want
Make use of a reputable printer or a printing service. Determine the picture measurements based on the size of your wall area. For a striking effect, use huge poster prints; for a collage-style background, use smaller photos.

-
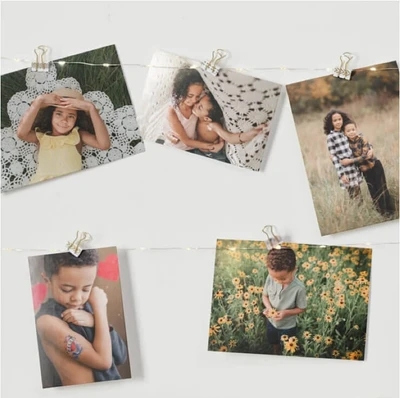
Step 4. Put the Images on a Wall or Board
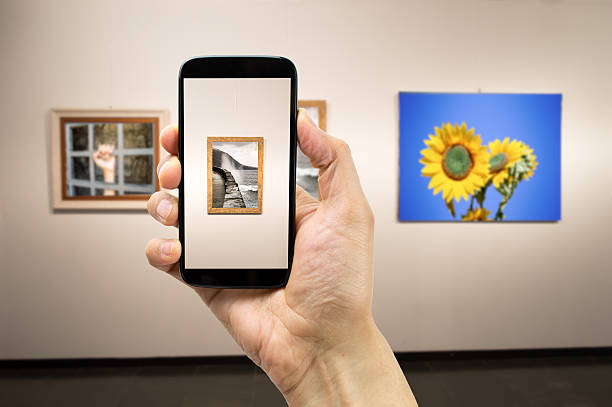
Before you fix the photos, try out the layout. Adhesive strips or double-sided tape can be used to directly adhere the photos to the wall, or you can use a wide board or foam. Try out various configurations to determine which suits your camera angle and frame size the best To draw attention to specific parts of the background, use spotlights or LED strips.
HitPaw Edimakor (Video Editor)
- Create effortlessly with our AI-powered video editing suite, no experience needed.
- Add auto subtitles and lifelike voiceovers to videos with our AI.
- Convert scripts to videos with our AI script generator.
- Explore a rich library of effects, stickers, videos, audios, music, images, and sounds.

Part 3: How to Create a Fake YouTube Studio Background Using Photoshop
Follow these steps to create a fake YouTube studio background photoshop version and elevate your content presentation.
-
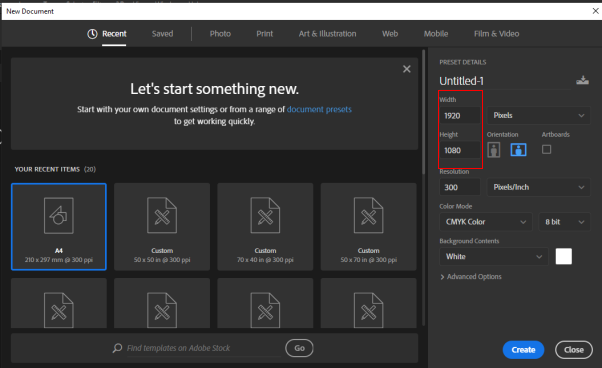
Step 1. Choose the Background's Canvas Size.
First, open Photoshop and create a new document. Adjust the canvas's size to the resolution of your movie, which is usually 1920x1080 pixels for HD.

-
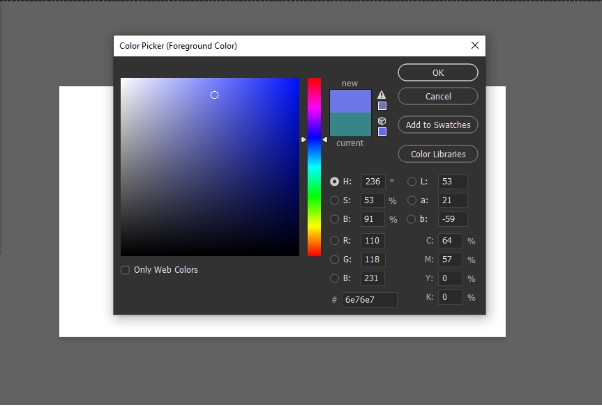
Step 2. Select a Theme or Color Scheme
Select a theme that blends in with the personality of your channel. Choose elements, colours, or patterns that complement the tone of your material.

-
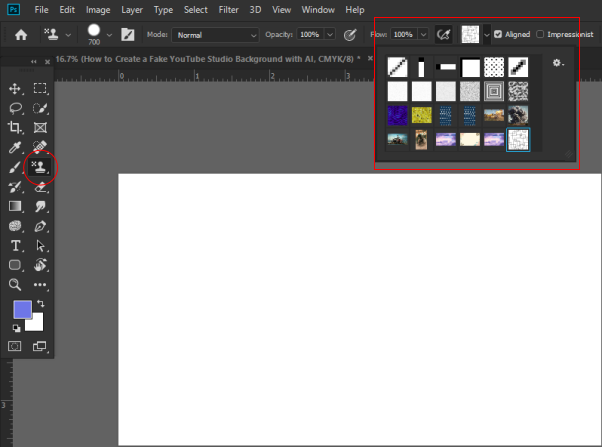
Step 3. Include Textures and Background Layers
To give your design depth and appeal, use layers. For smooth designs, you can utilise Photoshop's pattern tool, import high-quality textures, or add gradient backgrounds. Try different blending and opacity settings to get a finished appearance.

-
Step 4. Add Personalized Elements, Such as Icons or Logos
Add your branding components to give the background a distinctive look. Place your channel name or logo discreetly throughout the design. For a more individualized touch, you can also include icons, shapes, or pictures related to your content specialization. Then, save it as a youtube studio background template psd for future use.
Part 4: How to Create a Fake YouTube Studio Background Using Green Screen
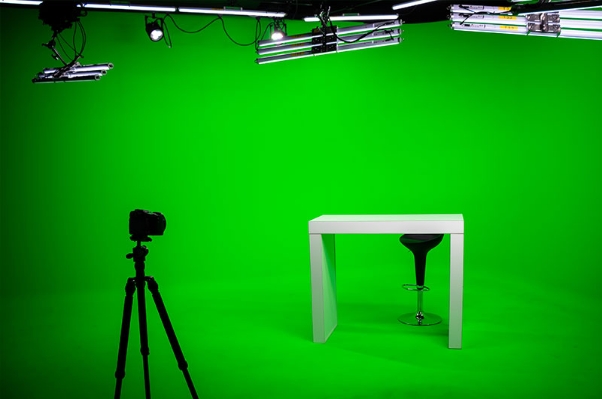
Green screens offer a versatile and cost-effective way to create professional YouTube studio backgrounds. Here are the steps of Youtube Studio background green screen creation:
-
Step 1. Get your Green Screen Ready
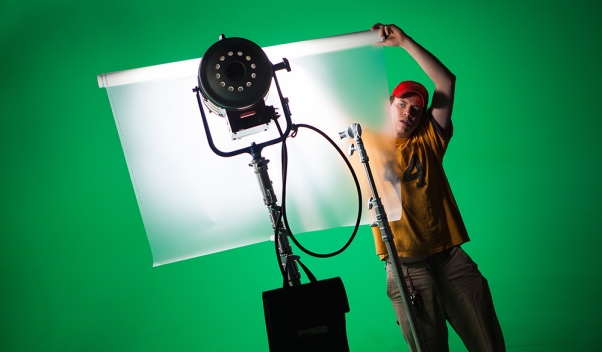
Set up a wrinkle-free, silky green screen first. A cloth green screen, a foldable background, or even a painted green wall can be used. For smooth keying during editing, make sure it is well-lit and covers the full background.

-
Step 2. Properly Place Your Lighting
Effective use of the green screen is ensured by adequate illumination. In order to get rid of shadows on the green screen, use even, gentle lighting. To further distinguish yourself from your surroundings, illuminate yourself independently.

-
Step 3. Use the Green Screen to Record your Video.
Record your stuff while standing in front of the green screen. To prevent editing problems, make sure your actions remain inside the green screen region. Throughout the video, maintain a constant background lighting design.
-
Step 4. Choose a Virtual Background or Make One
Select or create the desired studio backdrop. High-quality virtual backgrounds are available for download from stock photo websites, or you may use programs like HitPaw Edimakor to make your own. For a professional appearance, make sure the resolution matches the size of your video.

-
Step 5. Change the Video Editing Software's Green Screen
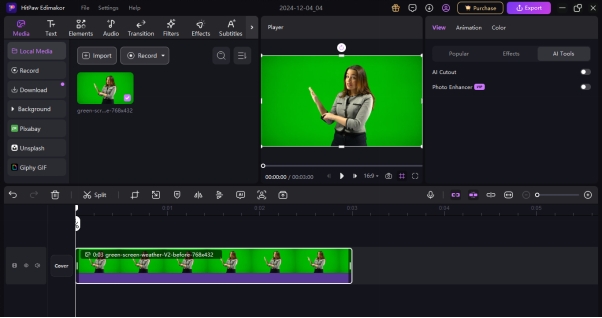
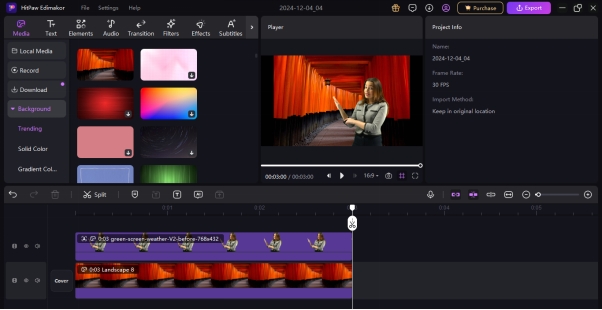
To replace the green screen with the YouTube studio background free, use video editing software. Chroma keying features are available in programs like HitPaw Edimakor. Apply the green screen effect after importing your video, then swap out the green region with your virtual backdrop.

Last Words
For content creators, using AI to create a custom youtube studio background is revolutionary. It guarantees expert aesthetics without requiring expensive installations. You can easily improve the quality of your videos and audience engagement by using sophisticated tools to create distinctive, eye-catching backdrops that are suited to your business. You can access HitPaw Edimakor (Video Editor) to create fake studio background videos.
HitPaw Edimakor (Video Editor)
- Create effortlessly with our AI-powered video editing suite, no experience needed.
- Add auto subtitles and lifelike voiceovers to videos with our AI.
- Convert scripts to videos with our AI script generator.
- Explore a rich library of effects, stickers, videos, audios, music, images, and sounds.
Home > Video Editing Tips > Effortlessly Enhance Your YouTube Videos with a Custom Studio Background
Leave a Comment
Create your review for HitPaw articles






Yuraq Wambli
Editor-in-Chief
Yuraq Wambli is the Editor-in-Chief of Edimakor, dedicated to the art and science of video editing. With a passion for visual storytelling, Yuraq oversees the creation of high-quality content that offers expert tips, in-depth tutorials, and the latest trends in video production.
(Click to rate this post)