Many editing tools allow you to split video into frames with merely one click. Although several free portals to cut video into frames are available online, industry professionals do not prefer using them to avoid unwanted content exposure.
Nevertheless, if your files are not classified and you want to split those clips into frames only once a blue moon, going for a web solution would be a wise approach.
With that in mind, the following sections cover both PC applications and online portals to divide video into frames easily and quickly.
Part 1: Best Free and Easy Way to Split Video into Frames (Recommended)
The first and the most recommended application on the list is HitPaw Edimakor, a desktop program available for Mac and Windows platforms. Although HitPaw Edimakor is primarily an AI video editing program comprising an image enhancer, screen recorder, scriptwriter, etc., it can split videos into frames with precision and quite quickly.
You can learn how to break down a video into frames with HitPaw Edimakor by following the step-by-step instructions explained below:
Step 1: Drag a Video to the Timeline
Step 2: Capture a Snapshot
Step 3: Import the Snapshots to HitPaw Edimakor
Step 4: Add a Cover Photo to the Video (Optional)
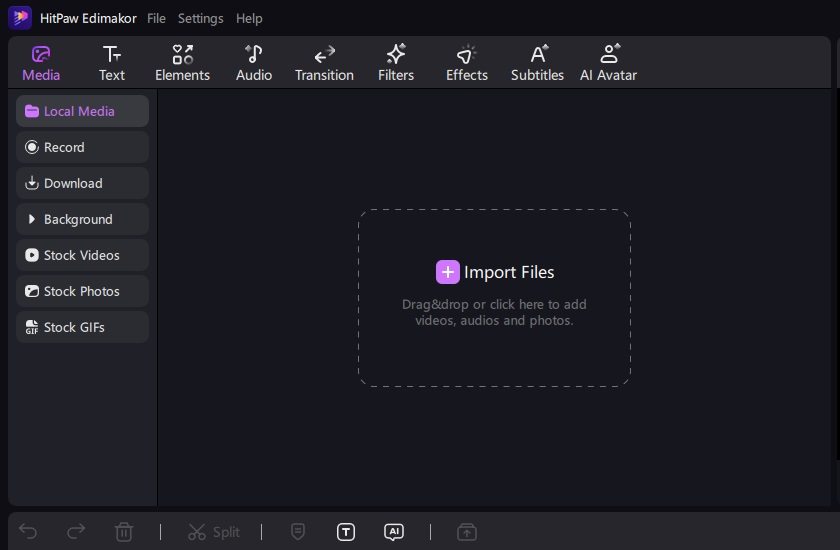
After opening HitPaw Edimakor on your Mac or Windows computer, click Create a video from the first screen that appears. On the video editor window, click Import Files, locate and import a video file to HitPaw Edimakor, and drag the clip's thumbnail to the Timeline at the lower part of the interface.
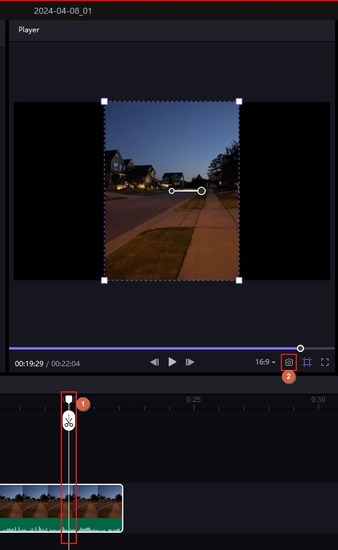
Drag and position the Playhead (Skimmer) on the frame you want to capture the screenshot of, click the Snapshot icon below the Preview window, and click the folder icon within the thumbnail of the snapshot that appears at the bottom-right corner. This opens the destination folder to access the screenshot from.
Note: You must click the icon immediately after clicking the Snapshot button, as the thumbnail remains there only for a couple of seconds. However, if you miss the shot and the thumbnail disappears, you can access the snapshots from the C:\Users\<yourname>\Documents\HitPawEdimakor\Snapshots folder, which is the default save location for the photos HitPaw Edimakor captures.
Use the method explained earlier to import the snapshots you captured to the HitPaw Edimakor's video editor window.
Note: Because the video may already exist inside the Media Box, you may not see the Import Files button. In such a case, click Import from the upper-left corner of the box, navigate to the default screenshot destination folder on your computer, and import the images from there.
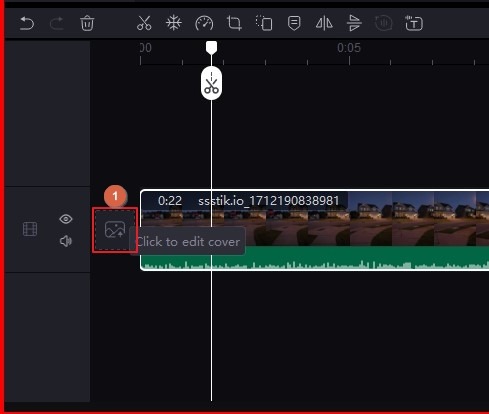
To add a cover photo to your video, click the Click to edit cover button at the left-most corner of the media clip in the Timeline. On the Select a cover box, ensure that you are on the From Video tab. Position the Skimmer on the frame of the video you want to use as the cover photo and click OK from the bottom-right.
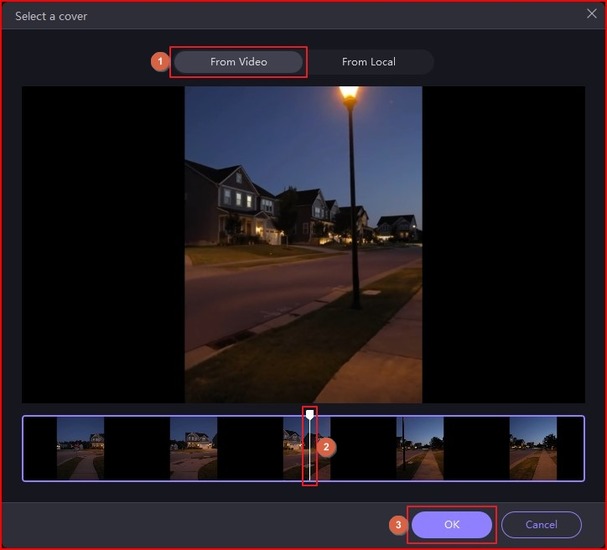
Alternatively, go to the From Local tab, choose and import a picture (preferably the snapshot you captured earlier), and click OK to use the photo as the cover for the video.
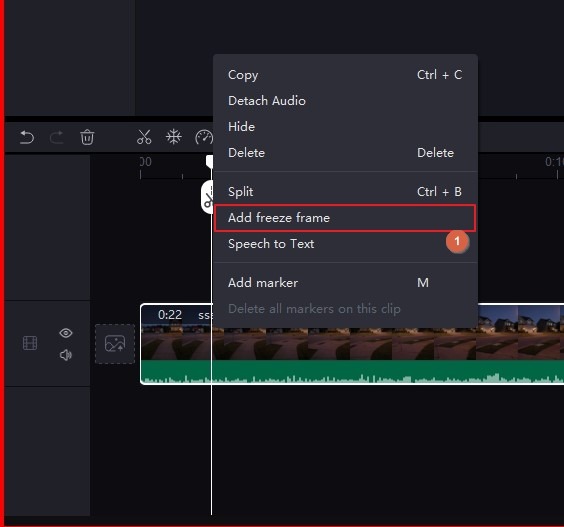
Note: In case you want to extend the duration of a frame, position the Skimmer on it, right-click the media track, and click Add freeze frame from the context menu.
Part 2: How to Split Video into Frames in VLC?
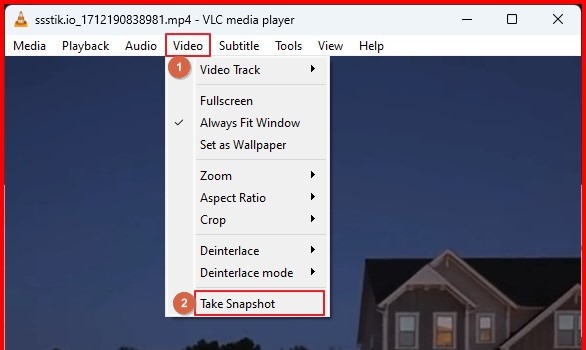
Being an open-source and cross-platform program, VLC is available for downloading and installing for free on any computer you have. In addition to working as a media player, VLC also comes with a plethora of additional tools to make your media production tasks easy. Therefore, it is easy to split a video into frames, and the instructions are explained below:
- Open the video file in VLC
- Drag the playback progress bar to the scene you want to capture the screenshot of
- Go to VLC's Video menu at the top
- Click Take Snapshot from the bottom of the list
- Access the snapshots from the C:\Users\<yourname>\Pictures folder
Part 3: How to Break Video into Frames Online for Free?
Among several online portals to split videos into frames, the easiest one is Canva, as it allows you to upload the source media from your PC or choose a clip from its library and extract the image of your choice from it. The best thing about Canva is that it is free and accessible globally.
Follow the process given below to break down a video into frames using Canva:
Step 1: Pick a Source Video
Step 2: Get to the Target Frame
Step 3: Convert Video to Frame
Open Canva on your favorite web browser and create a new project or open an existing one. Click Uploads from the left pane, and click Upload Files from the top of the center pane. Upload a video and click on it to add it to the center window and Timeline.
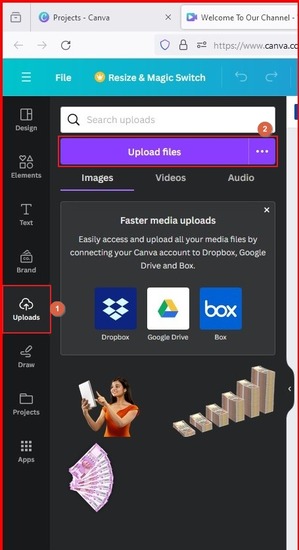
Note:Alternatively, click an existing video from Canva's library.
Place the Skimmer on the frame in the Timeline you want to save as a snapshot.
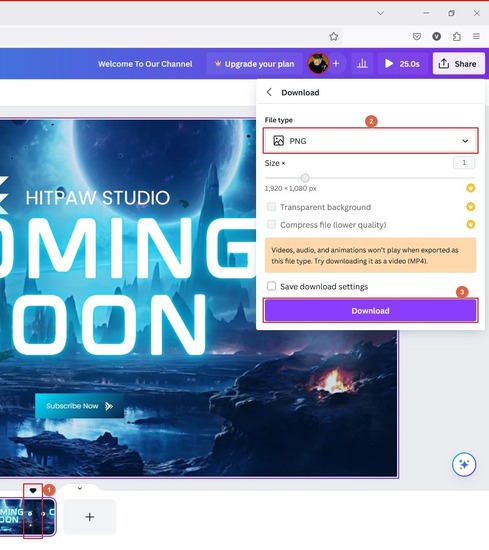
Click Share from the top-right, click Download from the options list, choose PNG as the output format, and click Download to save the frame as an image file.
Conclusion
It is easy to break videos into frames using a desktop app or web solution. However, while a PC program offers more flexibility and security to your content, online portals impose limitations on how you can get the job done. Considering this, it is safe to say that if you are a professional and/or seek precision in your outputs, HitPaw Edimakor would be the best choice to split a video into frames.
HitPaw Edimakor (Video Editor)
- Create effortlessly with our AI-powered video editing suite, no experience needed.
- Add auto subtitles and lifelike voiceovers to videos with our AI.
- Convert scripts to videos with our AI script generator.
- Explore a rich library of effects, stickers, videos, audios, music, images, and sounds.

Home > Video Editing Tips > 3 Free and Easy Ways to Split a Video into Frames in 2026
Leave a Comment
Create your review for HitPaw articles


Yuraq Wambli
Editor-in-Chief
Yuraq Wambli is the Editor-in-Chief of Edimakor, dedicated to the art and science of video editing. With a passion for visual storytelling, Yuraq oversees the creation of high-quality content that offers expert tips, in-depth tutorials, and the latest trends in video production.
(Click to rate this post)