"Looking for Mac compress video app - not Handbrake"------from Reddit User
In this age of video content, we have videos that are up to 8K in quality, and while this means the amount of detail in the videos is staggering, it also results in these videos having quite large file sizes. This can cause playback issues and take up storage space on your Mac, causing slowdowns. For these reasons, you may decide to use a Mac video compressor to reduce the file size so that it is easier to share, store, play, and upload. In this article, we discuss 10 different Mac video compression software.
Part 1: Does Mac Have a Video Compressor?
No, MacOS doesn’t come with a pre-installed dedicated video compression tool, however, it does offer several tools like the QuickTime player or iMovie that can help with video compression. For example, QuickTime player allows simple video editing and can export video files with reduced file size, while iMovie offers more compression capabilities. Although these options are useful, users often prefer specialized third-party software and online tools for video compression on MacOS.
Part 2: 10 Video Compressor Software for Mac
Let’s now have a look at 10 video compressors for Mac here and provide you detailed guidelines on how to use each of them to reduce video file size on your MacOS.
1. iMovie
2. Handbrake
3. Edimakor
Step 1: Run HitPaw Edimakor on your MacOS and click on Create a video. Then import the video file using the Import files button.
Step 2: Once the video is imported, move it to the main timeline. Like iMovie, you can cut, crop and trim uncessary parts of your video to reduce the size.
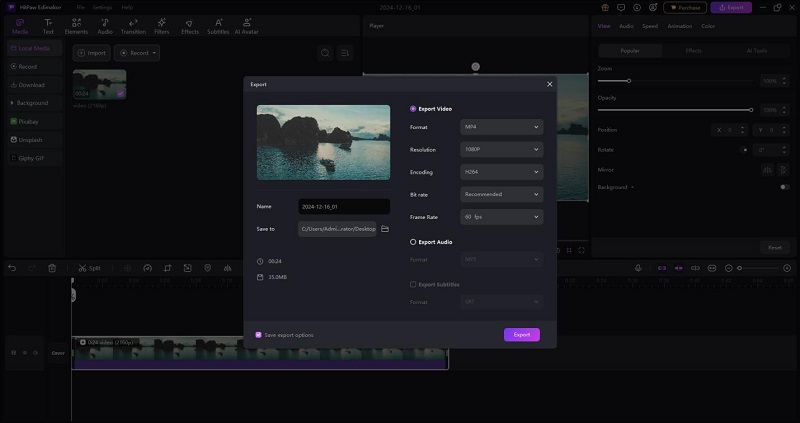
Step 3: Then, click on the export button on the top right. From format to resolution to encoding and even Bit rate, you can change any setting as per your desire and see how it affects the size of the video file.
4. ShrinkIt
5. VLC
6. FreeConvert Video Compressor [Online]
7. Compress2Go [Online]
8. Online Converter Compress Video [Online]
9. XConvert Video Compressor [Online]
10. VideoSmaller [Online]
iMovie comes pre-installed on your MacOS devices and is capable of editing your videos with a great deal of tools and even reducing the video file size. To use iMovie to reduce video size on your MacOS, all you have to do is follow the directions below:
1. Open iMovie on your MacOS and click on the Import Media button. You can also go to File > Import media and choose the file you’re looking to compress.
2. One way of reducing file size is to edit the video and trim out any unnecessary parts from your video file.
3. If that’s not the case, then go to the export settings. You can reduce the resolution, or quality and change the compress option to see which reduces the file size to your requirement.
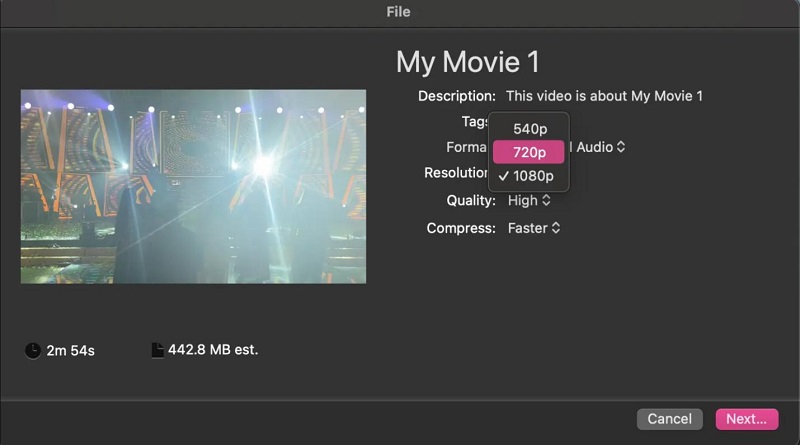
You may want to learn: How to fix iMovie can not export videos.
Handbrake is an open source video transcoder and a free Mac video compressor that is capable of running video files in various formats. With Handbrake, you can change aspects of your videos including resolution, bitrate, codecs and more, which helps compress your videos on Mac. Follow the instructions below:
1. Open Handbrake on your Mac and click on Open Source. Next, import the video file that you want to compress. Click on Browse to choose the destination folder for the converted video file.
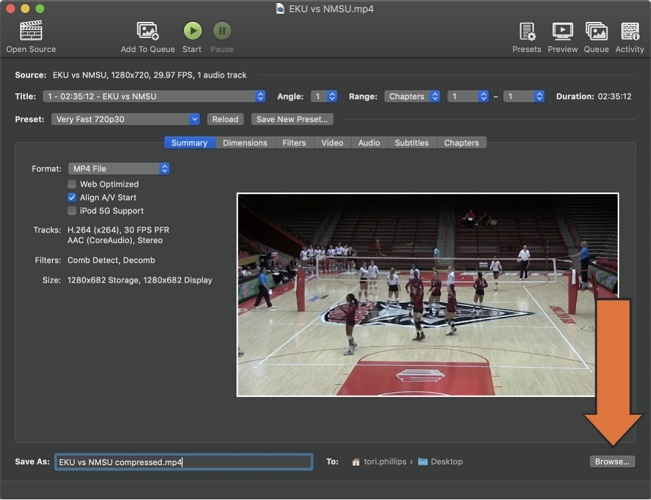
2. Choose a preset. You can select the preset from the preset drop down or look in the top right for the Presets section. Choose Very Fast 720p30.
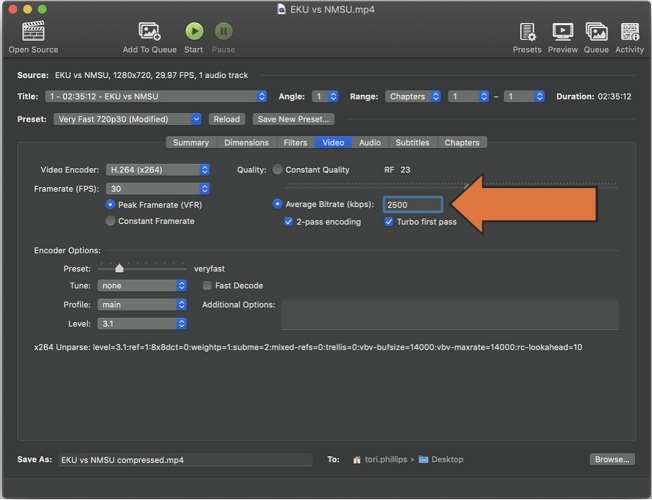
3. Set the Bitrate for your video. Also ensure that you check this Fast Decode option in the Video tab.
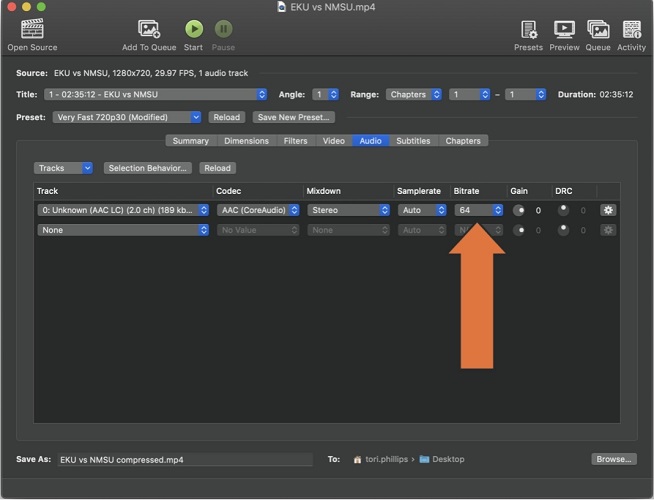
4. Next, navigate to the Audio tab and set the audio bitrate as per the guidelines of the table.
5. Click on the Start button to begin the compression process.
HitPaw Edimakor is a one of a kind video editing platform that has tons of video editing tools including compress Mac videos. It also gives its users extensive video export settings and users can determine the size of the output video file. Here’s how to compress a video on Mac using Edimakor.
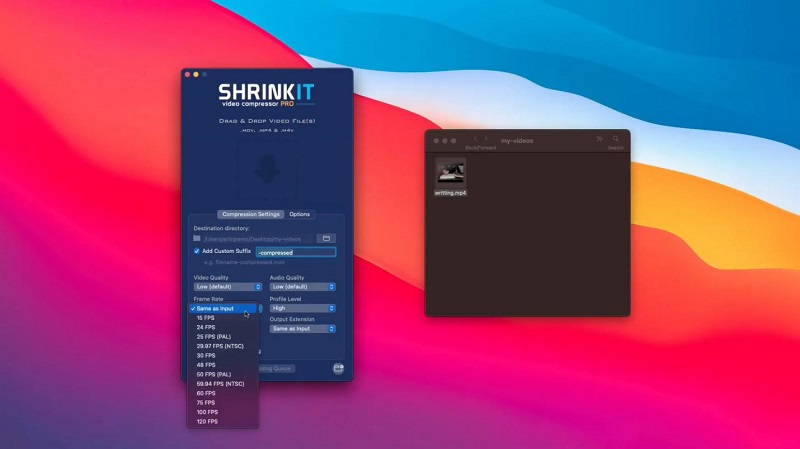
ShrinkIt has simplified the process of video compression for Mac users and made it so easy that even complete beginners can easily use the software to reduce the file size. Here’s how you would use it:
1. Install ShrinkIt on your Mac and run the program. From the settings, choose the desired frame rate, audio and video quality. Now, use the simple drag and drop feature to import the video to ShrinkIt.
2. Now it begins the conversion process. Once the video is converted, you’re greeted with a preview that showcases a side by side comparison of the original video and the converted one.
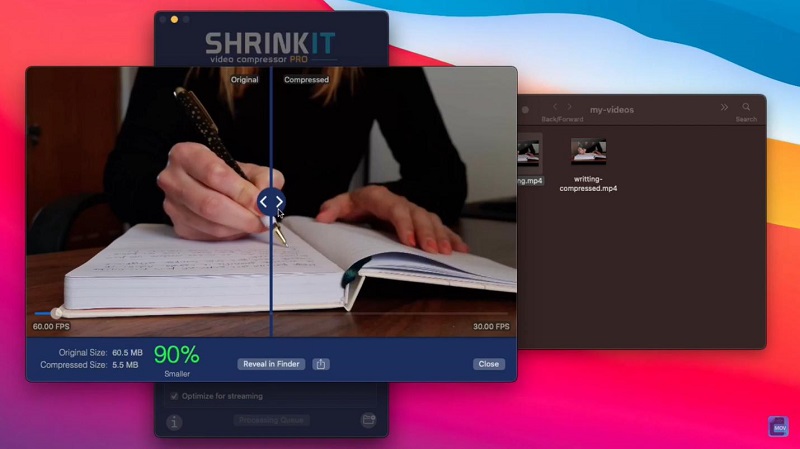
3. The video is automatically saved to your destination folder and can be found by clicking on Reveal in Finder.
VLC Media Player is one of the most popular video playback tools and people don’t actually realize how powerful this tool is. You can use it to even compress video files on your Mac using the instructions below:
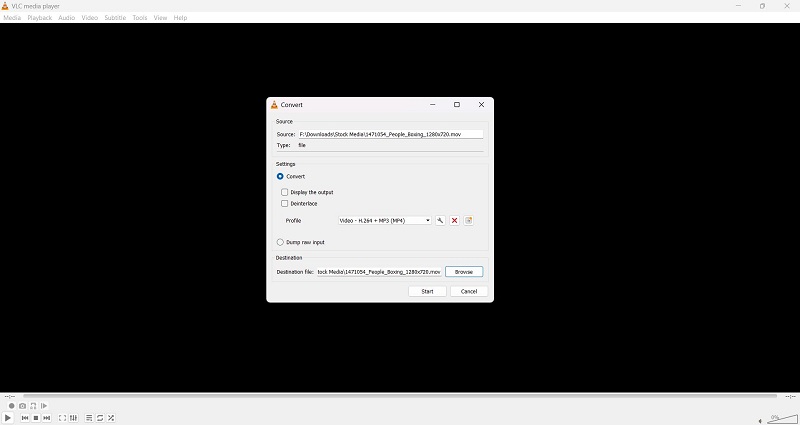
1. Open VLC Media Player on your Mac and click on Media, go to Convert/ Save. Next, choose the file you want to compress by clicking on Add. Then click on Convert/ Save.
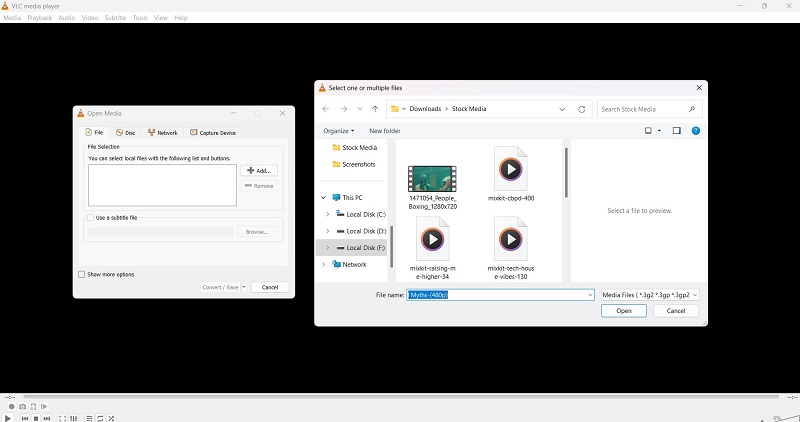
2. Now, go to Profile and click on the settings icon. Choose the desired settings, such as a lower video quality profile and reduce the Fps, which would also reduce the file size.
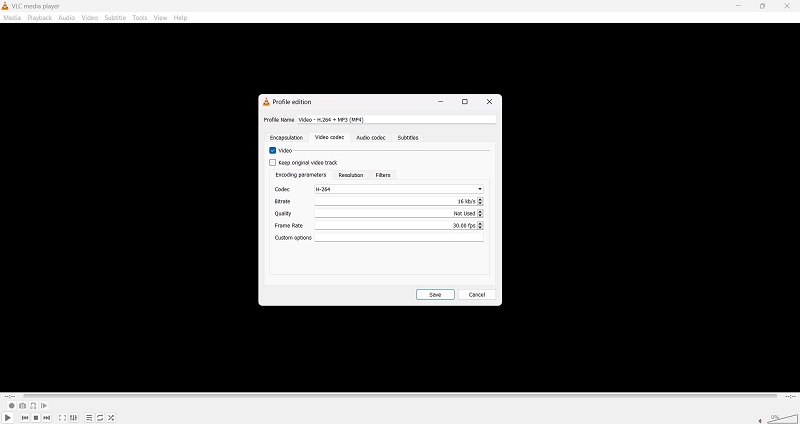
3. Click on Save and then hit Start to begin the conversion process.
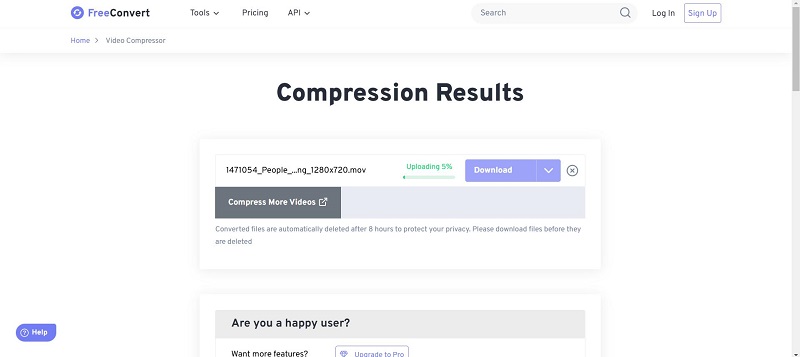
While installed software offers a capability to reduce video file size, online tools are often simpler and require no additional software installation and setup. Now we will introduce 5 free online video compressors for Mac. FreeConvert is the first one and can be easily accessed and used on any browser based device.
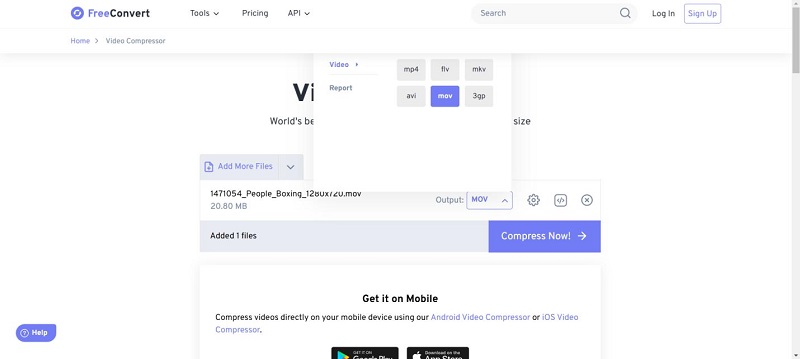
1. Go to Freeconvert video compressor website page and upload your video file by clicking on the Choose Files button. Once the video is uploaded, click on the output format to choose any format you want.
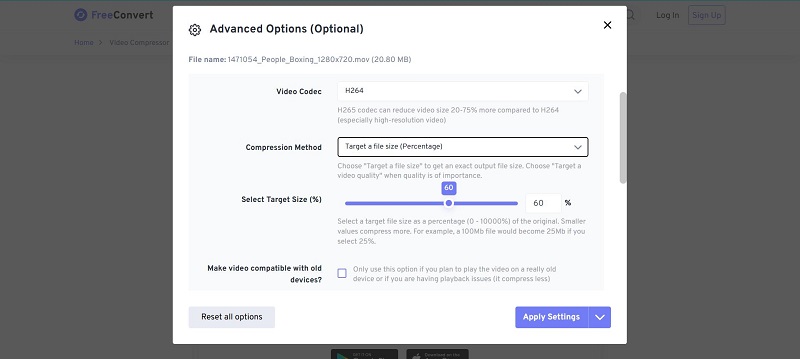
2. Next, hit the gear icon to choose the compression settings. You can choose the video codec, compression method and even specify the file size. Click on Apply Settings.
3. Hit compress now and watch FreeConvert perform its magic.
Online tools has no system limitations so it means online compressors work for compressing videos on both Mac and Windows. Among them Compress2Go is a versatile online tool that’s not only capable of compressing your video file size, but also allows you to compress PDFs, images and even creates ZIP files.
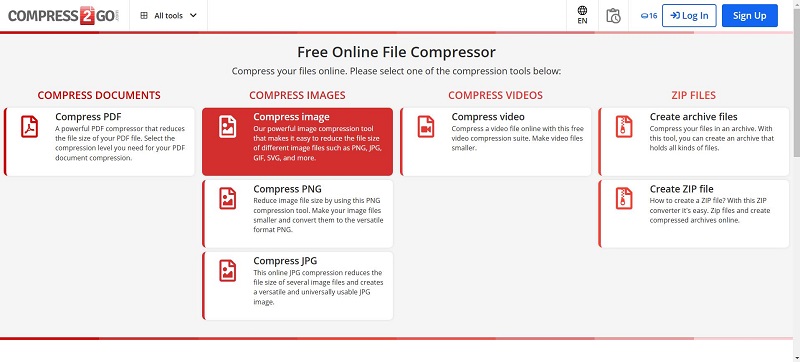
All you need to do is: Open Compress2Go website and click on Compress video. Upload your video file to the tool. Set a specific size of your output file and then hit Start. This is how easy it is to use Compress2Go as a video compressor software for Mac.
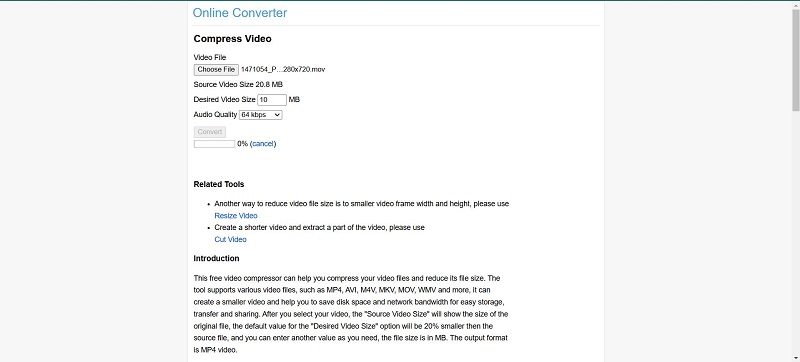
Online Converter Compress Video is a free tool to reduce video file size on your Mac OS and supports different file types such as MP4, MOV, MKV. You can select the audio quality and even desire video size.
Go to Online Converter Compress homepage and upload a video file by clicking on Choose file. Choose the desired settings and hit Convert. The speed of the process depends on your internet’s speed.
XConvert is another online tool that’s easy to use and offers video compression without making it too complex. You can easily upload any video file, choose the desired settings and you’re good to go.
1. Open XConvert’s website and upload video files by clicking on Add Video files.
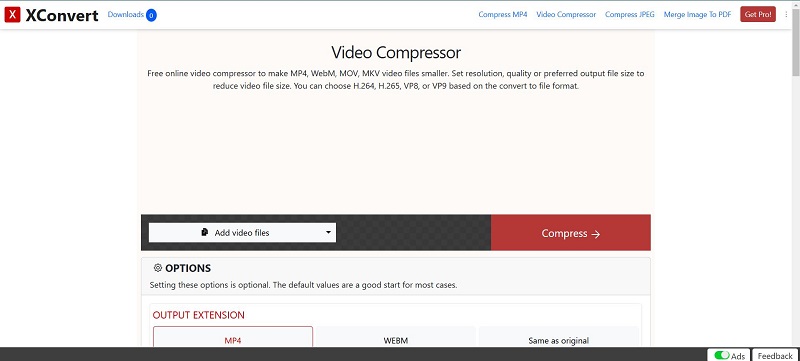
2. While you’re waiting for the file to upload, choose the output file settings. You can even set how much you want to reduce the file size.
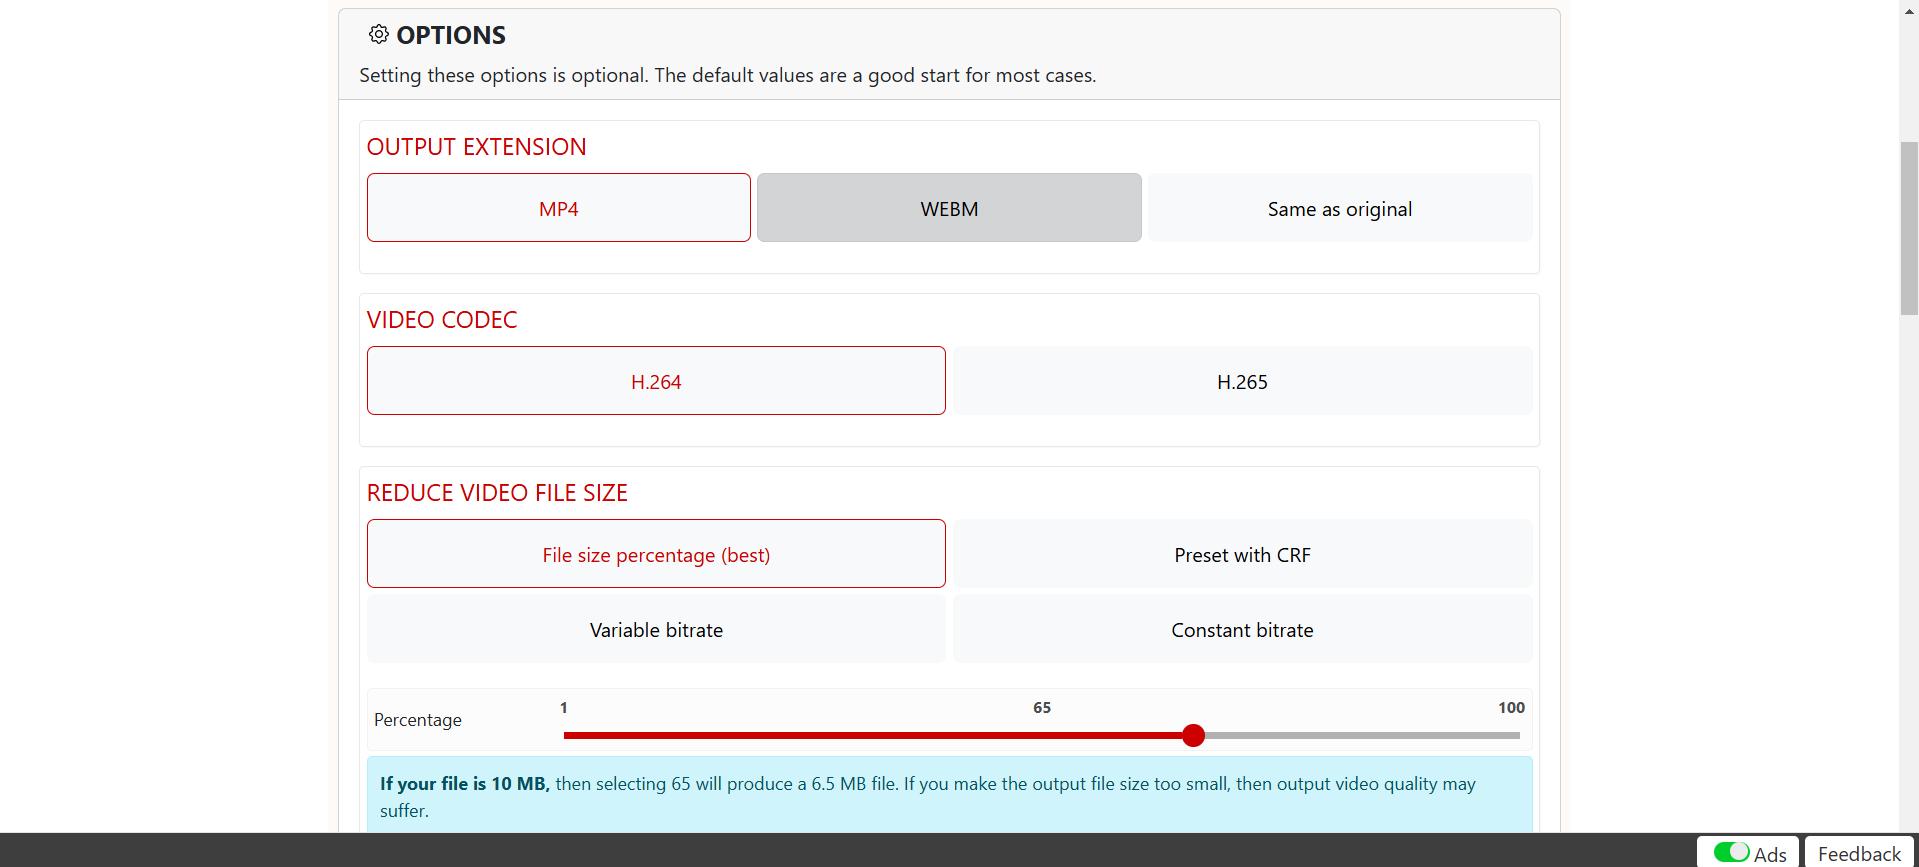
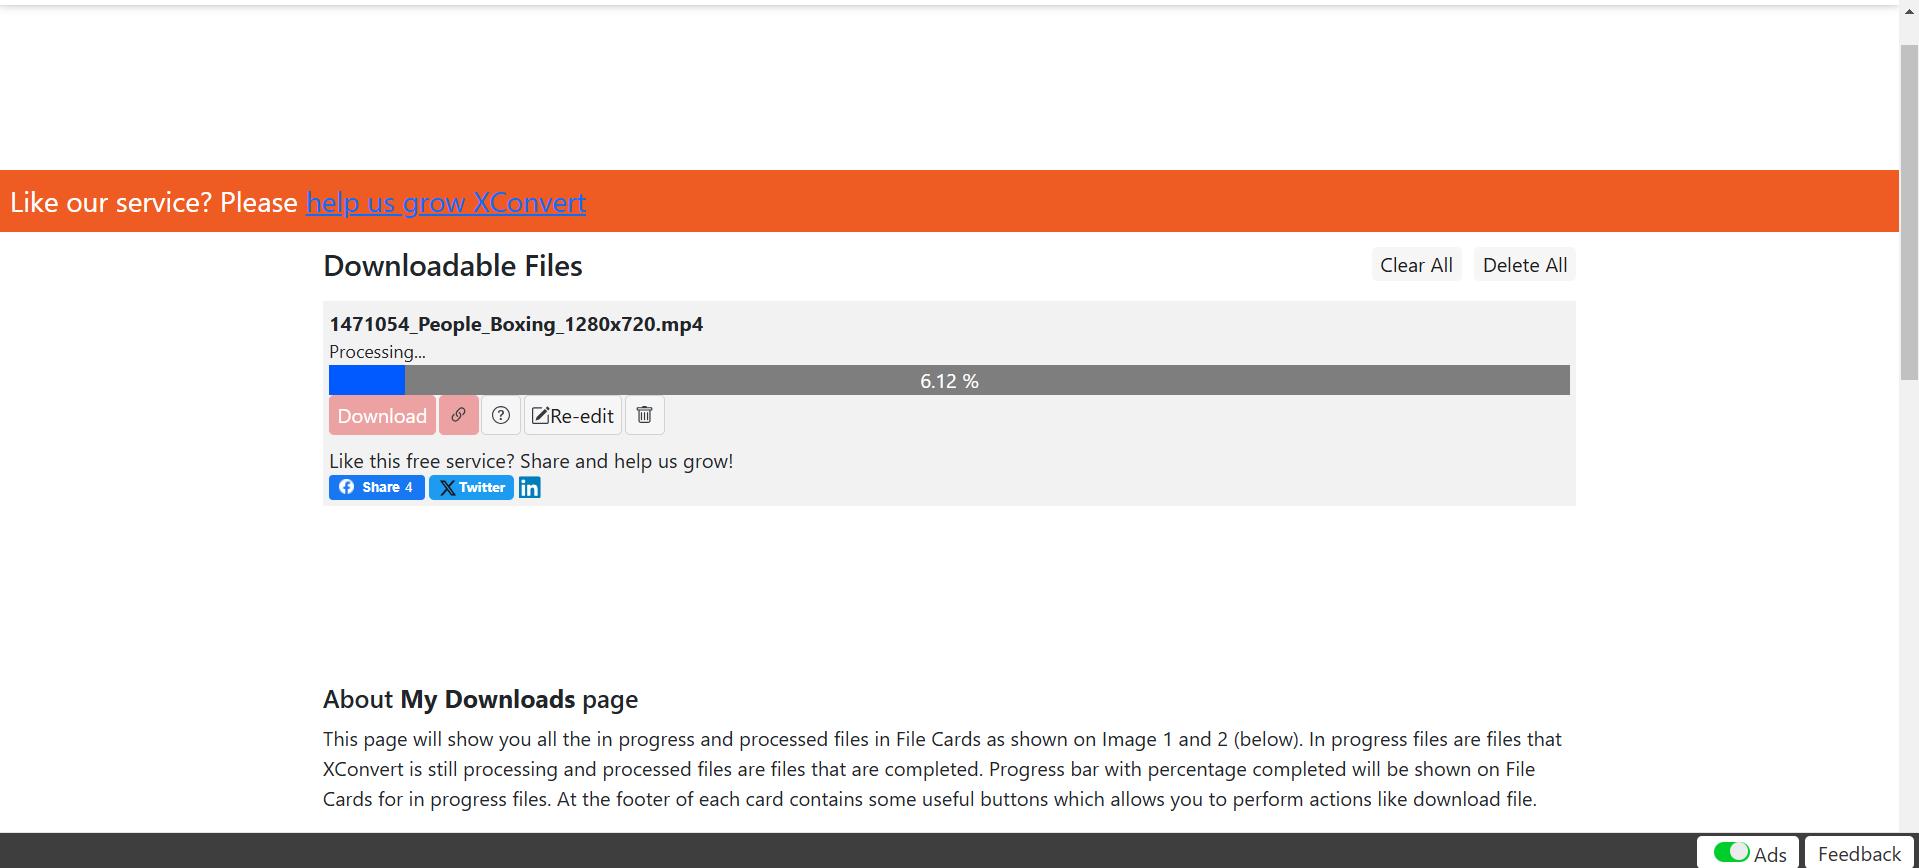
3. Finally hit Compress and wait as XConvert reduces the file size. Once done, you can download the compressed video file.
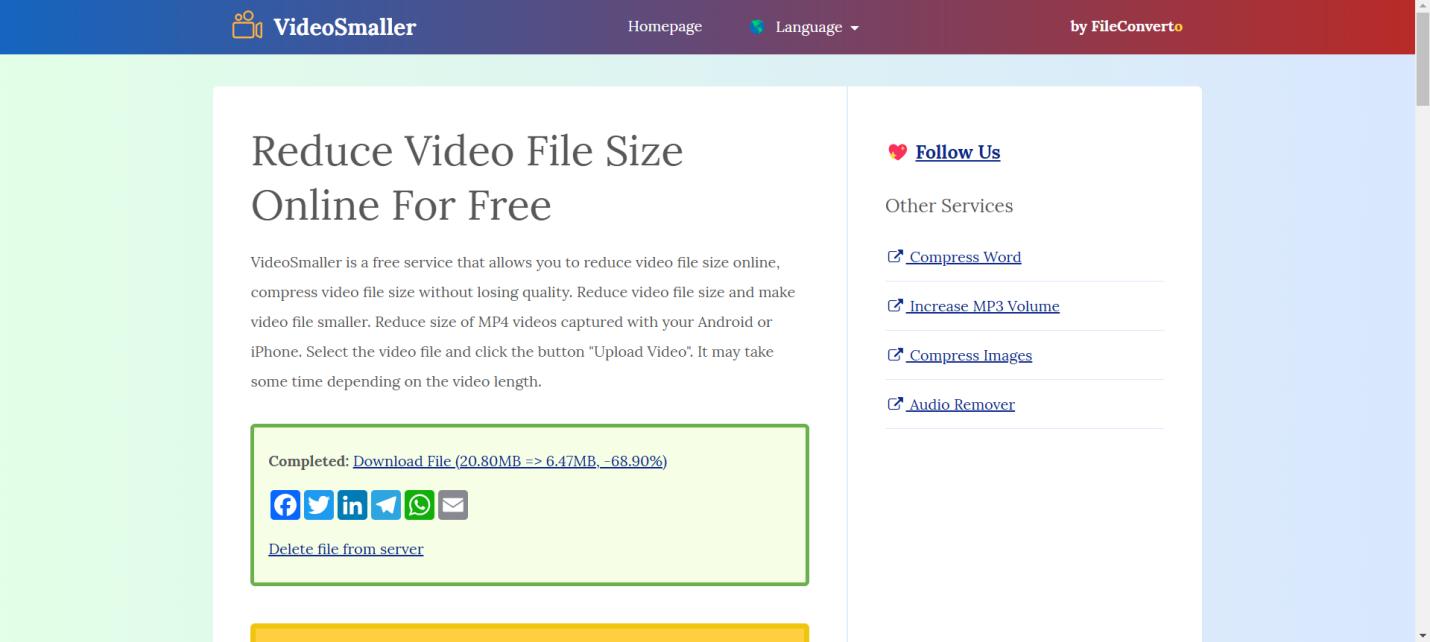
Last on our list of free video compressor Mac tools, we have VideoSmaller. It offers simple functionality and reduces file size to how much you want. Go to VideoSmaller website and upload your video file. Once the conversion completes, you get the option to download the compressed file. You can even delete the file from their server once you get the download.
Part 3: FAQs on Video Compressor Mac
-
Q1. How do I reduce the size of a video?
A1. You can reduce the size of a video by utilizing various tools online like FreeConvert or XConvert, or installed software like iMovie or HitPaw Edimakor.
-
Q2. How to compress a video on Mac QuickTime Player?
A2. To compress a video on MacOS using QuickTime Player, open the video, go to File > Export As, and choose the next lower video quality than your original file, e.g., if your video is in 1440p, choosing 1080p would considerably reduce file size.
-
Q3. How to zip a video on Mac?
A3. To zip a video on Mac is quite easy. Just go to the video on your Mac and right click on it. From the list of options that appear, click on Compress video and it will create a compressed Zip file of your video.
Conclusion
Video compressors is an essential tool to have, especially if you deal with large video files on a daily basis. 10 top video compressor software for Mac are present here and you just need to decide which tools to use. HitPaw Edimakor is a good choice if you want a method that can do both video editing and compression. If you’re looking for a simple online tool to compress videos, you can choose any tool from the above list.
HitPaw Edimakor (Video Editor)
- Create effortlessly with our AI-powered video editing suite, no experience needed.
- Add auto subtitles and lifelike voiceovers to videos with our AI.
- Convert scripts to videos with our AI script generator.
- Explore a rich library of effects, stickers, videos, audios, music, images, and sounds.

Home > AI Video Tools > Top 10 Mac Video Compressors: How to Compress Videos on Mac
Leave a Comment
Create your review for HitPaw articles



Yuraq Wambli
Editor-in-Chief
Yuraq Wambli is the Editor-in-Chief of Edimakor, dedicated to the art and science of video editing. With a passion for visual storytelling, Yuraq oversees the creation of high-quality content that offers expert tips, in-depth tutorials, and the latest trends in video production.
(Click to rate this post)