The thing that separates reality from what we see on a traditional screen is the third dimension, i.e., depth. Adding that third dimension brings videos and images to life. That is what the purpose of many AI tools has been, and Immersity AI is part of that group. This article talks about Immersity AI, which has harnessed the power of AI to change flat, normal, 2D stuff into an immersive 3D experience.
Part 1: What is Immersity AI?
Formerly knows as LeiaPix, Immersity AI is an innovative tool, which uses art technology to intelligently turn 2D photos into 3D content. With the help of Neural Depth Technology, all you need is a good quality photo with depth cues, and Immersity AI picks up on that and quickly converts the image into a 3D experience.
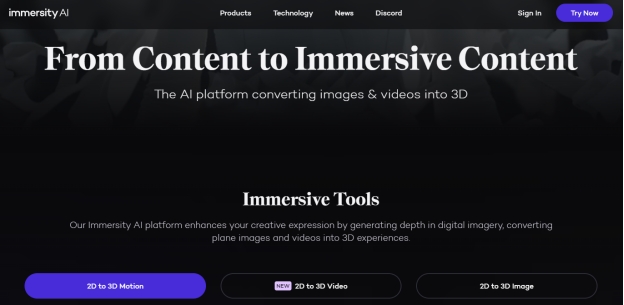
To fully understand this tool, have a look at the features it offers:
-
Convert 2D images and videos into 3D accurately with Neural Depth Technology and machine learning algorithms.
-
A user friendly interface ensures that users, even those who don’t have any experience with 3D modelling, can use this tool easily.
-
Fast processing time.
-
Real-time preview of what the product would look like.
-
Customization options like lighting, texture and other fine tune options.
Some people might argue that there isn’t much scope of using Immersity AI. If you have any doubts like that, read the use cases below which show the variety of scenarios where a tool like Immersity AI would be perfect:
-
Film and Video production.
-
3D video Product Visualization.
-
VR/AR.
-
Marketing.
-
Healthcare.
-
Real Estate.
Part 2: Why or Why Not Use Immersity AI?
Now getting to the debate of why to use Immersity AI and why not to use, which is essential a comparison of the pros and cons of this tool. To briefly summarize, look at the table below:
Pros
- Turn 2D media to 3D
- Convert images and videos effortlessly
- Minimal wait times
- Versatile use cases
- Real time conversion
Cons
- Conversion quality greatly depends on the source file quality
- Learning curve might be steep for some people
- Depend on cloud services
- Require a good internet connection
Part 3: How Does Immersity AI Convert Photo/Video into 3D?
We’ll now give you an overview of the process, how to use Immersity AI properly so that it converts any photo or video into 3D:
1. First of all, go to Immersity AI’s website and login. You’re given free 100 credits in the start. Upload the image by clicking on the upload button.
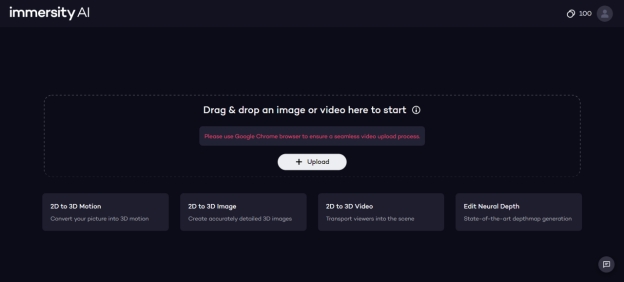
2. Immersity AI takes a few moments to analyse your photo.

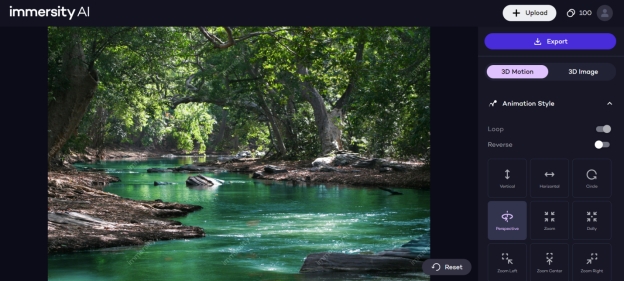
3. Now choose the right settings. You can choose animation style; decide how much you want the camera to move and just tweak some fine settings to create the final product. Once done, click on the Export button.
Part 4: FAQs on Immersity AI
-
Q1. Is Immersity AI free or paid?
A1: Immersity AI is a paid software to use. However, when you login, you get a free 100 credits to try out the product, just like how a trial would work.
-
Q2. How do I delete my Immersity AI account?
A2: If you want to delete your Immersity account, go to Account settings, select the delete account option. Then follow the instructions on your screen.
-
Q3. What file formats does Immersity AI support?
A3: Immersity AI supports a wide range of formats, for example PNG, JPEG/JPG, HEIC and others. As long as the quality of the source file is good, the end product will be great.
-
Q4. How long does it take to convert image/video to 3D?
A4: It usually takes less than a minute to add dimensions to a 2D image and enhance it to a 3D video.
Extra Tips: How to Turn Photos into Videos with Lip-Sync Talking?
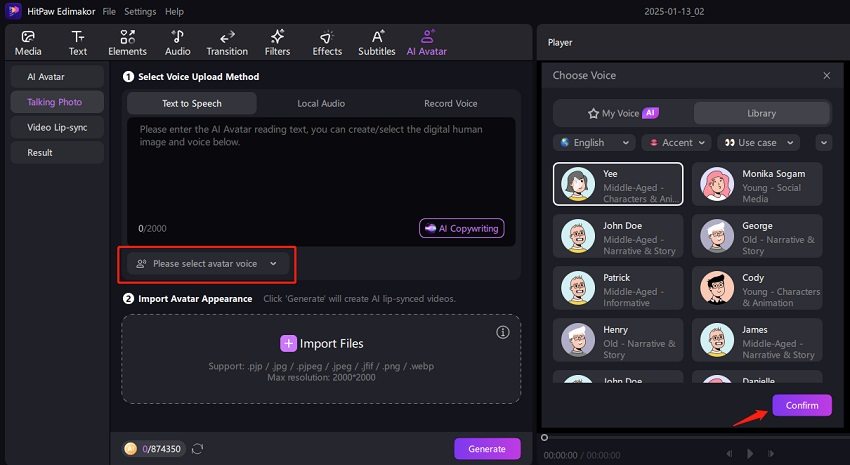
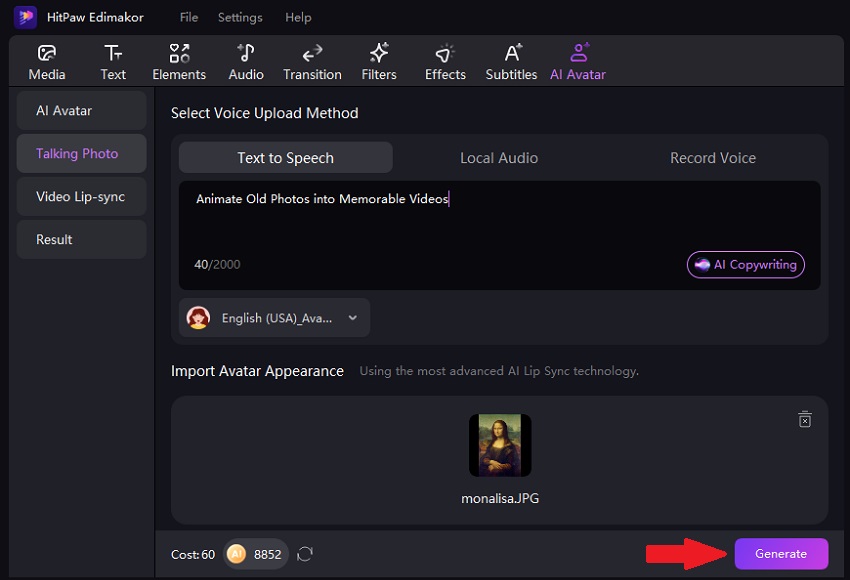
Immersity transforms 2D images into 3D, but what if you want to take it a step further and turn a simple image into a lifelike video? With the AI avatar effect, this is now possible using various AI-powered tools like HitPaw Edimakor. To turn a photo or video into lip-sync video with Edimakor, just follow this step-by-step guide:
-
Step 1:On your computer, launch HitPaw Edimakor. Then click on AI Avatars.

-
Step 2: You have to now find the audio that you would like to use. You could also use the text-to-speech feature to generate AI voiceover for the video.

-
Step 3: Import the image that you want in your lip sync video. If you want to import a video, go to the Lip-sync Video section.

-
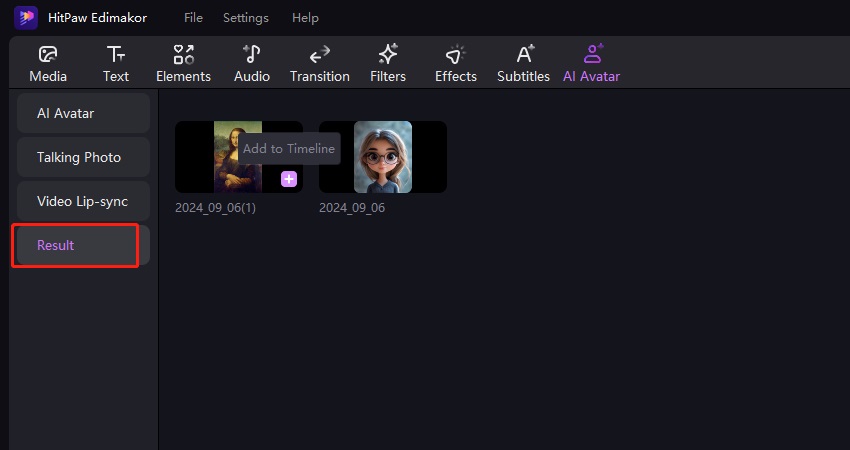
Step 4: It takes a few moments for Edimakor to process everything and turn the image into a talking video.

-
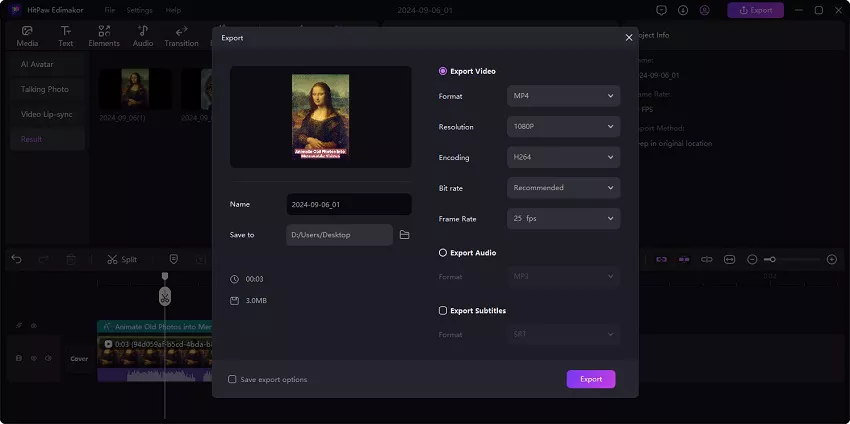
Step 5: Finally, click on the Export button in the top right corner to save your video.

Conclusion
Immersity AI drastically reduces the time and effort once needed to create 3D videos from 2D images. While its ability to transform static images into dynamic 3D content is impressive, there is still progress to be made when it comes to generating long-form videos using AI. However, with the rapid advancements in AI technology, this will likely become a reality soon. HitPaw Edimakor already enables users to create highly realistic lip-sync videos with ease.
Home > AI Video Tools > What is Immersity AI & How to Use [2026 Review]
Leave a Comment
Create your review for HitPaw articles




Yuraq Wambli
Editor-in-Chief
Yuraq Wambli is the Editor-in-Chief of Edimakor, dedicated to the art and science of video editing. With a passion for visual storytelling, Yuraq oversees the creation of high-quality content that offers expert tips, in-depth tutorials, and the latest trends in video production.
(Click to rate this post)